Generic x86-64 hardware
This article refers to Platform v3.3.0. The current Platform version is v3.3.0.
Overview
Most edge devices install from an image built for that exact model. The generic_amd64 image is
the alternative for the rest: a single, install-anywhere build for UEFI x86-64 machines, whose
kernel carries every boot-critical driver — storage controllers, network interfaces, USB — built in
rather than loaded from a per-model configuration. Use it on industrial PCs, mini PCs and servers
that are not in the Supported Hardware list.
Because a generic image cannot know in advance what the target machine looks like, the installer asks. You write it to a USB drive, boot the machine from it, and an interactive screen lists the disks it found so you can pick the one to install onto. That choice is the only decision you make: everything after it happens on its own.
If your hardware model appears in Supported Hardware, install the image for that model instead — see Physical device. A model-specific image ships the tuning and peripherals support for that board.
What you need
- An x86-64 machine that boots in UEFI mode, with a keyboard and a display attached. The generic installer is UEFI-only: it does not boot in Legacy/CSM mode.
- Secure Boot disabled in the firmware setup.
- A USB drive of 16 GB or more. The installer image is around 14.5 GB, so an 8 GB stick will not hold it.
- An internal disk of at least 32 GB — SATA, NVMe or eMMC. It will be erased completely.
- The
generic_amd64image, downloaded from the OS Images view in Barbara Panel (see OS Images view). - Balena Etcher, or any tool that writes a raw disk image to a USB drive.
Hardware requirements
Strict minimum
- RAM: 1024 MB
- Disk: 32 GB
- Processor: x86-64, 2 cores
- Network: 1 × Ethernet interface
Recommended
- RAM: 4096 MB
- Disk: 64 GB
- Processor: x86-64, 4 cores
- Network: 1 × Ethernet interface
Write the installer to the USB drive
Unzip the archive you downloaded from Barbara Panel. It contains an *-installer.img file: that is
the image you write to the USB drive with Etcher, exactly as you would any other Barbara OS
image (see Physical device).
The installer must be written as a raw image to the whole USB device, not copied onto an existing
filesystem. Etcher does the right thing; dragging the .img onto the drive does not.
Boot the machine from the USB drive
- Plug the USB drive into the target machine, connect the keyboard and display, and power it on.
- Enter the firmware setup (the key depends on the manufacturer — usually F2, F10, F12 or Del).
- Make sure the machine is set to UEFI boot and that Secure Boot is disabled.
- Select the USB drive as the first boot device, save and exit.
The installer's boot menu appears for a few seconds and starts on its own:

The installer boot menu. It starts by itself after a few seconds.
Pick the disk to install onto
After a short hardware scan, the installer lists every disk it can write to and waits for you.

Disk selection. Captured on a lab machine — the disk names, sizes and models you see will be those of your own hardware.
Each row shows the disk's device name, its size and its model, so you can tell the internal storage from anything else attached. Two details are worth knowing:
(!) has datamarks a disk that already contains partitions. It is only a warning, not a restriction — but it is your cue to check you are not about to erase the wrong disk.- The USB drive you booted from is not in the list. The installer excludes its own medium, so it cannot overwrite itself.
Use ↑ and ↓ to move, Enter to install onto the highlighted disk, and q to abort without writing anything.
Installing rewrites the whole disk: partition table, existing systems and all data on it are gone. Nothing on the other disks is touched.
If nobody touches the keyboard, the installer counts down for 30 seconds and then installs onto the highlighted disk — the behaviour a factory line or a headless machine needs. Any key press moves the selection and restarts the countdown, so you have as long as you need to decide.
Wait for the image to be written
A progress bar tracks the write, with the number of bytes already written:

Writing the image onto the selected disk.
How long this takes depends almost entirely on the speed of the USB drive and the target disk: a few minutes on a fast NVMe, considerably longer on eMMC. Do not power the machine off and do not remove the USB drive while the bar is moving. The installer also beeps the PC speaker twice when the write starts, so a machine with no display attached still tells you it got going.
Remove the USB drive when it finishes
When the write completes, the installer beeps five times, reports the disk it wrote and starts a 15-second countdown to reboot:

The write is done. Press the v key to verify it first, or let it reboot.
Optionally — and before you unplug anything, since it re-reads the source image from the USB drive — press v to verify the write. The installer compares the SHA-256 of what it wrote against the image, with its own progress bar:

The optional verification pass. Worth it on slow or suspect storage; skip it otherwise.
Verification is optional because it doubles the time spent on the disk and a normal install does not need it. Run it when you are commissioning unfamiliar hardware, or when a machine has already failed an install once.
Take the USB drive out during the countdown — or, if you prefer, leave it in and put the internal disk back as the first boot device in the firmware setup. If the machine boots from the installer USB again it will not start the system you just installed: depending on the firmware it either lands back in the installer and reinstalls, or stops at the boot menu with an error.
First boot
On the first boot after installation, Barbara OS finishes setting the device up and starts the Barbara Agent. Nothing is asked of you here.
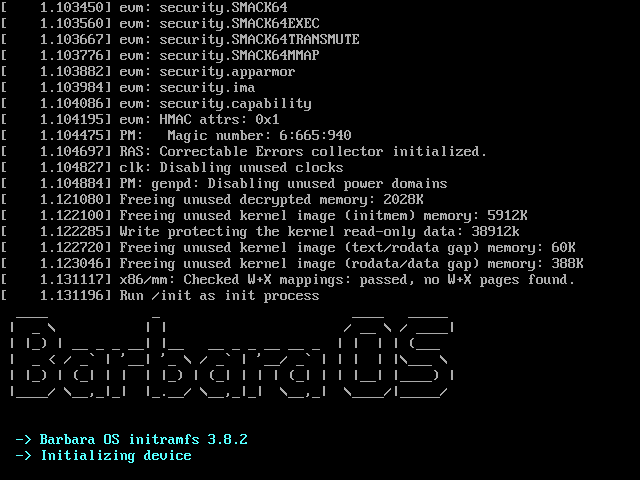
First boot: the OS initialises the device before reaching the login prompt.
This first boot can take up to 10 minutes depending on the hardware, and the machine may reboot by itself along the way. Let it finish before assuming something went wrong. Later boots are much faster.
Summary
You have written the generic_amd64 installer to a USB drive, booted the target machine from it,
selected the internal disk in the installer's interactive screen, and let it flash and reboot into a
freshly installed Barbara OS.
The node is now running but not yet registered. Next, get its Barbara ID — see Get the Barbara ID of the node — and add it to Barbara Panel with Add a node to Panel.