App Library
This article refers to Platform v3.2.0. The current Platform version is v3.3.0.
Overview
The Library view in Barbara Panel is the catalogue of every application available to your organization. It groups three kinds of apps:
- Docker — Docker-Compose-based applications you and your team upload directly.
- Marketplace — applications added from the Barbara Marketplace and ready for deployment on your nodes.
From the Library you can create new applications, version them, edit their metadata, and delete versions or whole applications.
Library view UI
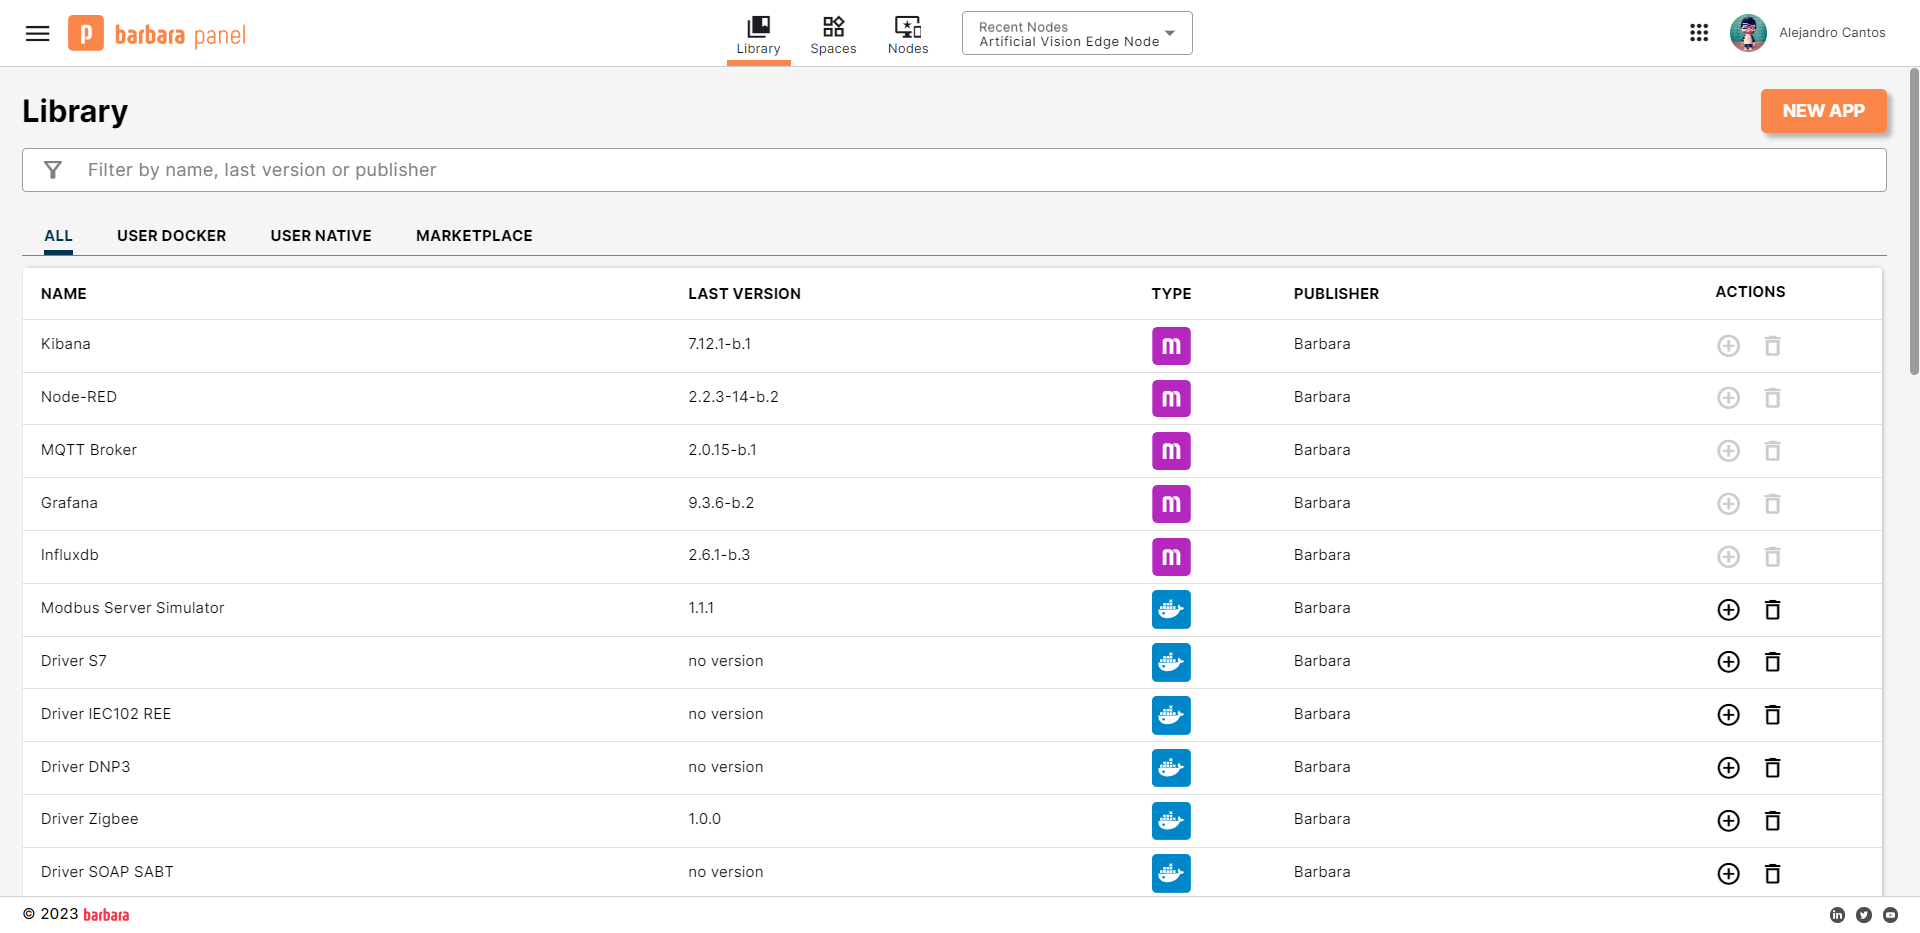
Library view
- Title and counter — the Library title shows the total number of applications available in your organization.
- New app — opens the New Application popup.
- Search bar — filters the list by name, version, or publisher.
- Filter tabs — narrow the list by application type (Docker, Marketplace).
- Applications list — every row carries a + button to add a new version and a trash icon to delete the application.
Create a new application
- From the Library view, click New app. The New Application popup opens.
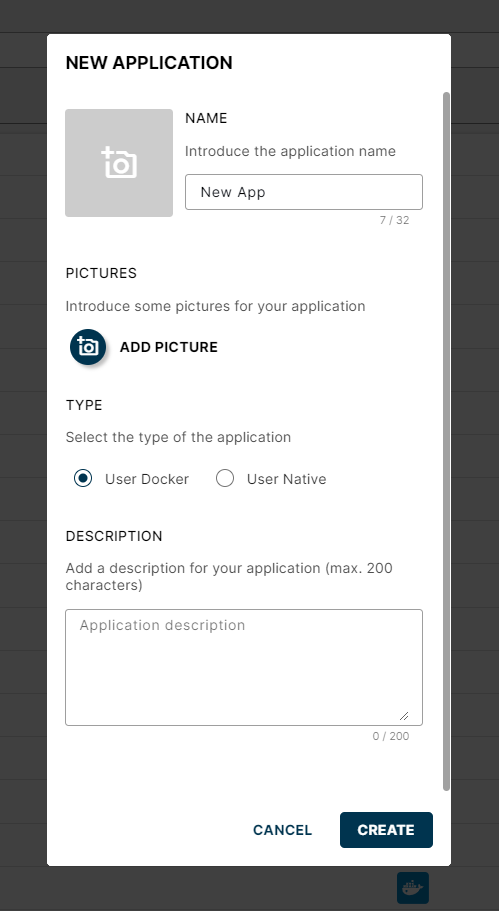
New Application popup
- Fill in the fields:
- Name **.
- Icon (optional) — click the grey square on the right to upload one.
- Pictures (optional).
- Application type — Docker.
- Description (optional).
- Click CREATE. The application appears in the Library.
Edit an existing application
Click an application's name to open its Application view. From here you can edit:
- Name.
- Description.
- Icon.
- Images.

Application view
Add a new version
- From the Application view, click ADD VERSION. The New Version popup opens.
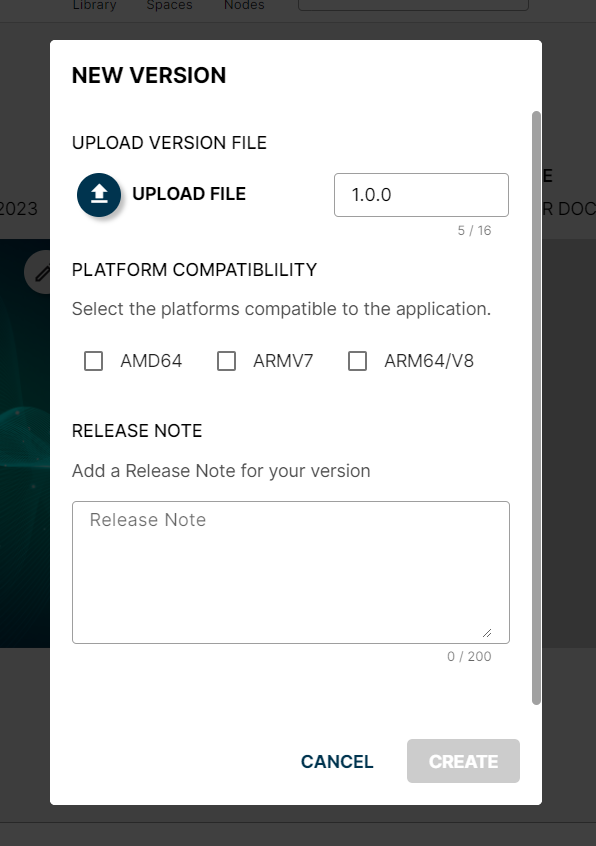
New Version popup
- Click UPLOAD FILE and pick the file with the new version.
- The system suggests a version number following the x.y.z convention. You can override it, but we recommend keeping the convention.
- Pick the compatible platforms for this version.
- Add release notes (optional).
- Click CREATE. The new version appears in the Application view.
Delete a version
- In the Application view, click the delete icon on the row of the version you want to remove.
- Confirm with OK.
Delete an application
- In the Library view, click the delete icon in the Actions column of the application.
- Confirm with OK.
Summary
Use the Library view as the single source of truth for the applications your organization has access to: create, version, edit, and delete here, and head to the Node Details page when you are ready to deploy any of them to an edge node.