1.1 - Add your first node
This article refers to Platform v3.2.0. The current Platform version is v3.3.0.
Overview
In this guide, you'll master the platform fundamentals. We'll begin by registering a node, followed by the practical steps of deploying multiple applications to create a complete solution. You will also learn the various methods for configuring these workloads. By the end, you'll have the foundational knowledge needed to confidently explore the platform's potential on your own.
In this step you'll register a new edge node in Barbara Panel. Barbara allows you to deploy various types of nodes, such as physical nodes, virtual machines, or hosted nodes. If you plan to use a physical or virtual machine node, please refer to the Barbara Core section to learn more about its installation.
In this tutorial, however, you will learn how to create a hosted node, which is a node hosted by Barbara. Hosted nodes are ideal for quick testing and prototyping, though they may be limited for more advanced tasks. You will create the node, learn how to verify its basic status in the Nodes list, and see how to access the Node Details page, which is the central point for its operation.
Add a new Hosted Node
Open the list of nodes in Barbara Panel by clicking on Nodes in the side menu. If this is your first time here, the list will be empty. Click the + Add Node button in the top-right corner and choose Hosted (Sandbox) from the dropdown menu.
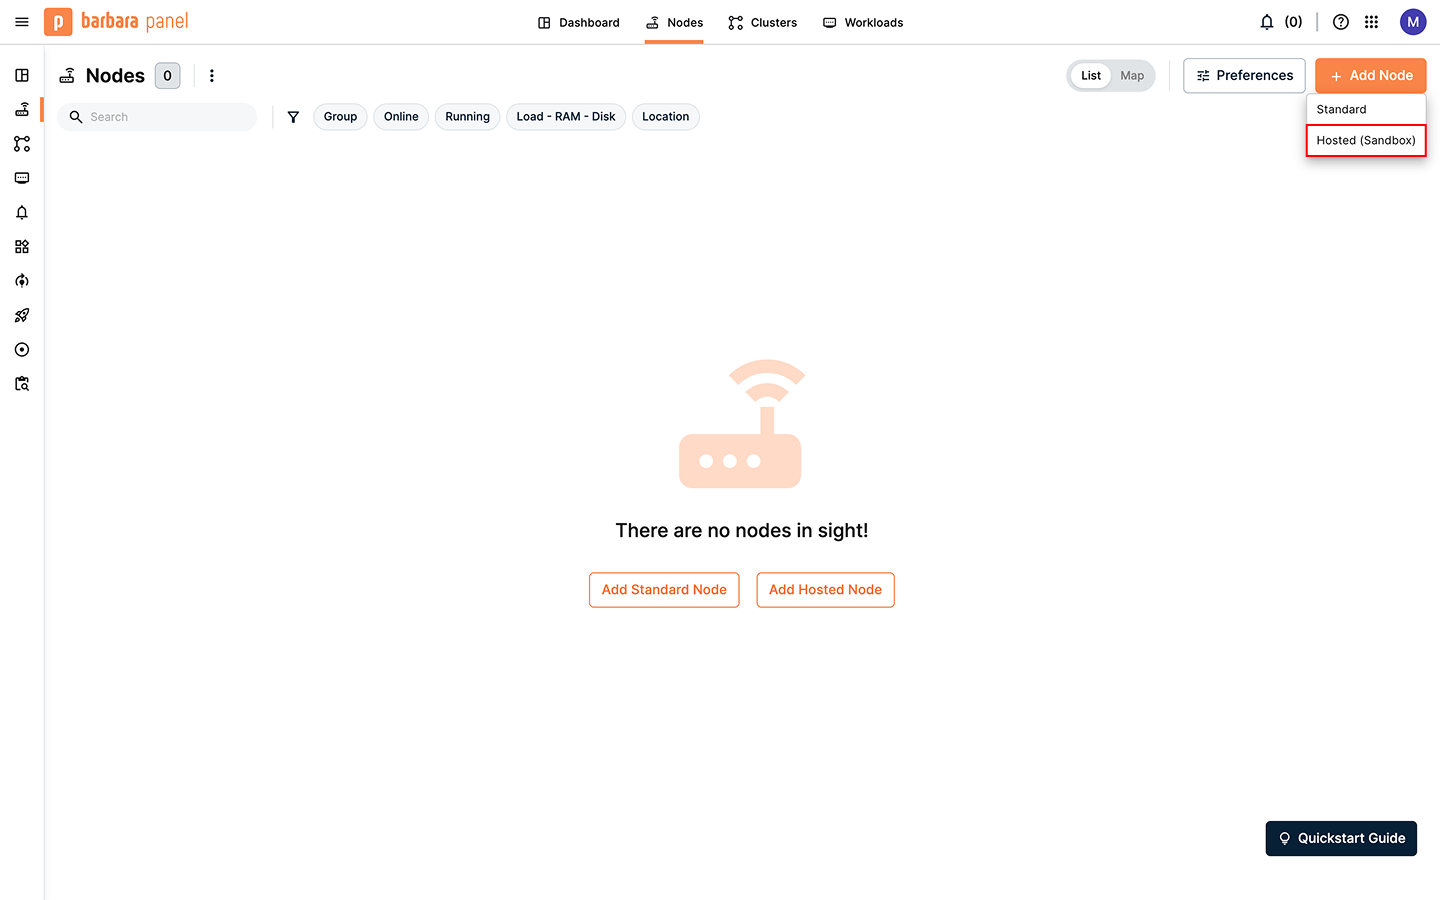
Empty Node List page
After selecting Hosted (Sandbox), a dialog window will appear explaining its recommended use cases and constraints. A hosted node is ideal to test the platform but has limited CPU and RAM capacity. Click on Create node.
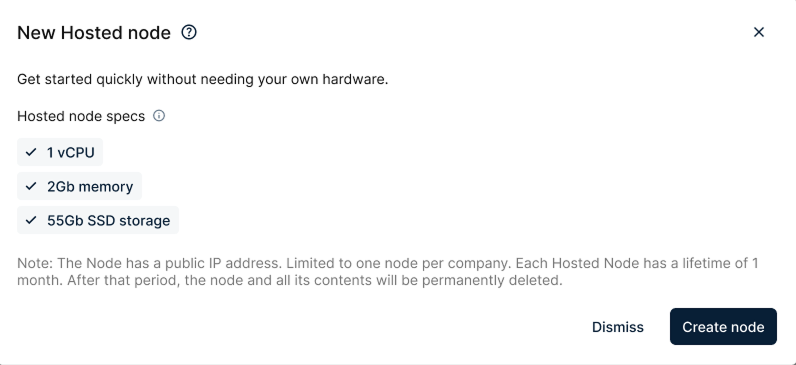
New Hosted node dialog
Only one hosted machine can be created per organization. Provisioning may take a few minutes before the node becomes available, so please wait. Each hosted node has a lifetime of 1 month. After this period, the node and all its contents will be permanently deleted.
Check your new node
Once added, the node will appear in the Nodes list, however it must go through a reboot to complete the provisioning process. Please wait until its status is Activated.
In the Nodes list, you can see information like the node's name, its status, real-time telemetry, and the default IP address. By clicking on the name, you can access the Node Details page, which is the central point of operations for that node.
The list also includes a section for quick actions. You can use the rename action to give your node a name meaningful for your project.
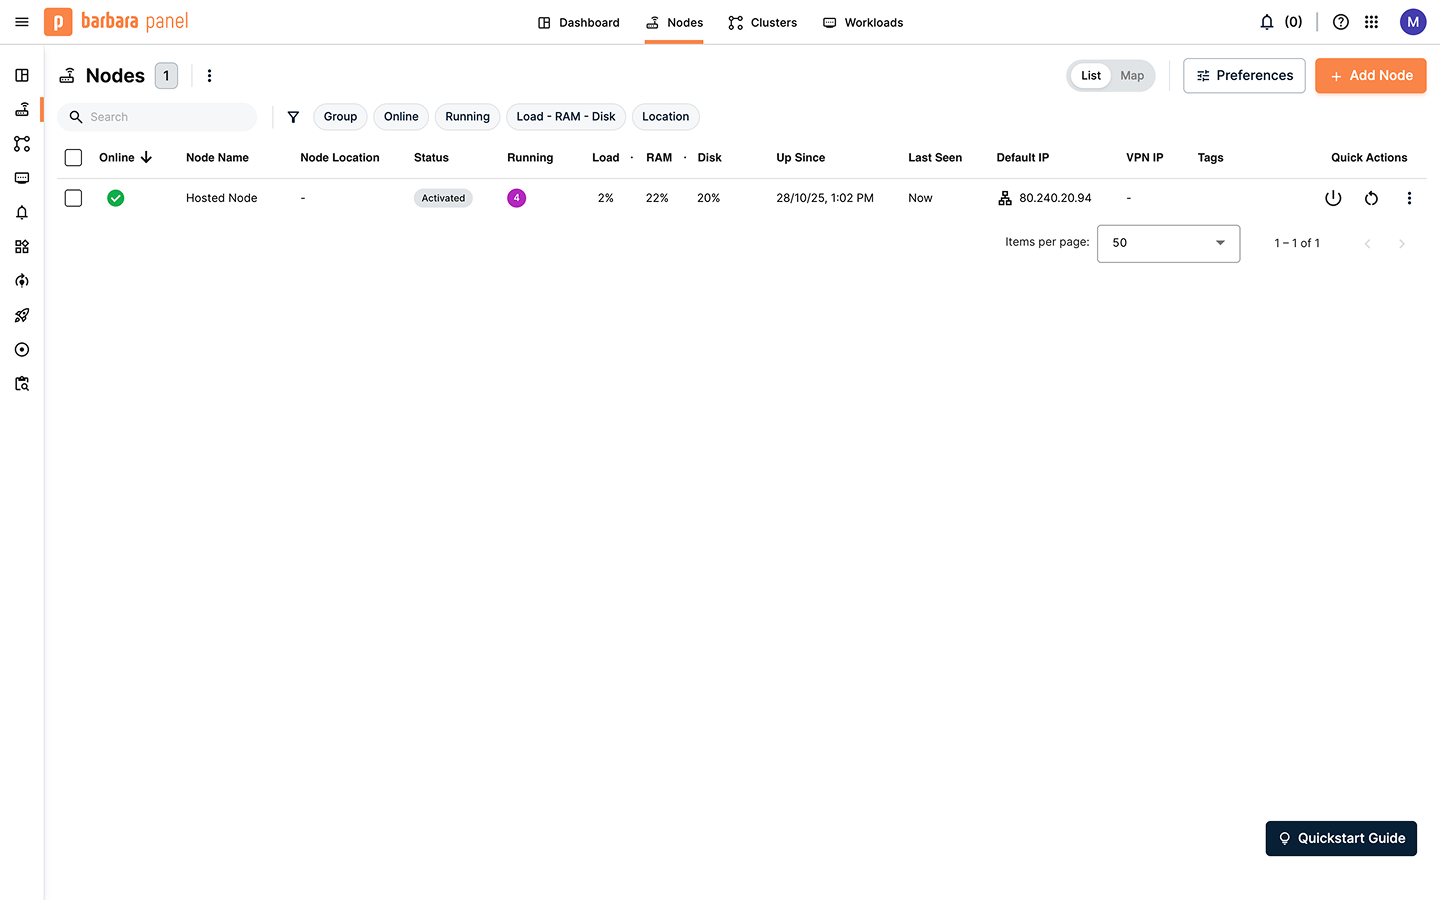
New Hosted Node in the Node List page
The Nodes list shows the default IP address, which you will use to access services deployed on the node. When the Default IP is publicly reachable, you typically do not need to enable the VPN to access your services remotely.
Summary
In this step you registered a new edge node in the Barbara Panel. We focused on creating a Hosted (Sandbox) node, an ideal choice for quick testing and prototyping. Remember that hosted nodes are restricted to one per organization and are temporary, with a 1-month lifetime. In the next step, we will deploy our first application.