OS Images view
This article refers to Platform v2.9.0. The current Platform version is v3.3.0.
Overview
The OS Images view in Barbara Panel is the entry point for downloading the firmware that runs on your edge nodes. It lists every official Barbara OS image we publish for the hardware models we support, and lets you build custom images that pre-bake network settings into the firmware so the node connects to your environment on first boot.
To open the view, click the three-line menu on the top left of Barbara Panel and select OS Images.
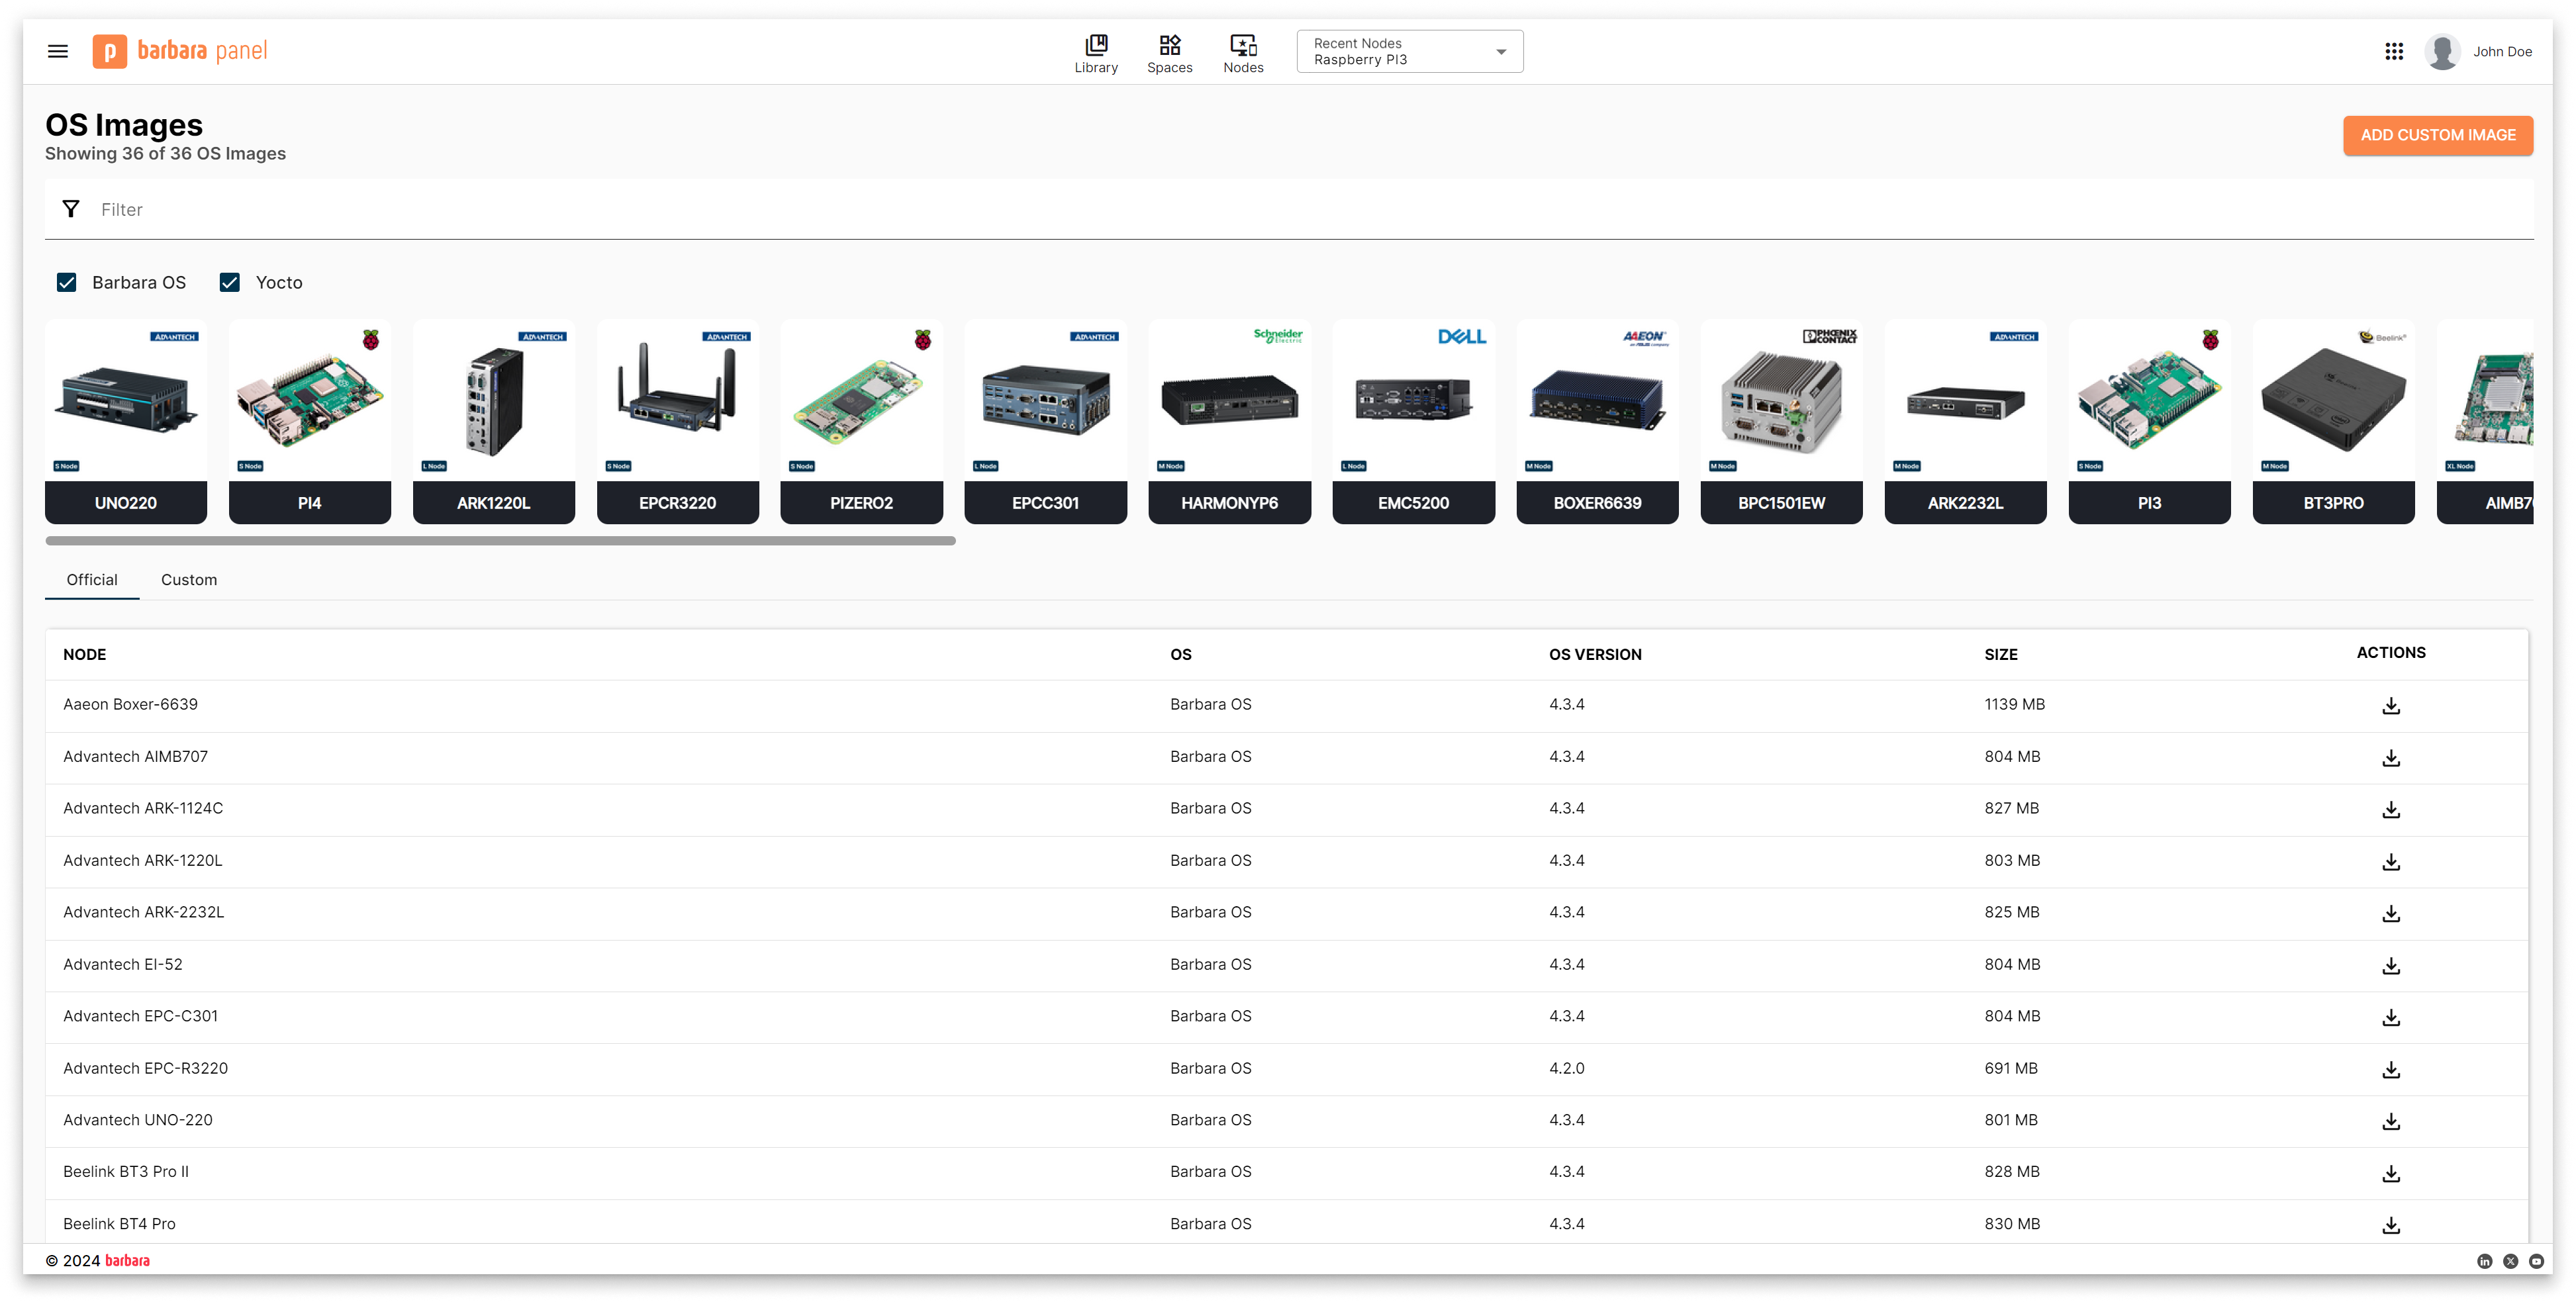
OS Images view
The view is split into two tabs:
- Official — pre-built images released by Barbara for every supported hardware model.
- Custom — images you have created with your own network settings baked in.
For the full list of supported devices, check the Supported Hardware overview.
Download an official image
- Filter by hardware:
- Text search [1] — type the device name or model in the filter bar.
- Image filter [2] — narrow the list to the
BarbaraorYoctoimage families. - Hardware carousel [3] — click the desired device card directly.
- Open the Official tab [4] to see only the latest official images for the selected hardware.
- Click the Download button [5] in the Actions column to start the download.
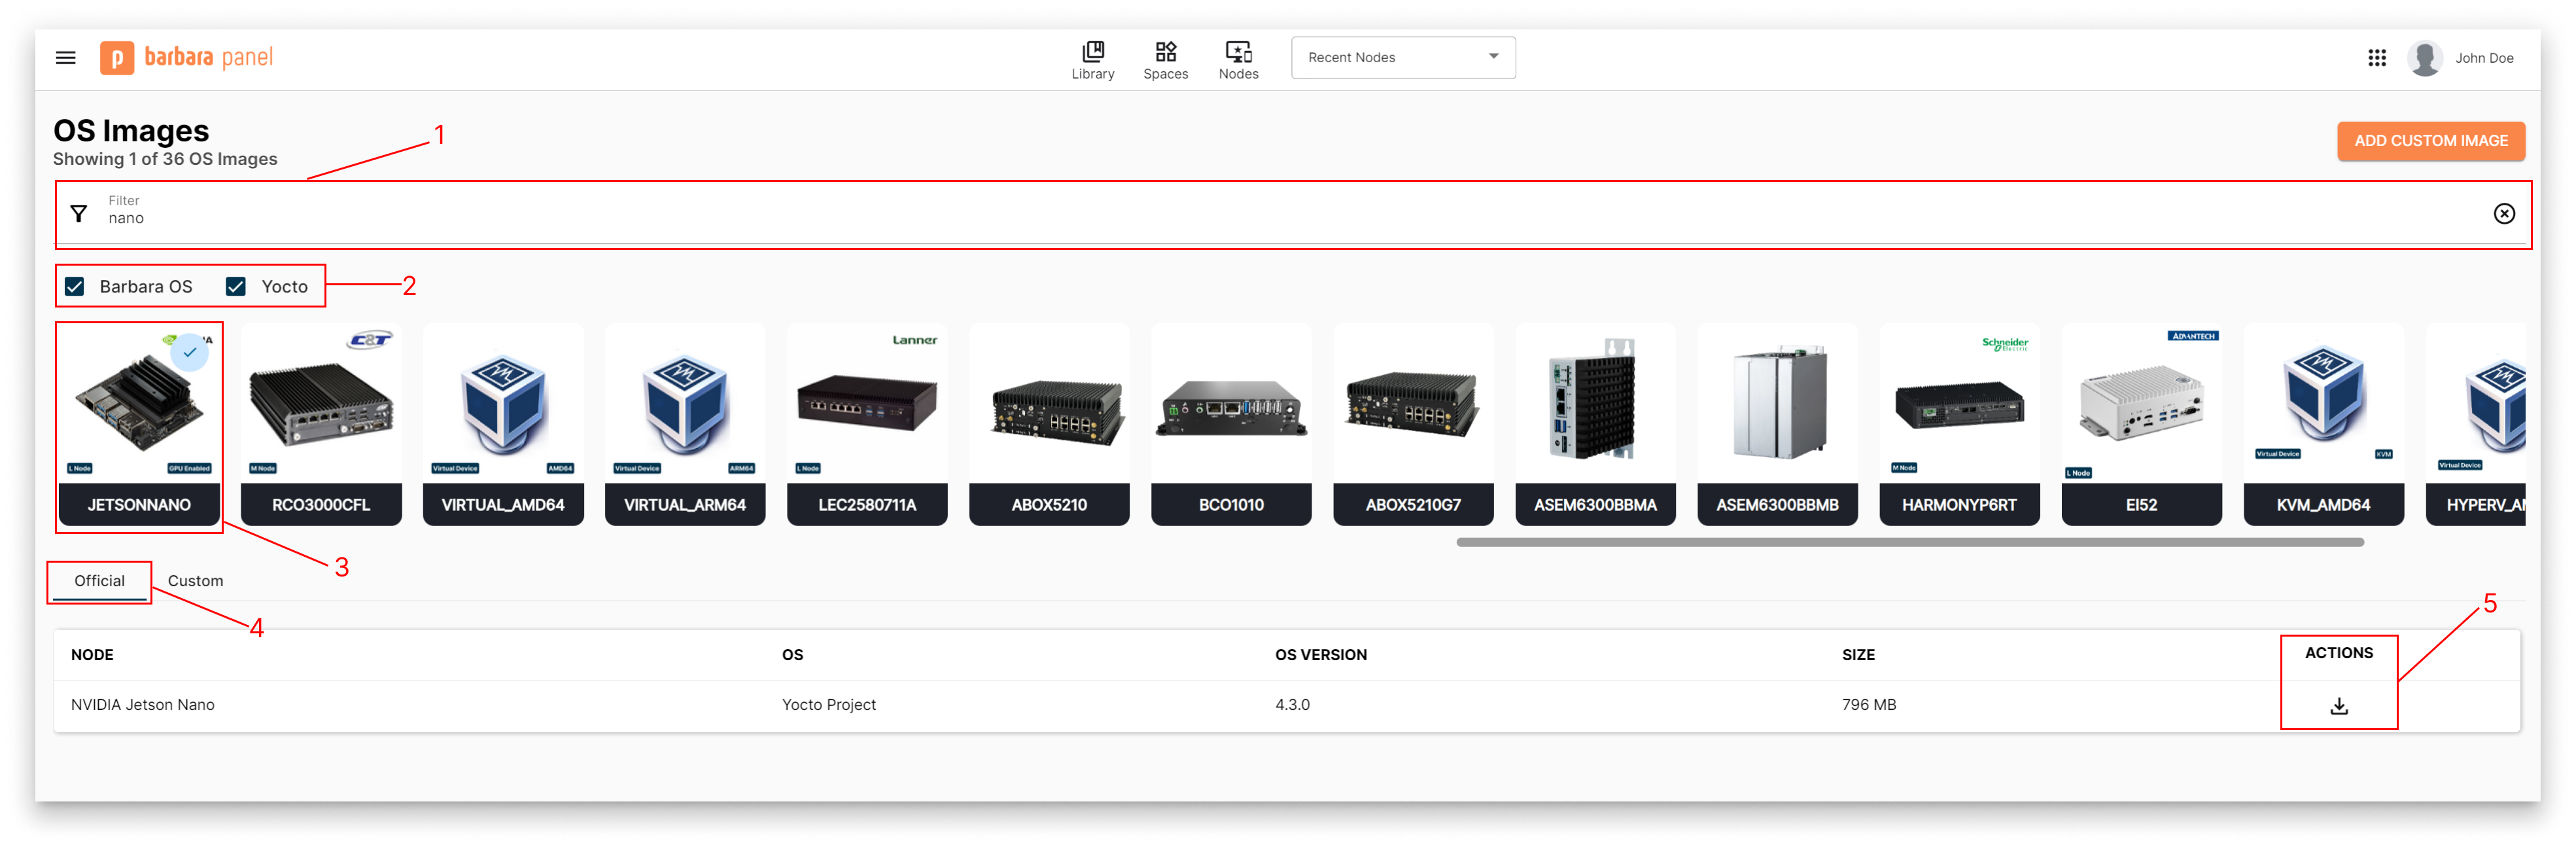
Download an image from the OS Images view
Create a custom image
A custom image is identical to an official one except that it carries pre-configured network settings in the firmware itself, so the node attaches to your network the moment it finishes booting.
- Click the Add Custom Image button in the top-right corner of the view.
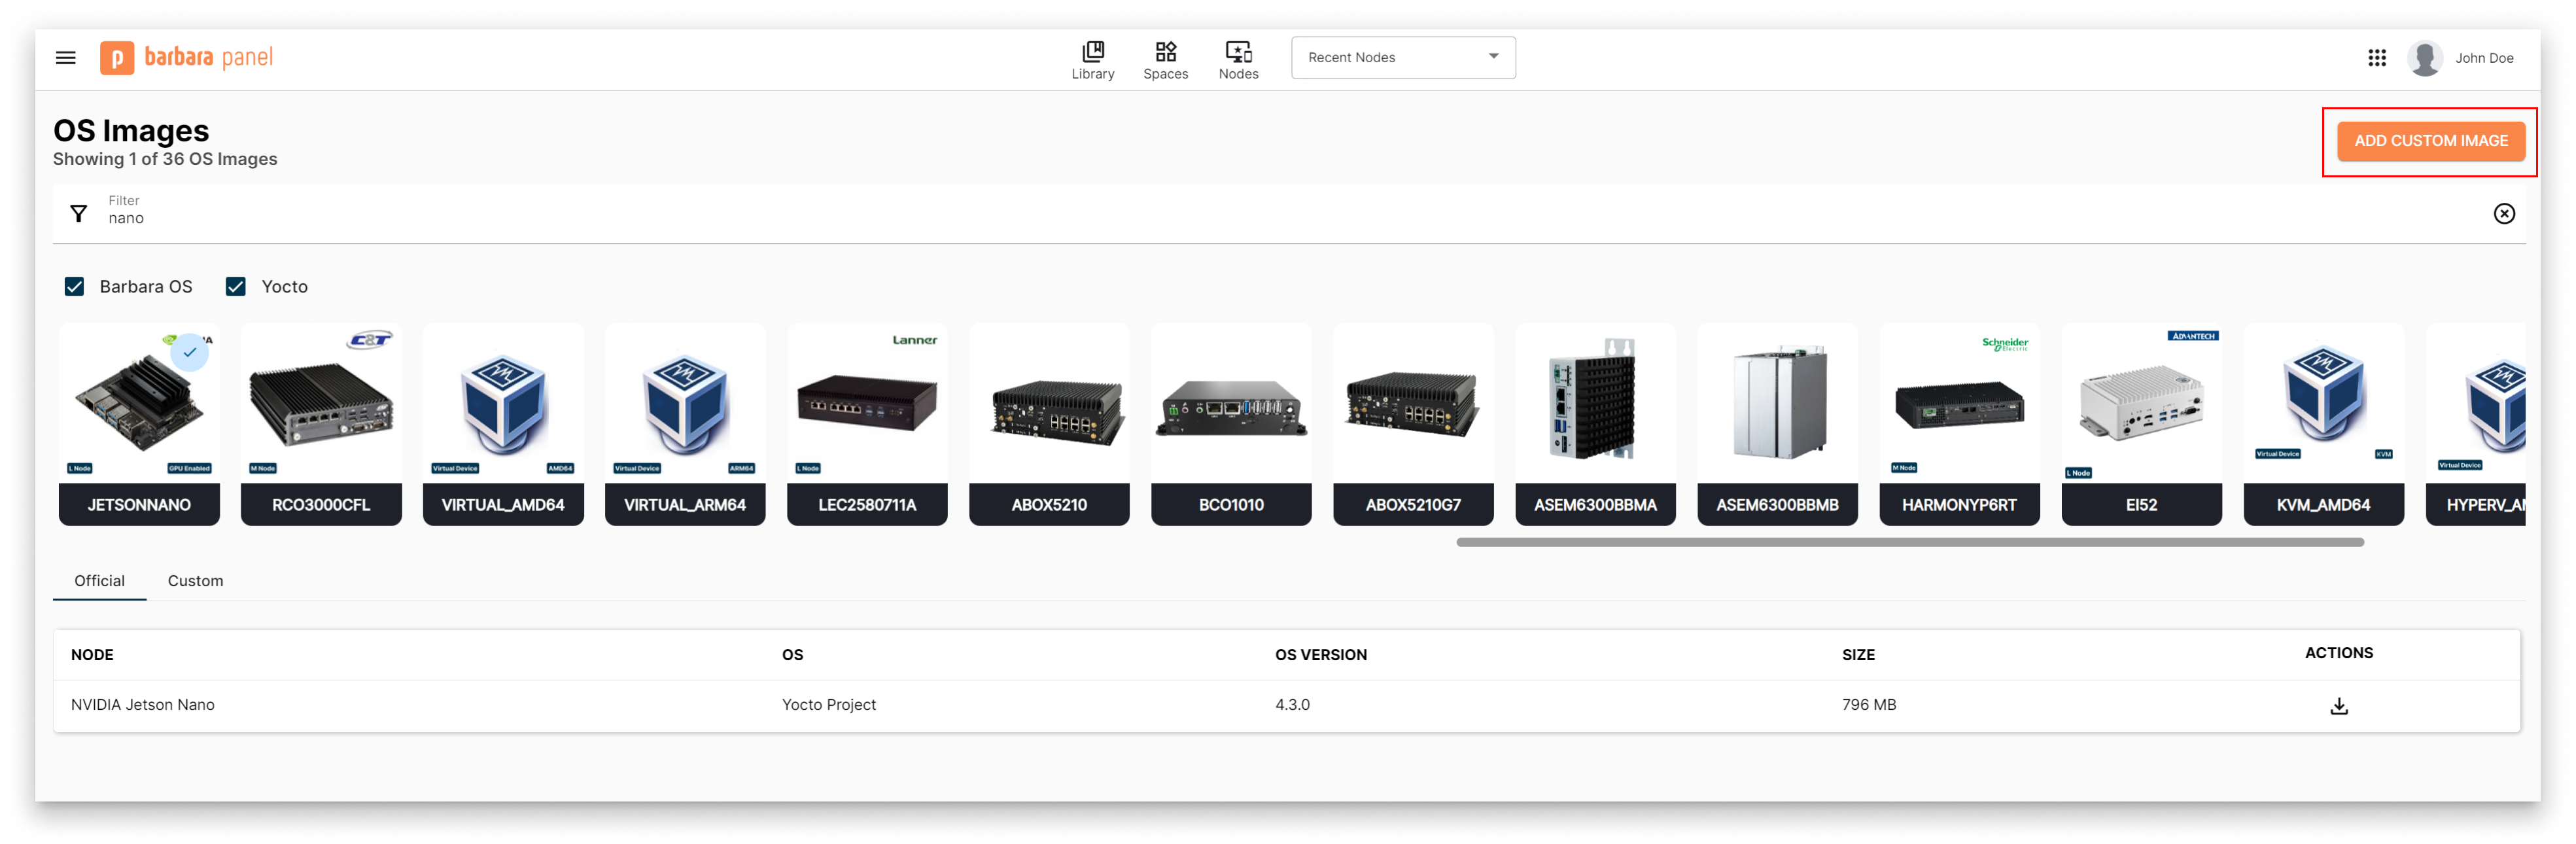
Add Custom Image button
- Fill in the Add Custom Image popup.
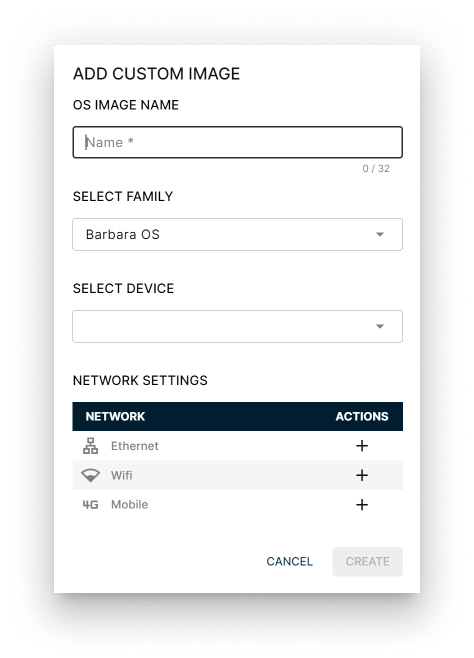
Add Custom Image popup
- OS Image Name — a descriptive label you'll use to identify this image later.
- Select Family — the image family for your hardware. Use Yocto for NVIDIA Jetson hardware and Barbara for everything else. The list of families is served by the platform API, so additional values may appear over time.
- Select Device — the exact hardware model the image targets.
- Network Settings — the network interface you want to pre-configure. Available types are Ethernet, WiFi, and Mobile.
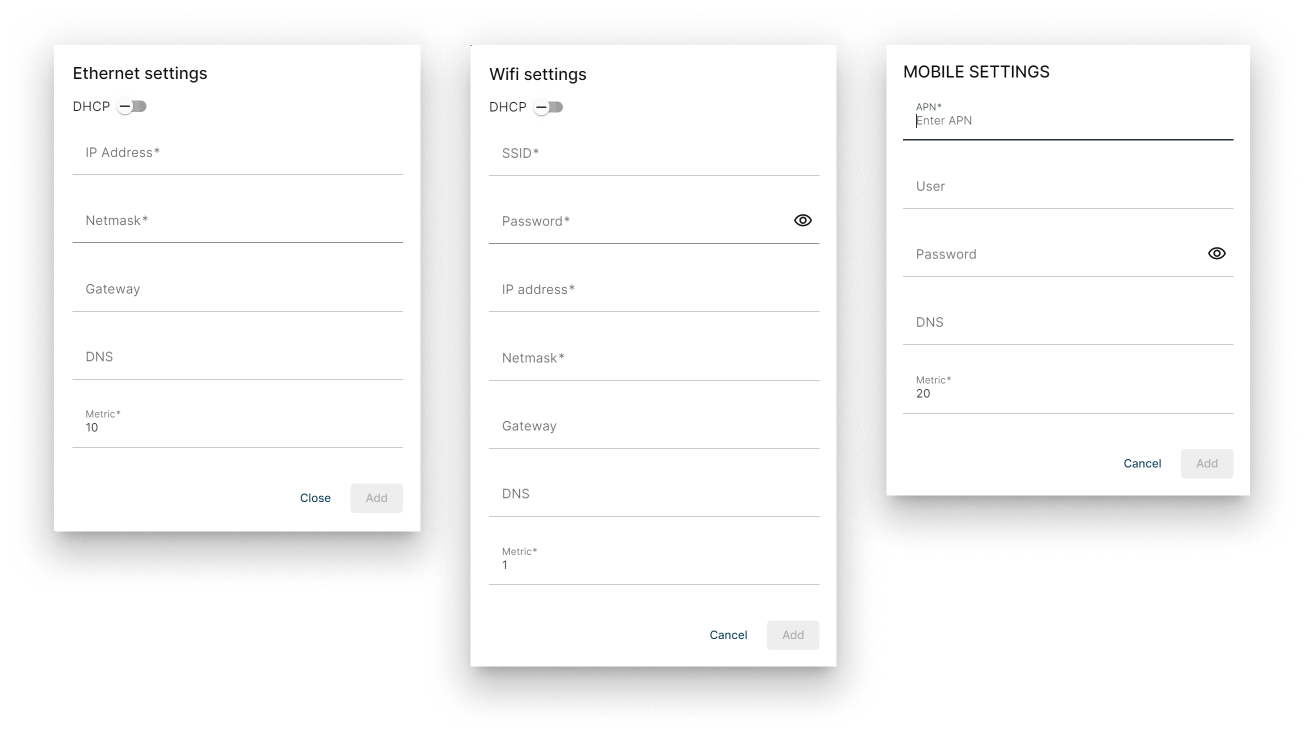
Custom image network settings
- Click Create. The build runs in the background; once it finishes, the new image appears under the Custom tab.
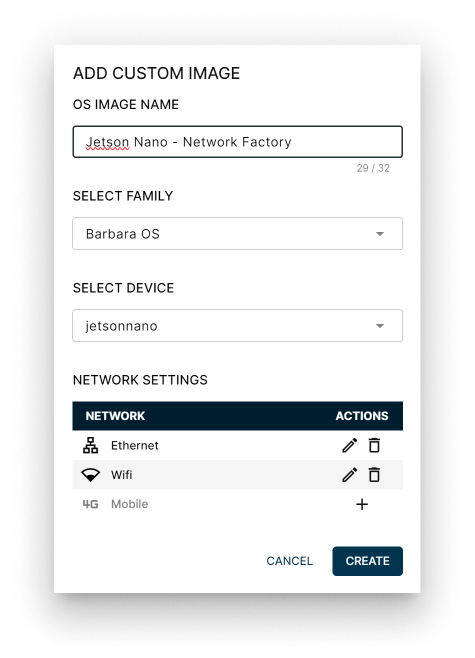
Creating a custom image
Manage your custom images
Open the Custom tab to see every custom image you have built.
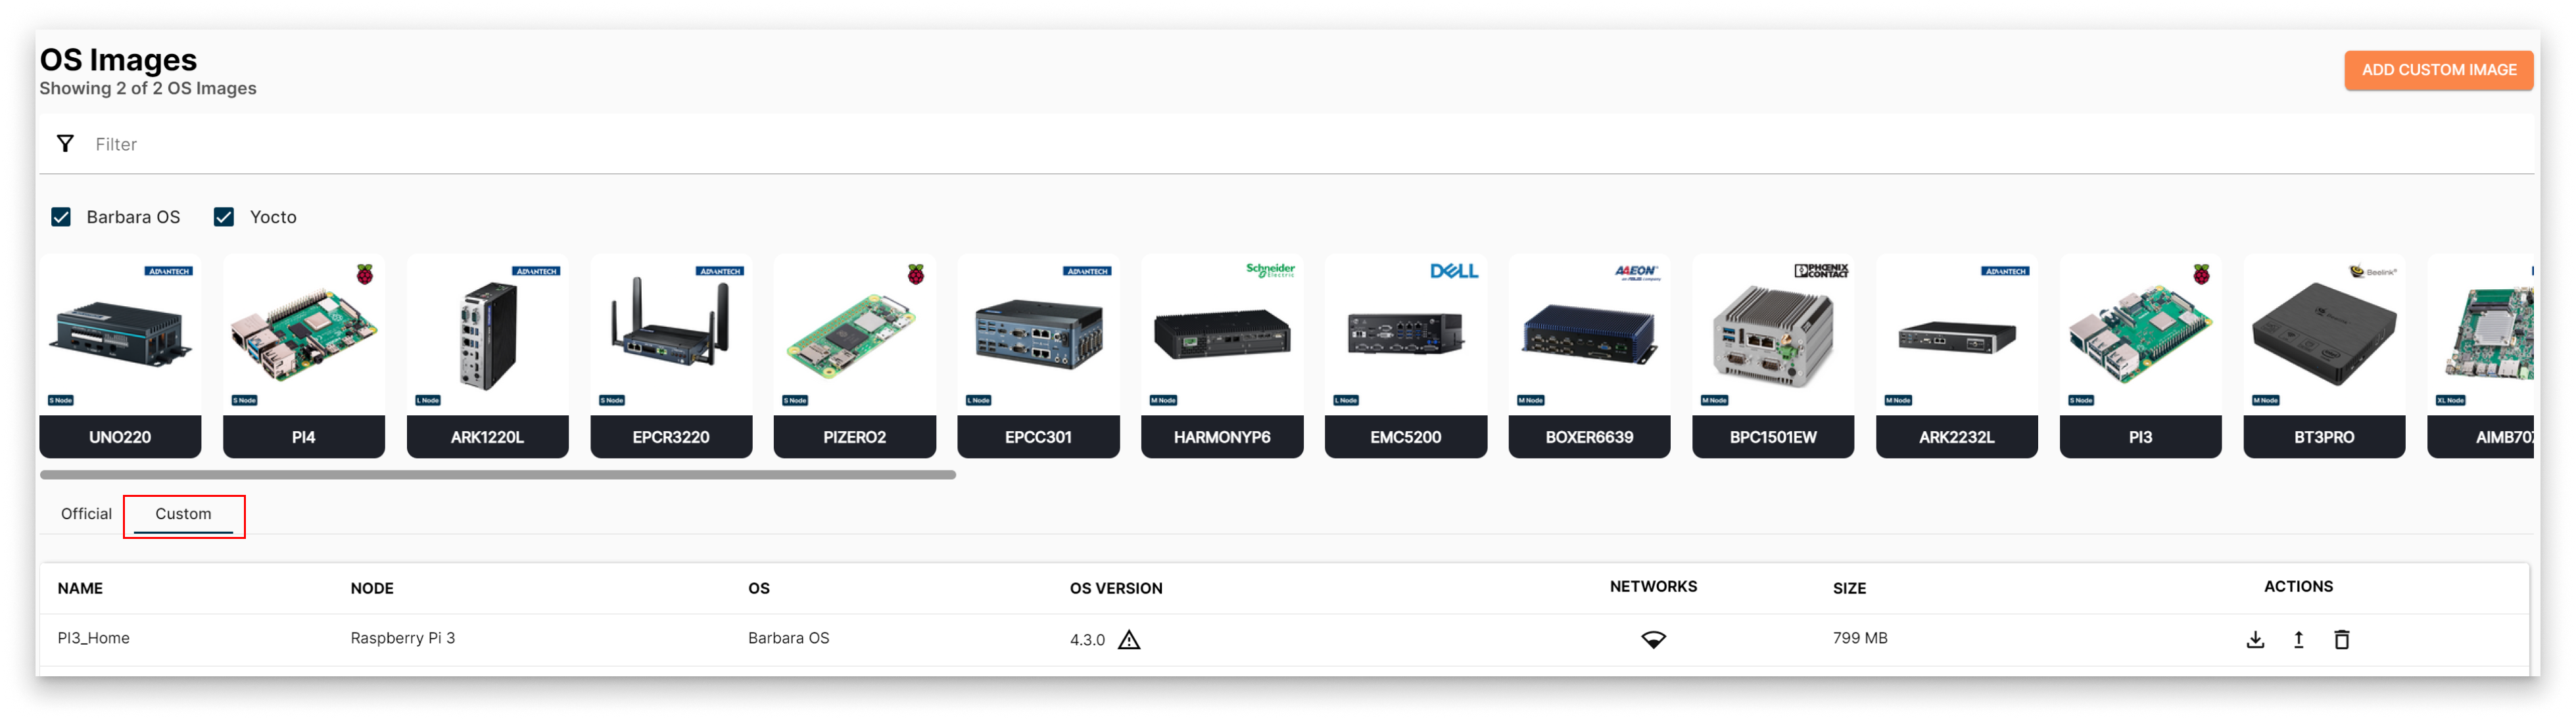
Custom image list
Custom images are built against the version of Barbara OS that was current at build time. They do not auto-update — older builds become outdated as new Barbara OS releases ship.
Each row in the list shows:
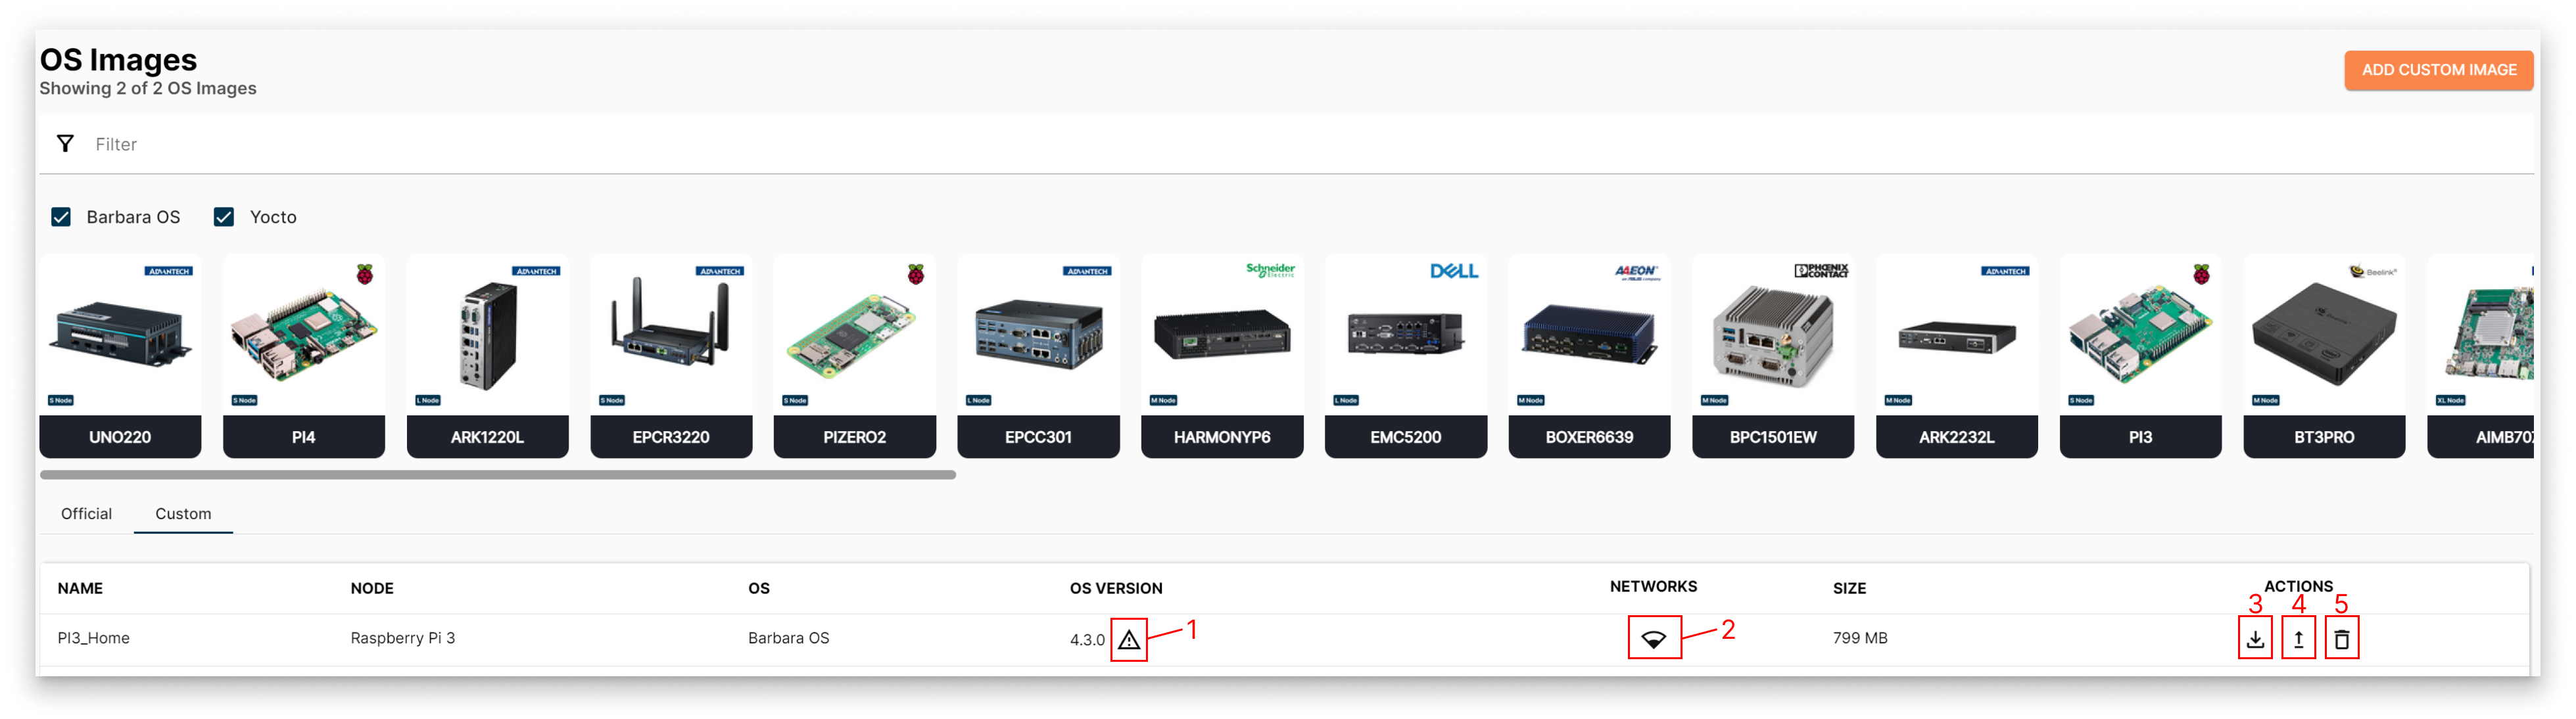
Custom image list columns
- Name — the label you set when creating the image.
- Device — the hardware model this image targets.
- OS — the image family (Barbara or Yocto).
- OS Version — the Barbara OS version this image was built from. An alert triangle icon [1] appears next to outdated builds.
- Networks [2] — the network interfaces baked into the image. Click the icon to inspect the parameters.
- Size — total file size of the image.
- Actions — three operations per image:
- Download [3] — pull the image for deployment.
- Update [4] — re-build against the latest Barbara OS version (only for outdated images).
- Delete [5] — remove the image from the list.
Summary
You now know how to find and download an official Barbara OS image, build a custom image with pre-configured network settings, and manage the resulting custom images. The next step is to install the image on your hardware — pick the article that matches your platform from the Barbara Core sidebar.