Network Card overview
This article refers to Platform v3.3.0. The current Platform version is v3.4.0.
Overview
The Network card on the Node Details page is the single place to inspect and change the network configuration of an edge node. It exposes every physical interface on the device (Ethernet, WiFi, Mobile), the node's hostname, and a set of Advanced features (VPN, Proxy, Standalone Mode, and IPTables), each with its own Settings popup.
Network card layout

Network card header, collapsed
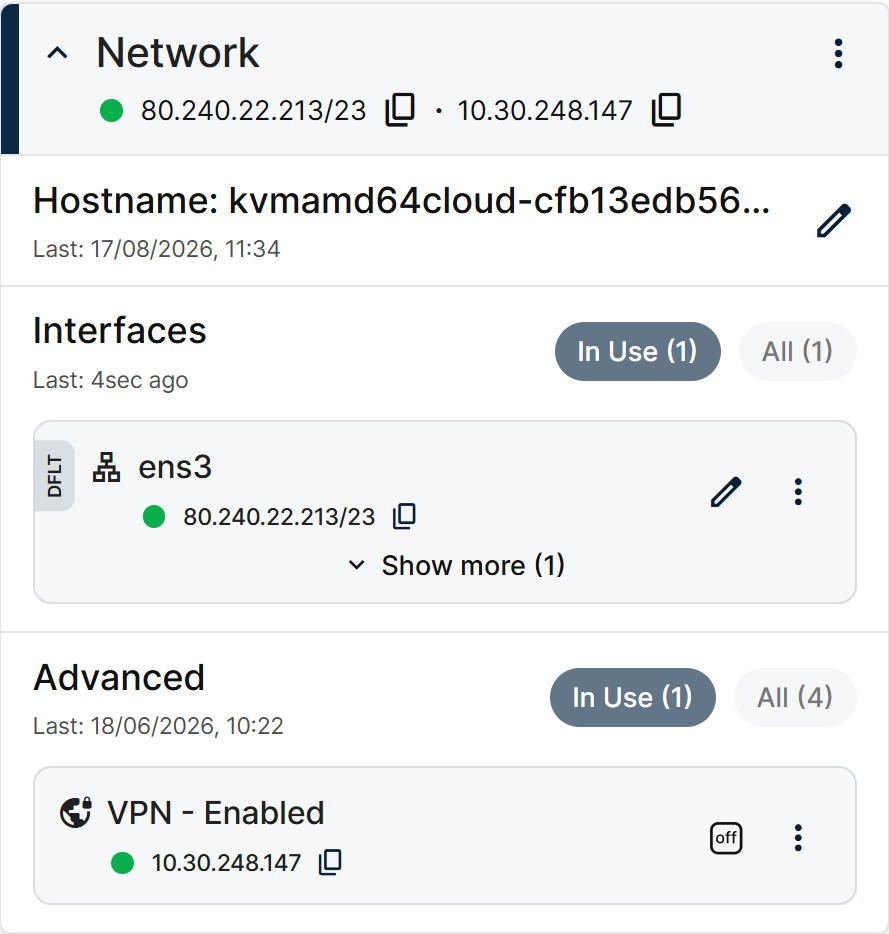
Collapsed, the card header shows the node's primary and VPN IP addresses with a copy-to-clipboard icon next to each. Click the chevron to expand it.
Network card, expanded
Expanded, the card is split into three sections:
- Hostname — the node's hostname and when it last changed, with an edit pencil.
- Interfaces — one row per physical interface (Ethernet / WiFi / Mobile). The In Use filter hides interfaces without a live IP; switch to All to see every interface the hardware exposes, including disconnected ones. The default-route interface carries a DFLT badge. Each row shows the IP address with a copy-to-clipboard icon, an edit pencil, and an options menu; click Show more to reveal any IP aliases.
- Advanced — one row per advanced feature: VPN, Proxy, Standalone Mode, and IPTables. The same In Use / All filter applies here.
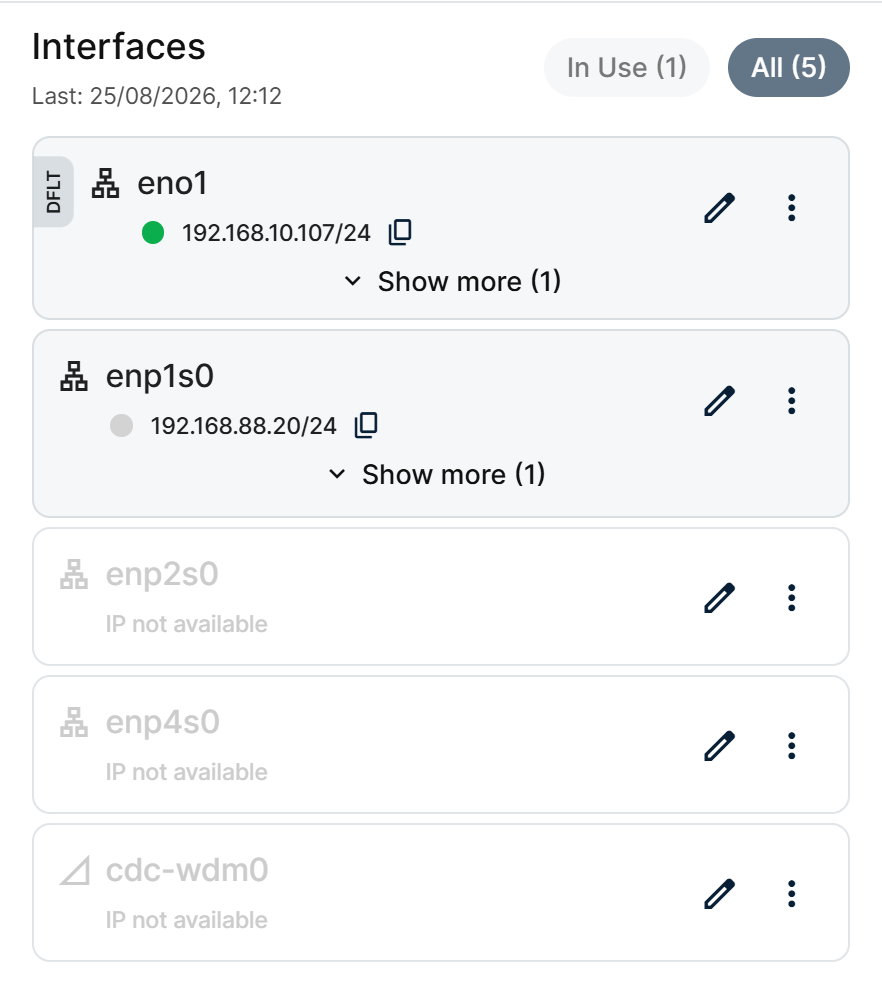
Interfaces section, All filter
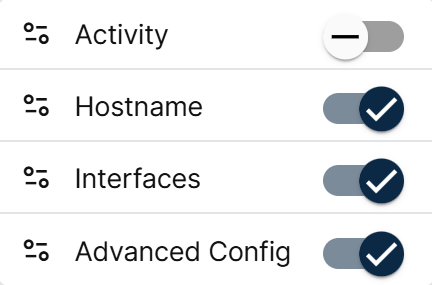
The ⋮ menu in the card's top-right corner lets you show or hide entire sections (Activity, Hostname, Interfaces, Advanced Config) if you only care about part of the card.
Section visibility menu
Enable Rollback
Every Settings popup that can change how the node reaches the network (interfaces, VLANs, Proxy, Standalone Mode, IPTables) includes an Enable Rollback checkbox. When checked, the node monitors connectivity after applying the new configuration; if it loses connection to Barbara Panel, it automatically reverts to the last known good configuration. The Hostname popup has no such checkbox, since changing the hostname does not affect connectivity.
Keep Enable Rollback checked whenever you change networking configuration over the network — it prevents a typo in a netmask from leaving the node unreachable.
Adjust the hostname
Edit hostname popup
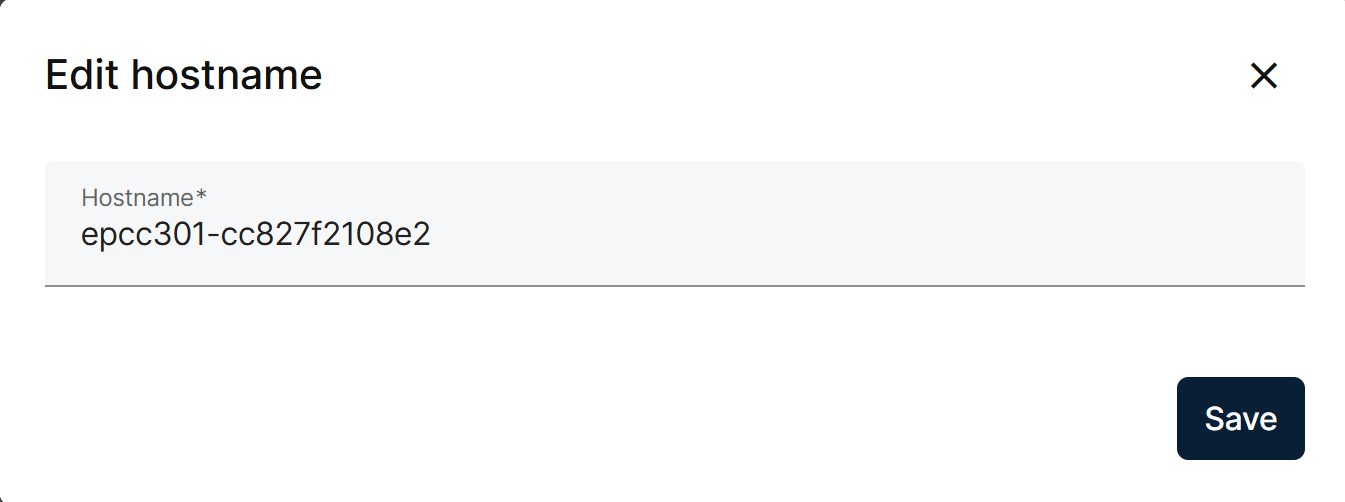
The hostname identifies the node on local networks and in remote management systems.
- Click the edit pencil next to the Hostname row.
- Type the new hostname in the Edit hostname popup.
- Click Save.
Adjust a physical interface
Each interface's Settings popup is named after the interface itself (for example Eno1 Settings) and exposes a slightly different set of parameters depending on the medium. Metric, MTU, IP (static or DHCP), Netmask, Gateway, and DNS servers are common across the three. The Primary IP and Primary DNS sections each carry a + Add IP Alias button, so you can attach more than one IP or DNS server to the same physical interface, which is useful for hosting several services, segmenting traffic, or DNS redundancy.
Ethernet
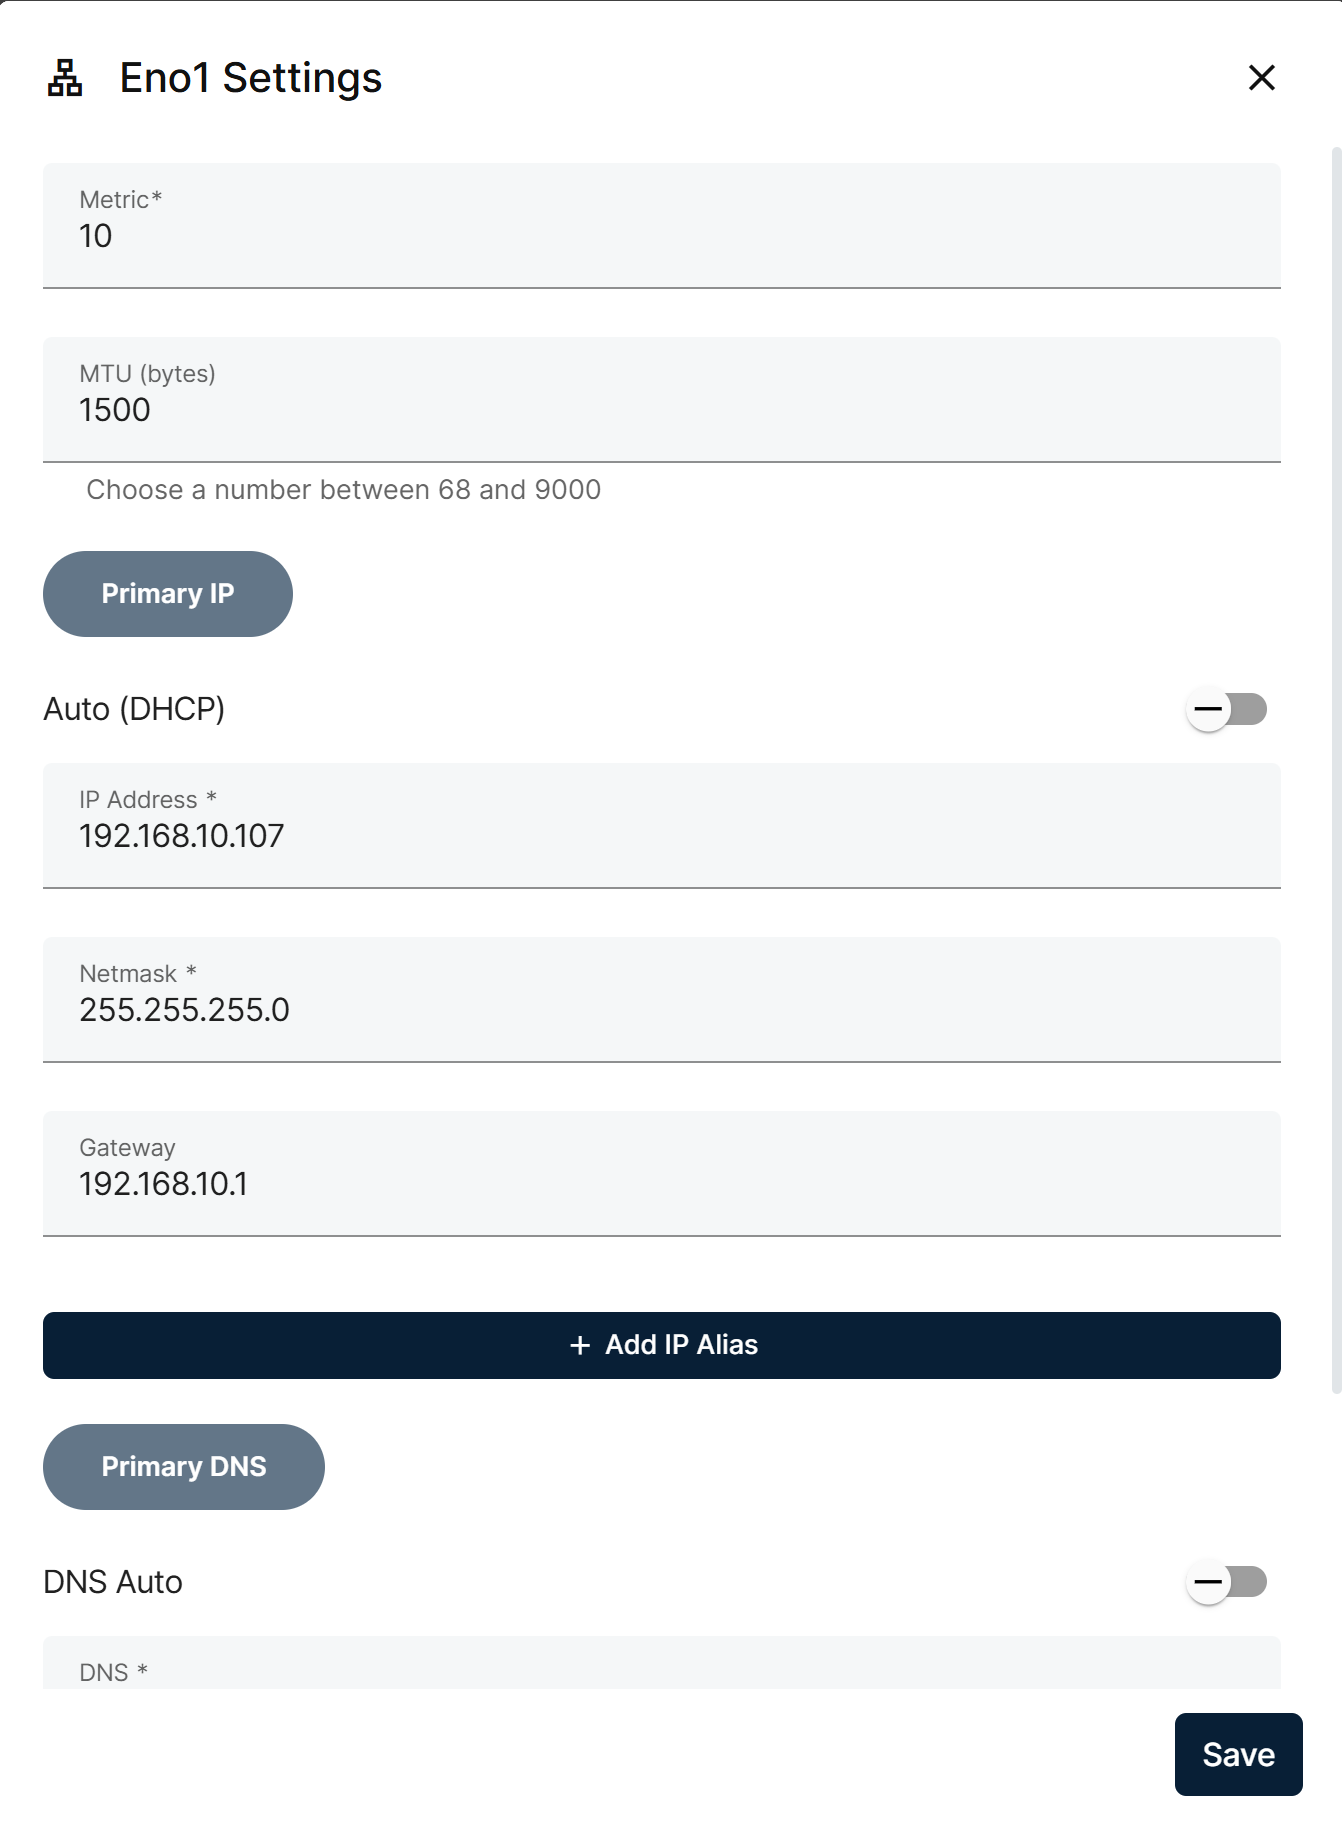
Ethernet Settings popup
- Click the edit pencil next to the Ethernet interface you want to configure.
- Set Metric, MTU, IP (static or DHCP), Netmask, and Gateway under Primary IP; add DNS servers under Primary DNS.
- Check Enable Rollback if you want the change protected.
- Click Save.
WiFi
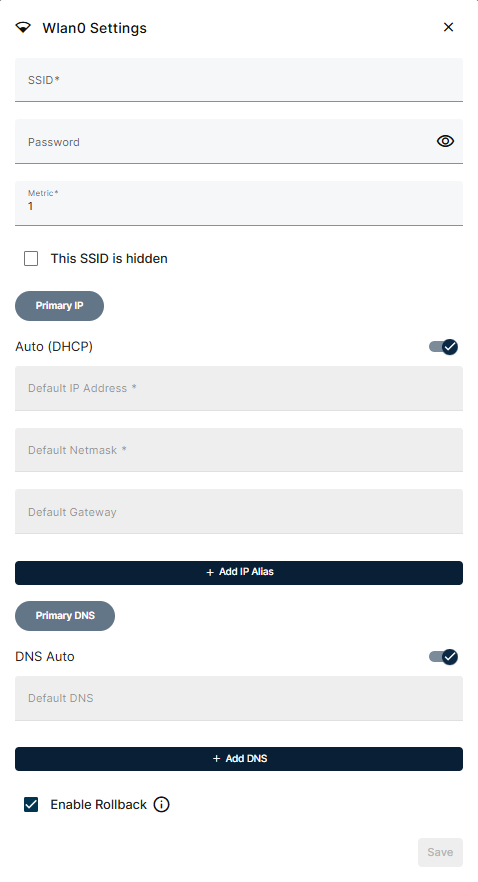
WiFi interface Settings popup
- Click the edit pencil next to the WiFi interface.
- Set SSID, password, the Hidden SSID toggle if needed, plus Metric, DHCP/IP, and DNS.
- Check Enable Rollback.
- Click Save.
Mobile
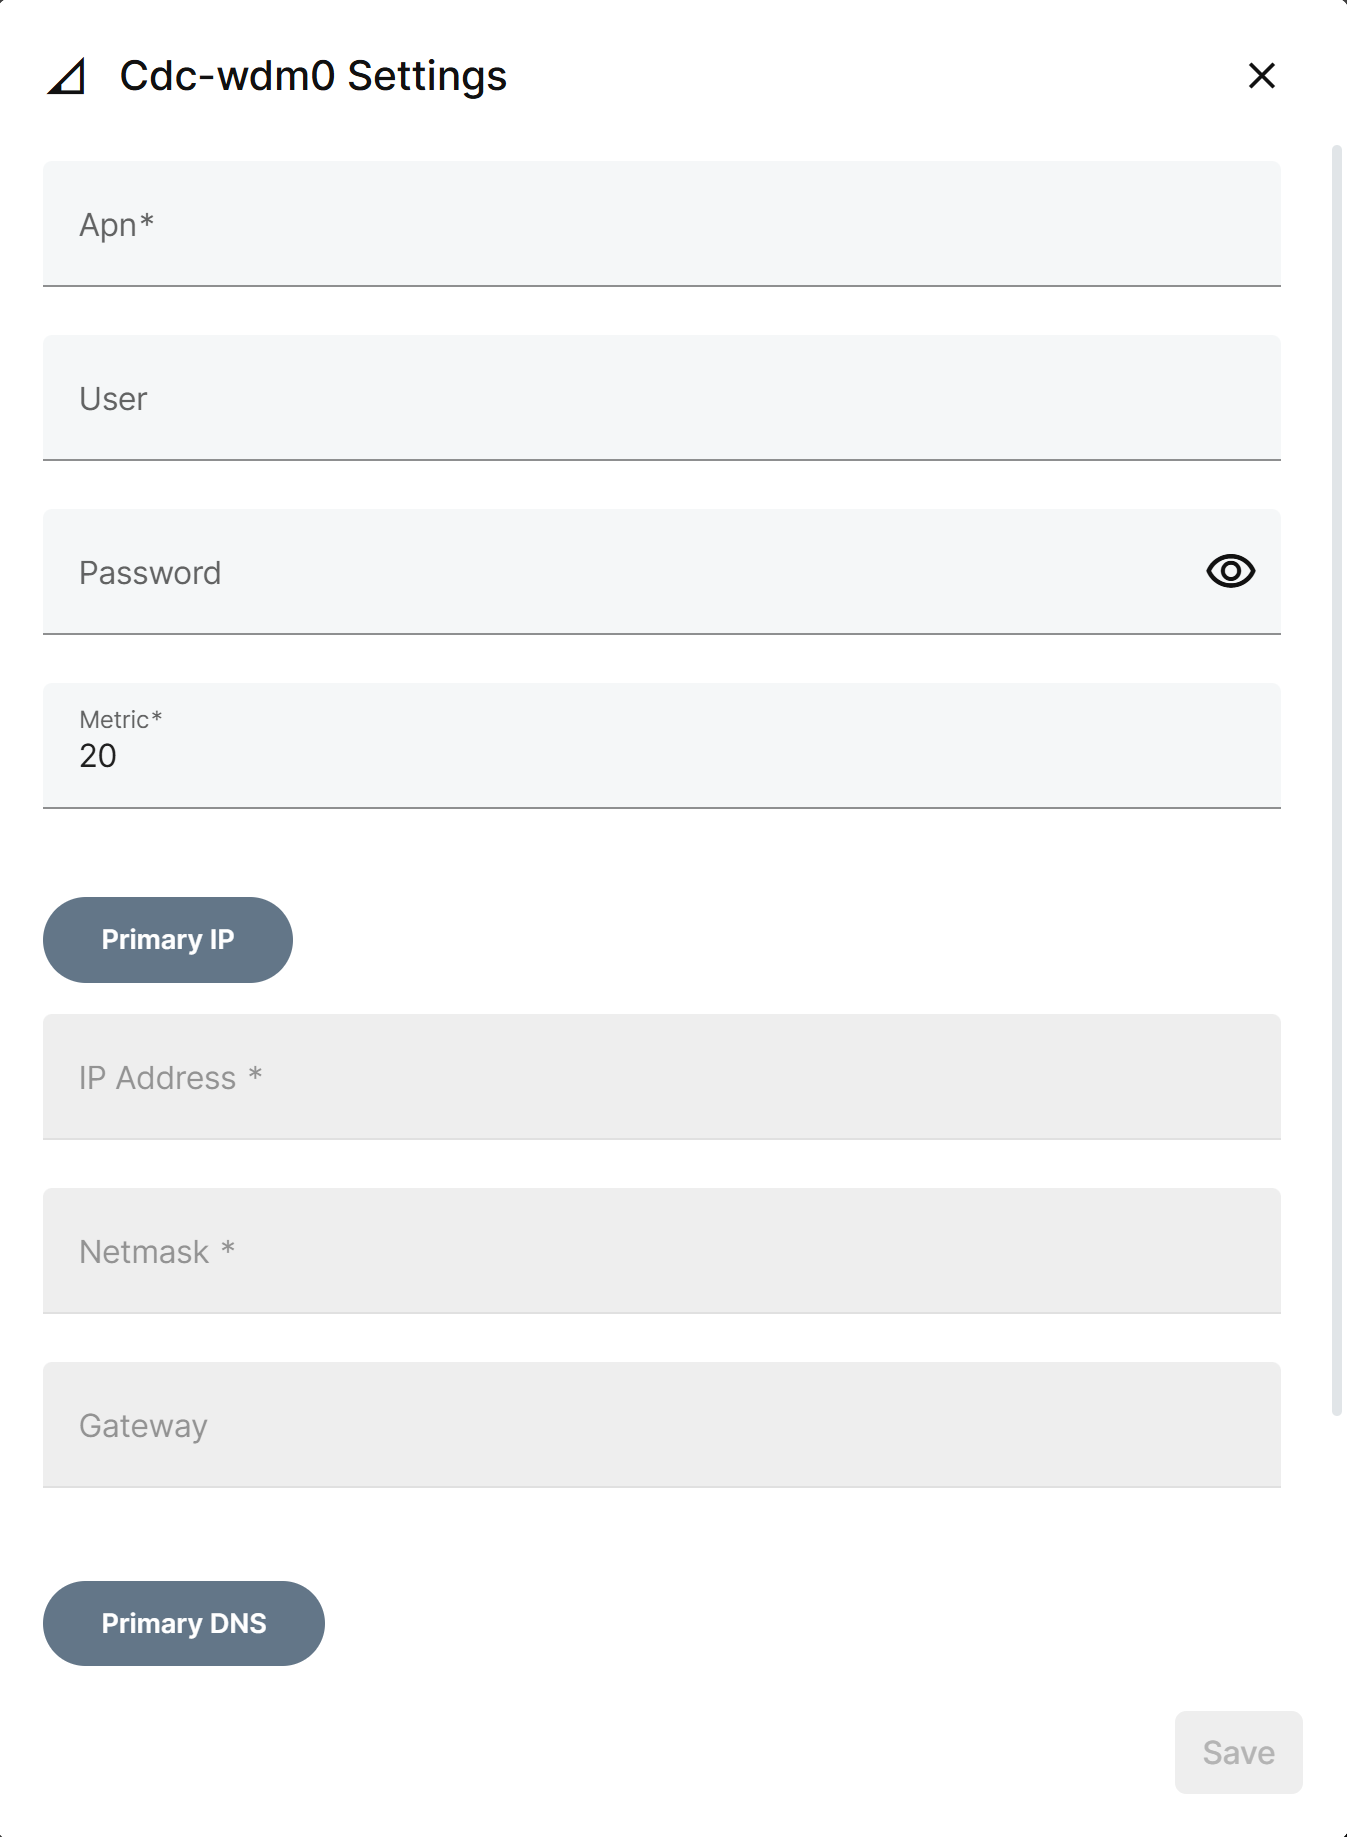
Mobile interface Settings popup
- Click the edit pencil next to the Mobile interface.
- Set APN, User and Password for the SIM, then Metric and, under Primary IP, IP Address, Netmask, and Gateway.
- Check Enable Rollback.
- Click Save.
Configure a VLAN
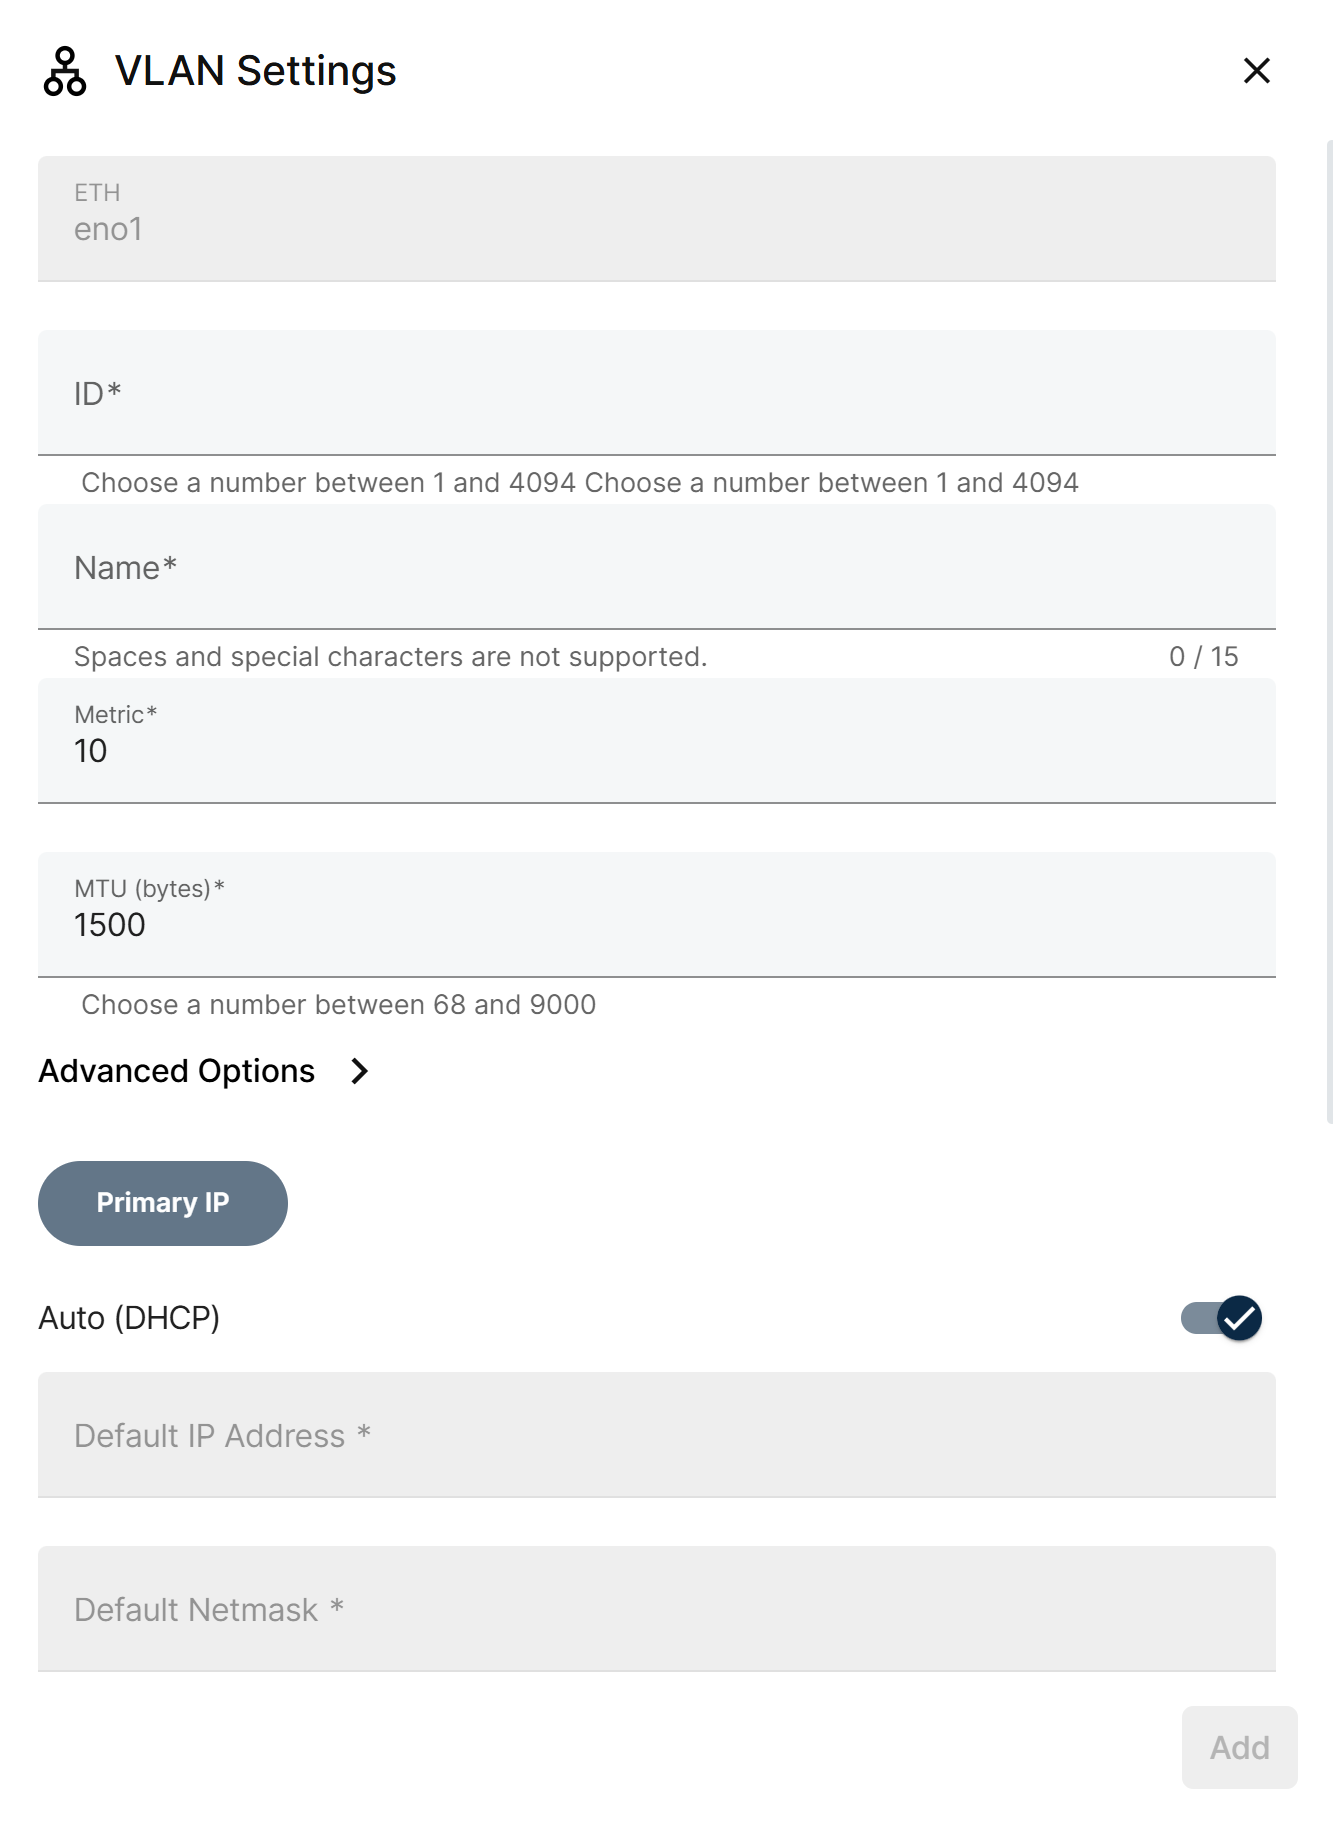
VLAN Settings popup
A VLAN (Virtual Local Area Network) is a logical subdivision of a physical network that groups devices regardless of their physical location. VLANs improve management, security, and traffic segmentation.
Open the VLAN Settings popup from the options menu of the parent Ethernet interface. Set:
- ID — a number between 1 and 4094.
- Name — letters and digits only; spaces and special characters are not supported.
- Metric and MTU.
- IP (static or DHCP) under Primary IP.
Advanced Options exposes the 802.1Q tuning parameters (MTU override, reorder headers, loose binding, GVRP, MVRP); leave them unless your network setup specifically requires them.
Check Enable Rollback to protect the change, then click Add.
The Advanced section
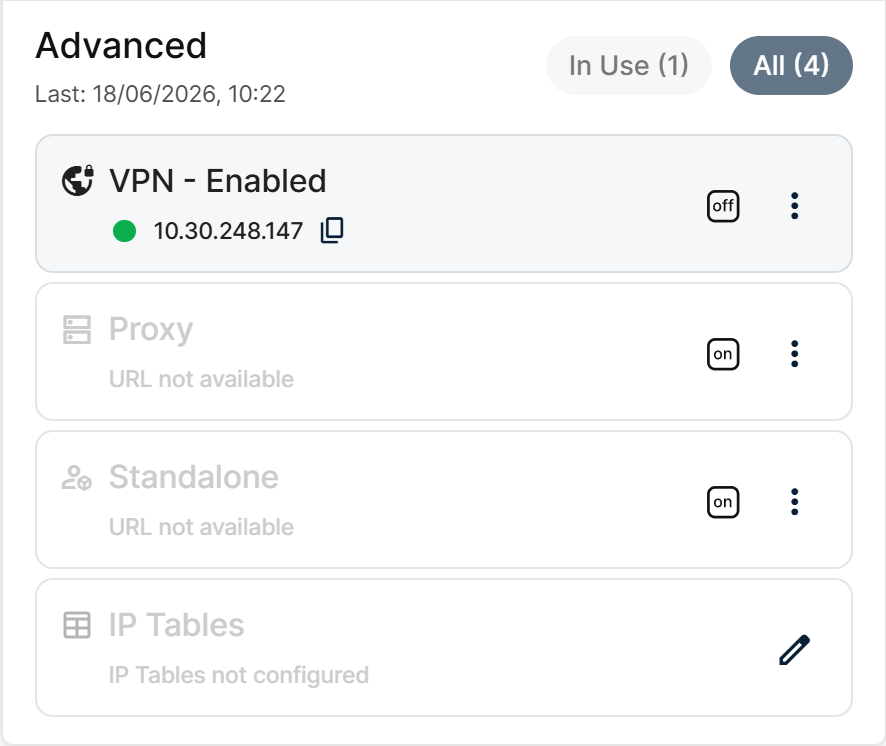
Advanced section, expanded
VPN, Proxy, Standalone Mode, and IPTables share the same row layout: a status indicator, an ON/OFF control, and an options menu that opens the feature's own Settings popup. IPTables is the one exception, since it has no enabled/disabled state: its row shows an edit pencil instead of an ON/OFF control.
- VPN — lets you reach the node from outside its LAN over a WireGuard tunnel. See Configure the VPN.
- Proxy — routes the node's traffic through an HTTP or Socks5 proxy. See Configure the Proxy.
- Standalone Mode — a fallback local UI for configuring the node when it cannot reach Panel. See Standalone Mode.
- IPTables — the node's Linux firewall, covered below.
Configure IPTables
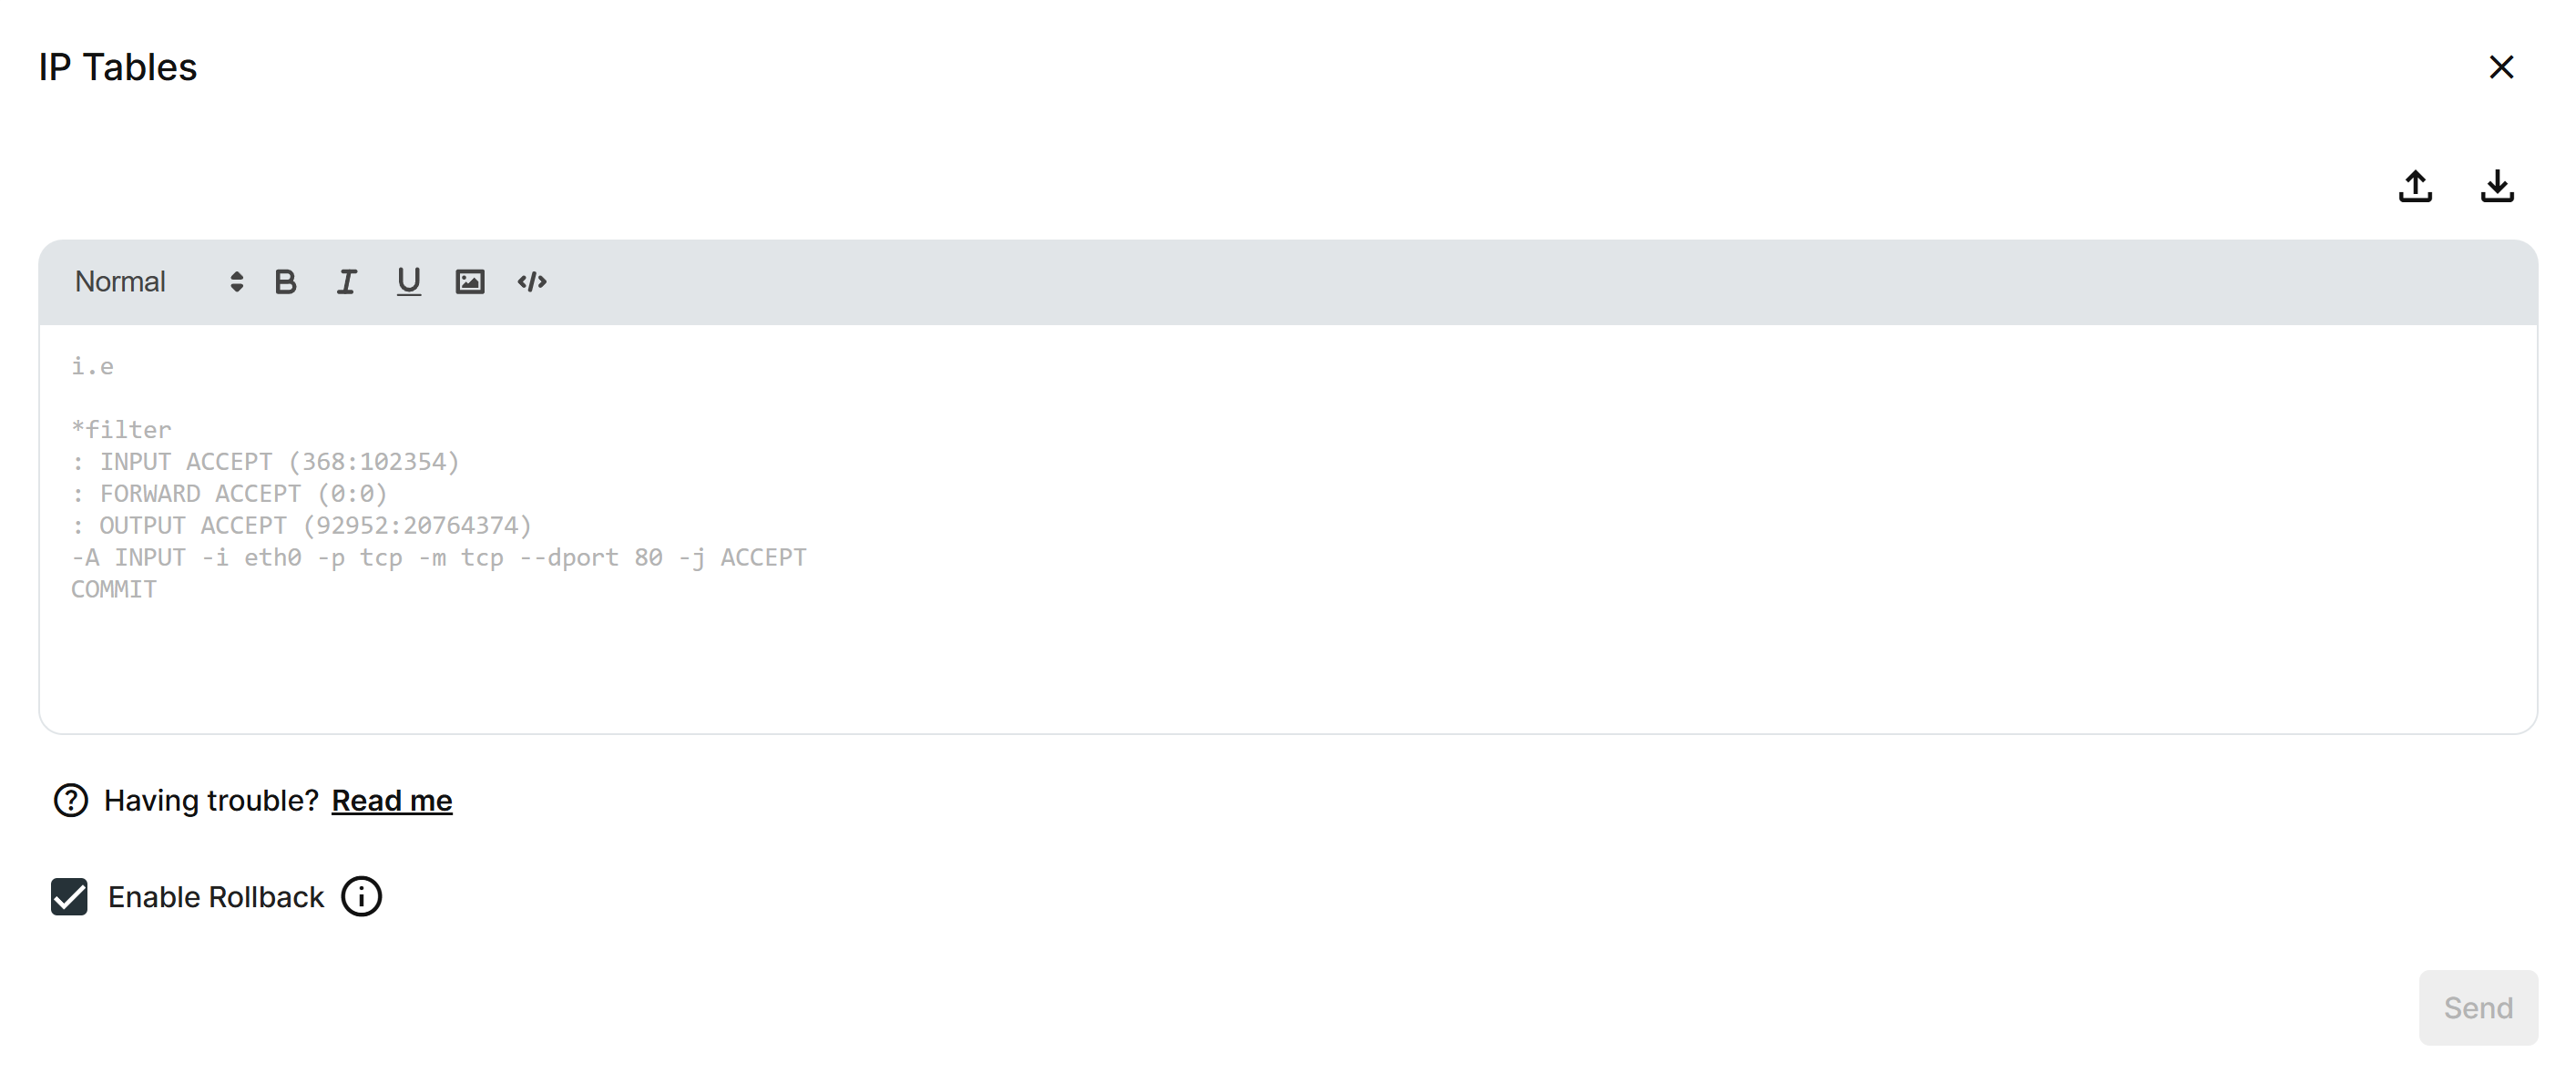
IP Tables editor
IPTables is the Linux firewall on the node. Click the edit pencil on the IPTables row to open the IP Tables editor, type or paste the rules, and click Send. Use the upload/download icons to work from a local file instead of typing rules directly.
Check Enable Rollback to protect yourself from a firewall rule that would otherwise lock you out.
Read the upstream documentation: iptables on Wikipedia.
Summary
The Network card centralizes every change you can make to the network state of a node: hostname and interfaces in their own sections, VPN/Proxy/Standalone Mode/IPTables in the Advanced section. Keep Enable Rollback checked whenever you push a risky change, and use the dedicated articles linked above for the deeper VPN, Proxy, and Standalone Mode flows.
Scripting these same changes across a fleet, instead of visiting each node's Network card by hand, is what client.nodes.network in the Barbara API SDK for Python is for. See Node networking for the same fields covered here as code, plus NTP server management, which lives on the node's General Info card rather than on this one.