VMware with GPU
This article refers to Platform v2.9.0. The current Platform version is v3.3.0.
Overview
This guide walks you through installing Barbara OS on a VMware ESXi virtual machine with GPU passthrough. With a GPU attached to the VM, you can run AI workloads (training, inference, vision) at the edge with hardware acceleration.
The procedure is similar to the regular VMware install, with two differences:
- The image used is
VMWare VM (amd64/gpu)from Barbara Panel. - The VM gets extra PCI devices (the GPU and its companion audio device) and a handful of advanced configuration parameters that enable 64-bit MMIO for the passthrough.
Pre-requisites
- ESXi 8.0
- VMware vCenter Server 8.0 U2
- VMware vCenter Converter 6.3.0
- A GPU on the ESXi host already configured for PCI passthrough.
Download the OS image
In Barbara Panel, open the OS Images view and search for VMWare VM (amd64/gpu). Click Download to retrieve the .zip archive, then unzip it; the .vmdk inside is the disk you will attach to the VM.
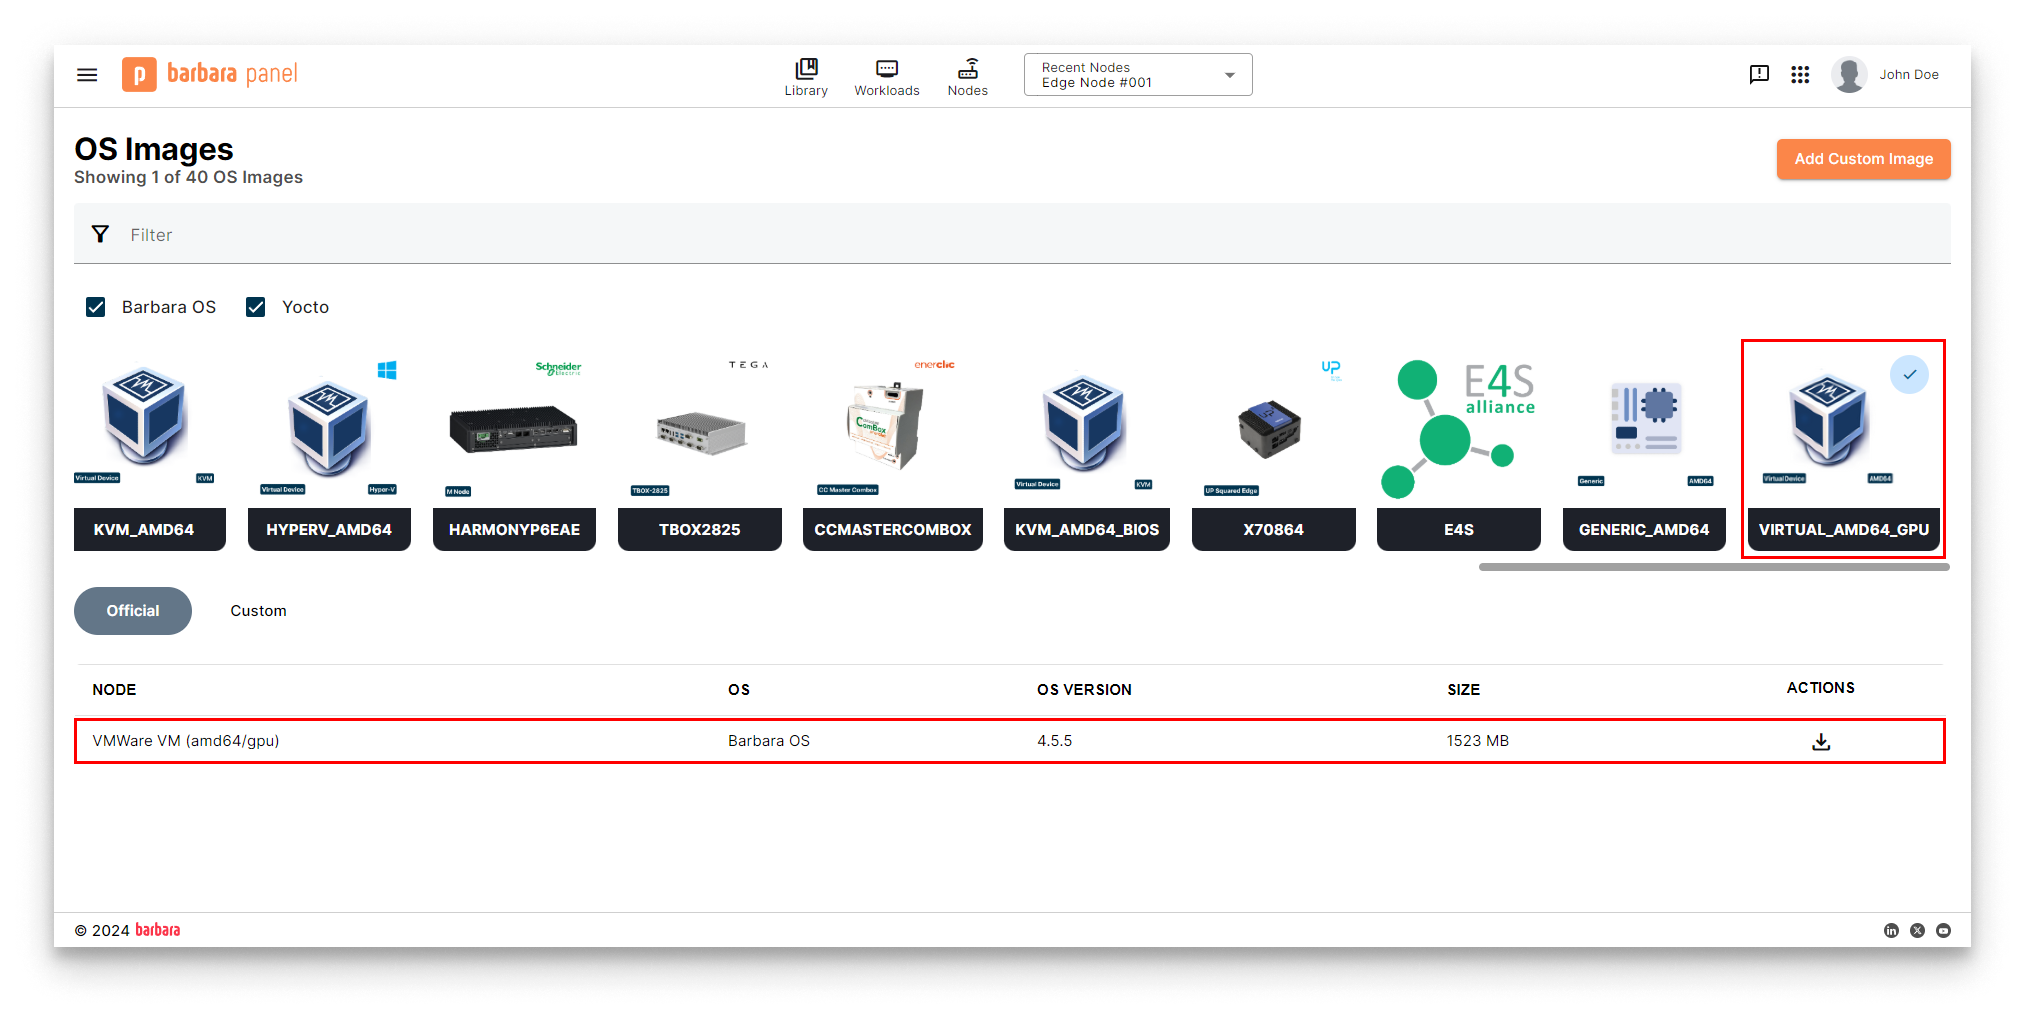
Download the GPU-enabled VMware OS image
Hardware requirements
Minimum
- RAM: 2 GB
- Disk: 32 GB
- CPU: 1 socket / 2 cores
- Network: 1 × Ethernet interface
Recommended
- RAM: 4 GB
- Disk: 64 GB
- CPU: 2 sockets / 2 cores
- Network: 2 × Ethernet interfaces
Convert the virtual disk
The .vmdk shipped in the Panel archive must be converted to a vSphere-native format before you can attach it to a VM.
With the vSphere Web Client
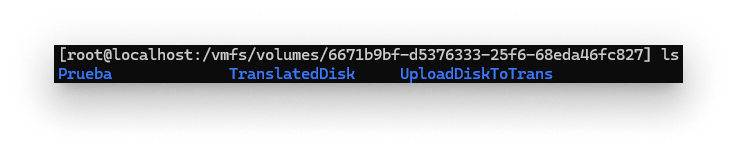
- Locate the datastore path. Copy the path of the datastore that will host the VM files.
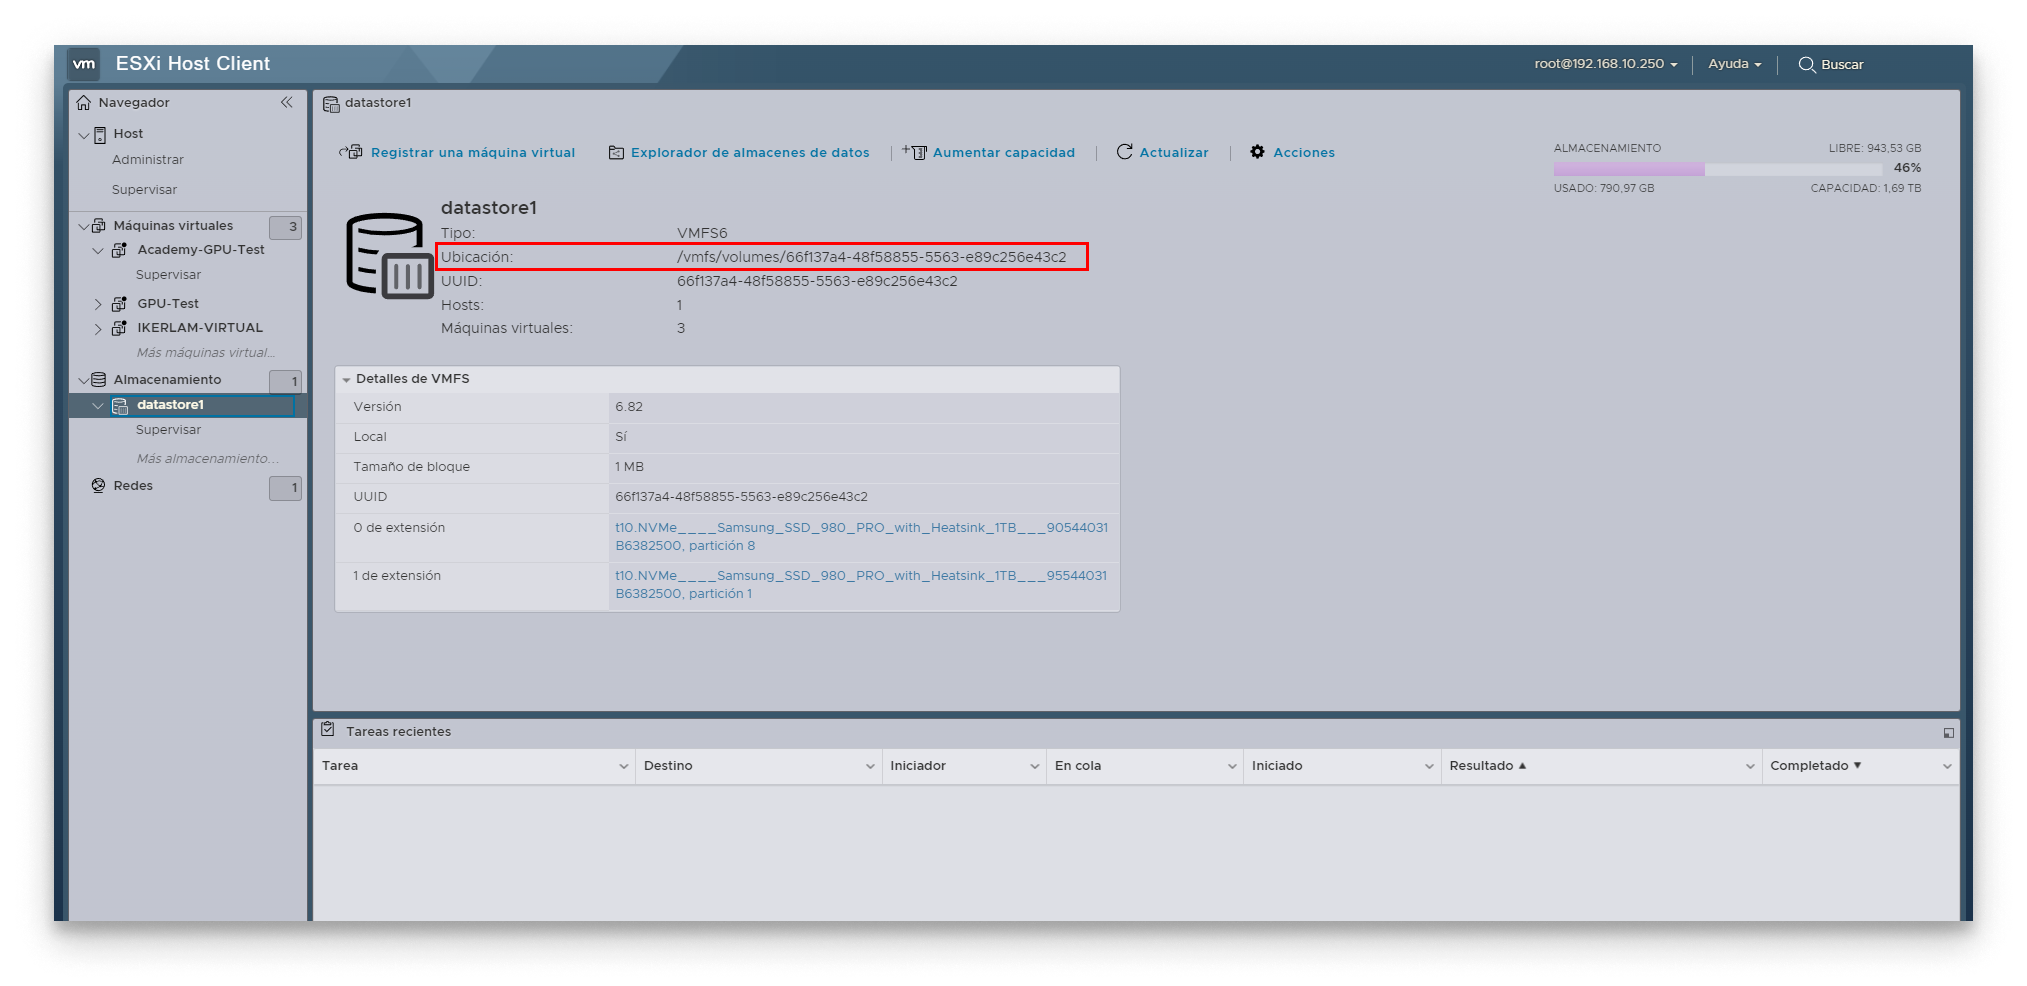
Datastore path
- Upload the original disk. Create a folder in the datastore for the original disk and upload the
.vmdkfrom the Panel archive.
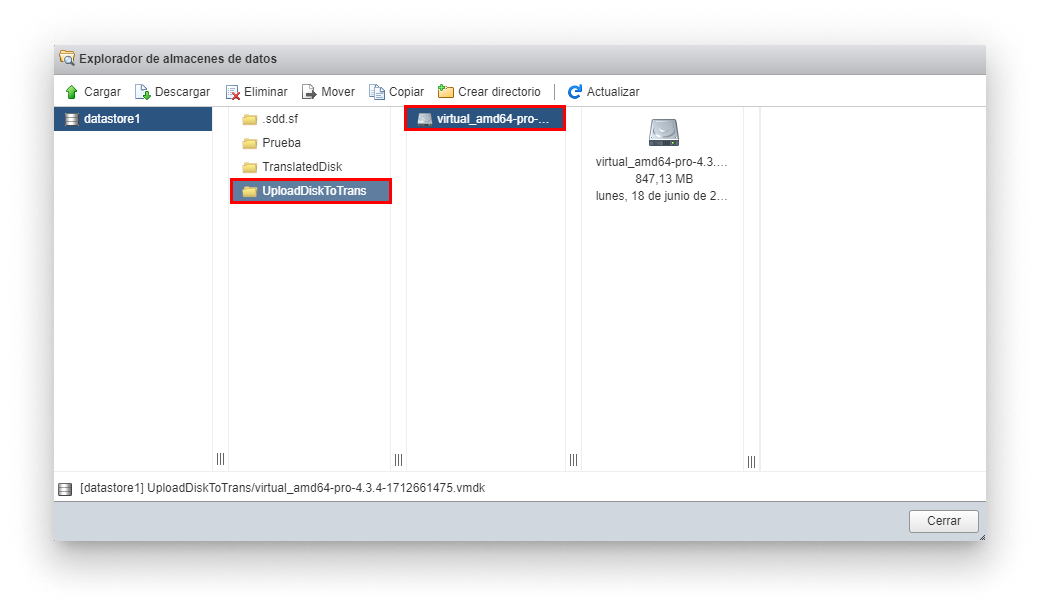
Upload the original disk
- Create the conversion folder. Create a second, empty folder for the converted disk.
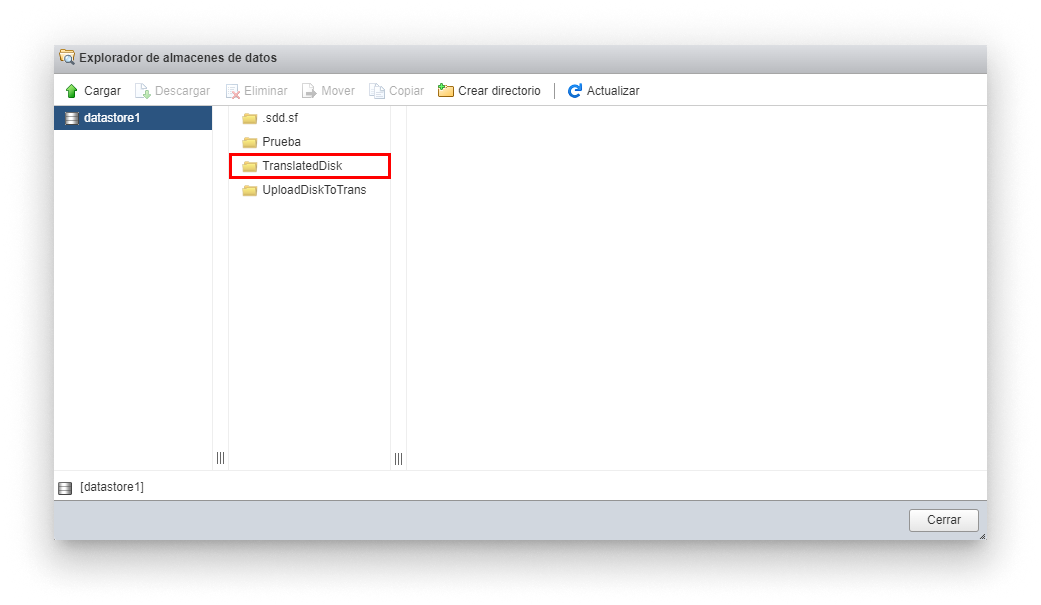
Conversion folder
Convert from the ESXi shell
- SSH into the ESXi host with administrative credentials.
- Navigate to the datastore with
cd, thenlsto confirm both folders are there.
Check the datastore folders
-
Run the conversion. Replace
originalDiskPathandconvertedDiskPathwith the actual paths inside the datastore:vmkfstools -i originalDiskPath convertedDiskPath

Run vmkfstools to convert the disk
Create the virtual machine
- Start the New Virtual Machine wizard. In the ESXi Host Client, open Virtual Machines and click Create / Register VM → Create a new virtual machine.
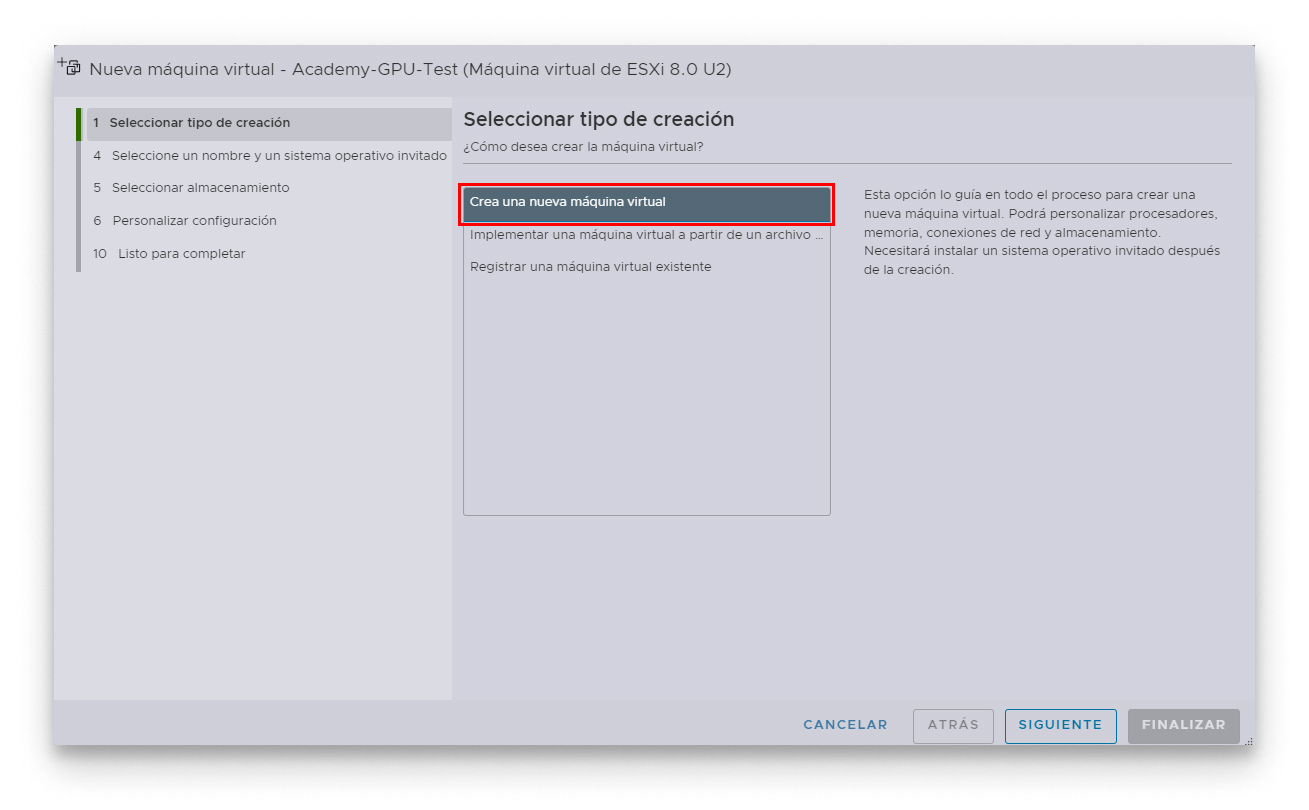
Create a new VM in vSphere
- Set name and compatibility.
- Compatibility:
ESXi 8.0 U2 virtual machine - Guest OS family:
Linux - Guest OS version:
Linux 6.x or later (64-bit)
- Compatibility:
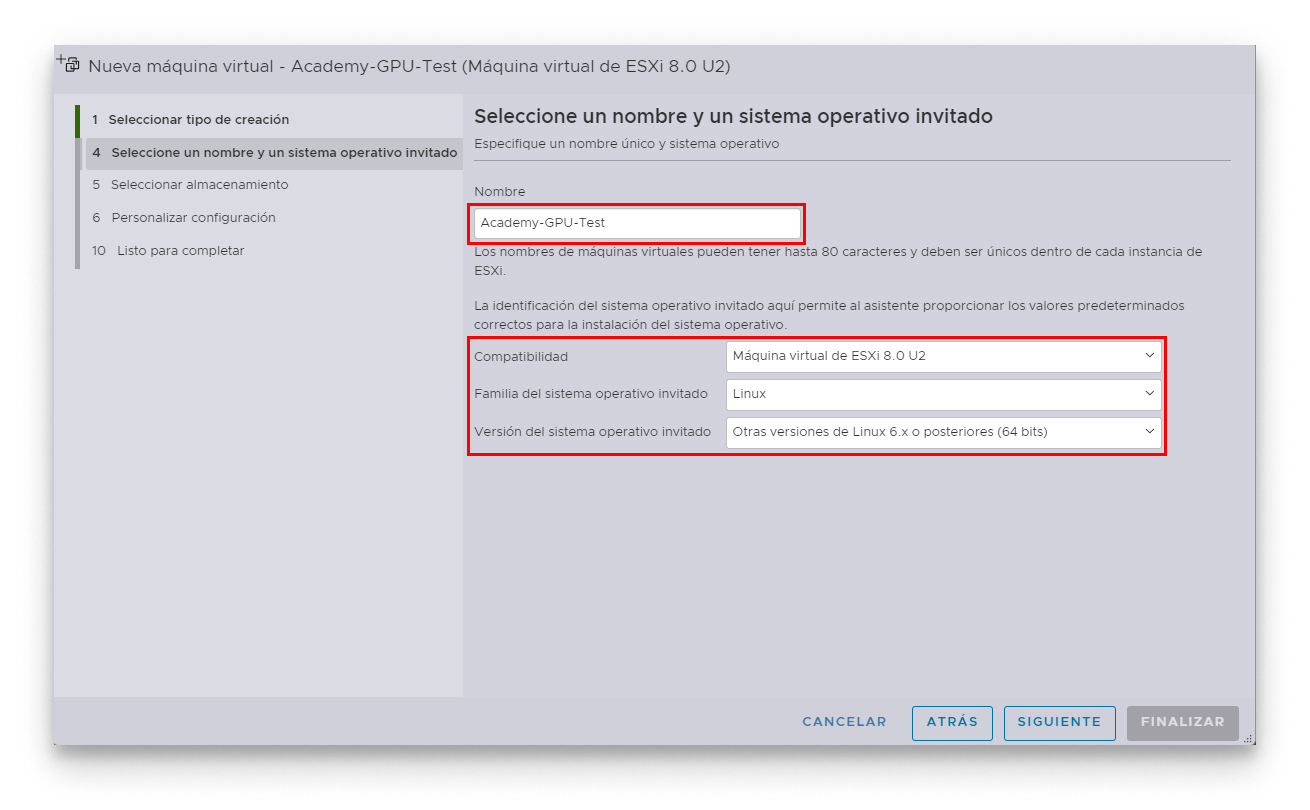
VM name and compatibility
- Select the storage and click Next.
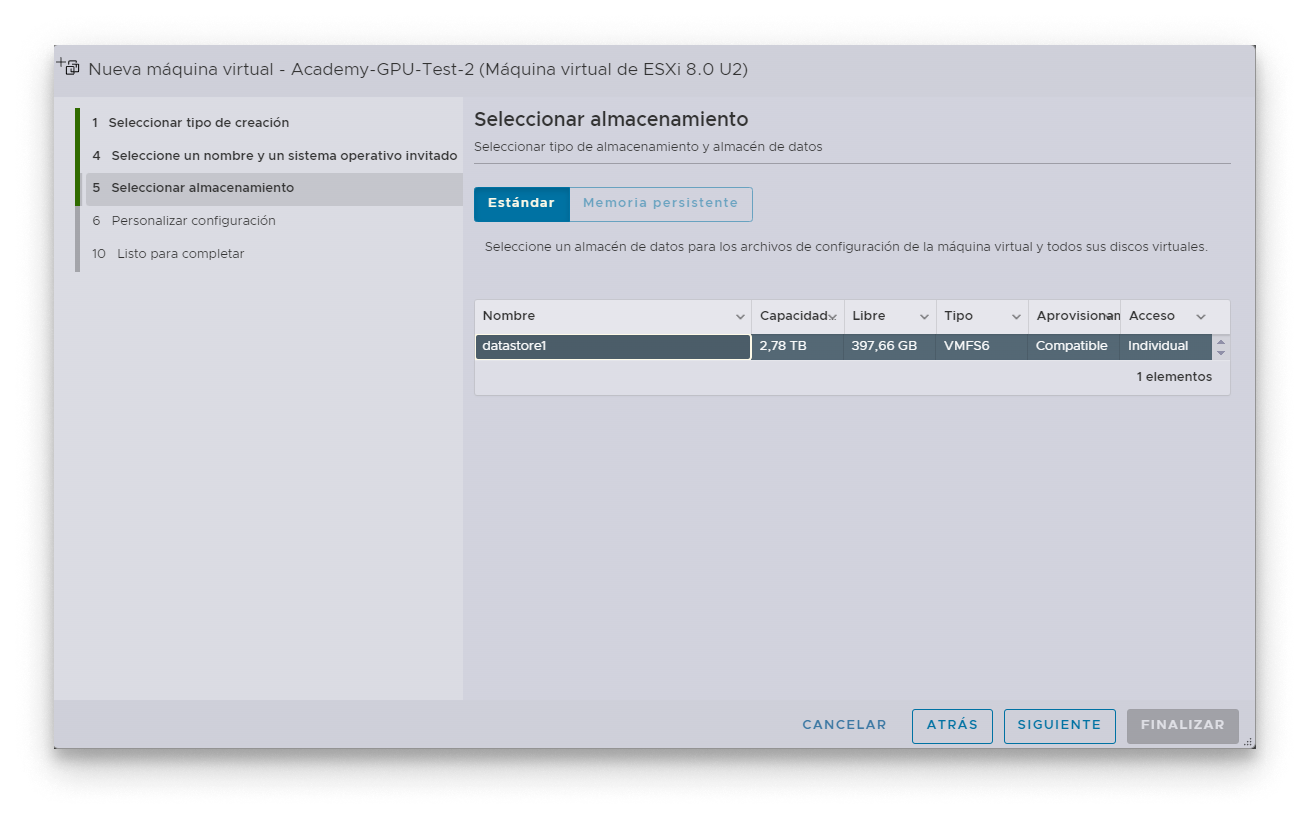
Select storage
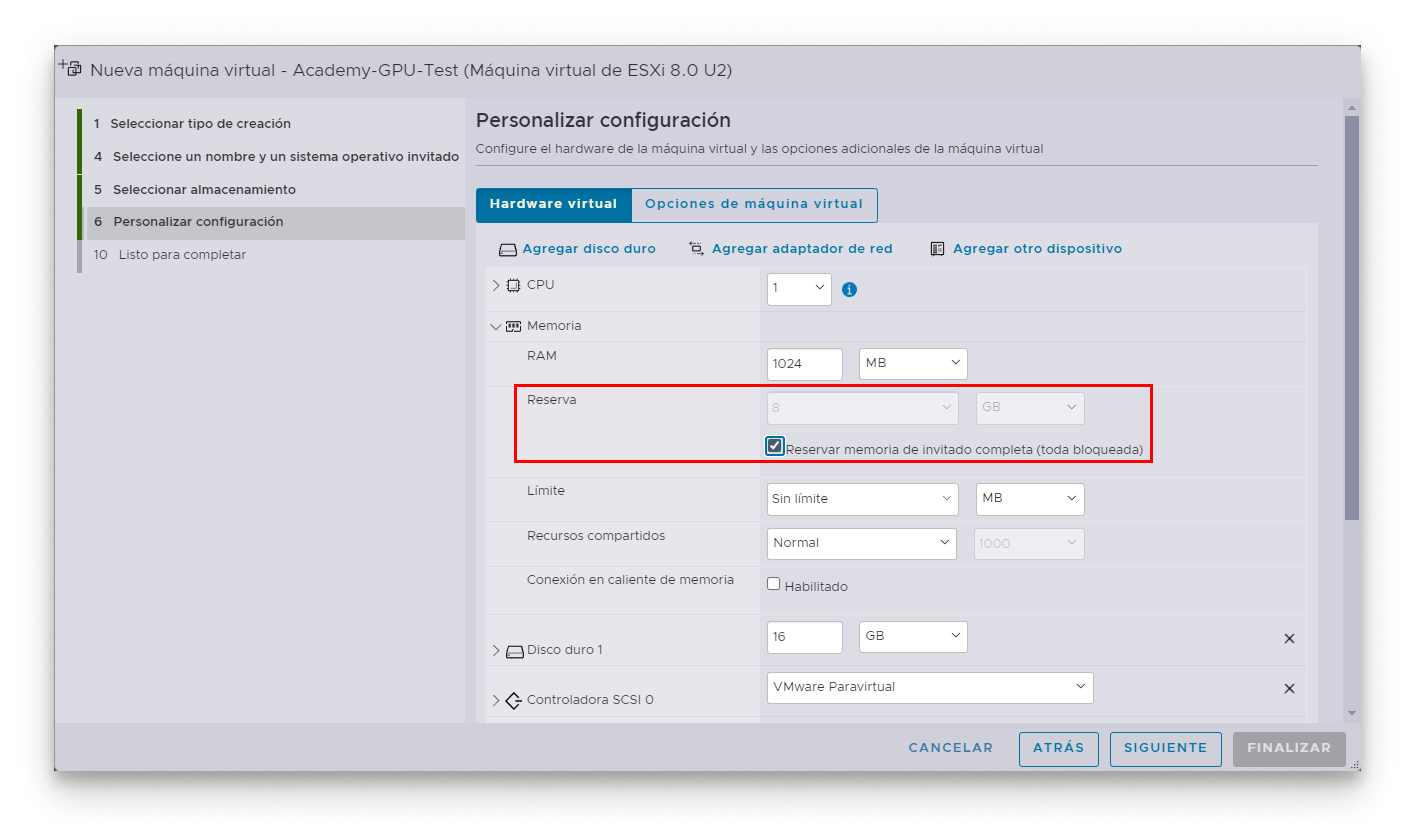
- Reserve memory. Under Memory, set the Reservation to 8 GB and tick Reserve all guest memory (All locked). Memory reservation is required for stable GPU passthrough.
Reserve VM memory
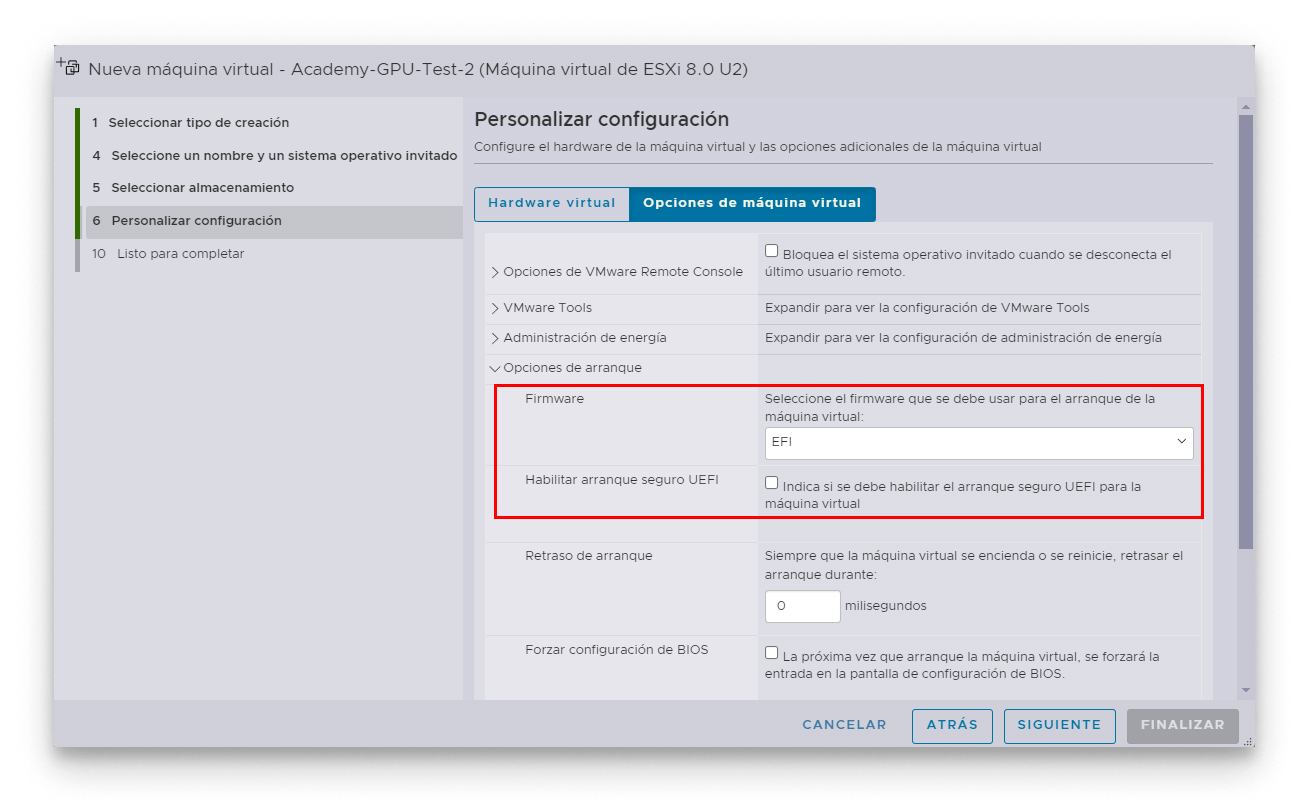
- Enable EFI. Under Boot Options → Firmware, choose EFI and uncheck Secure UEFI Boot.
Enable EFI firmware
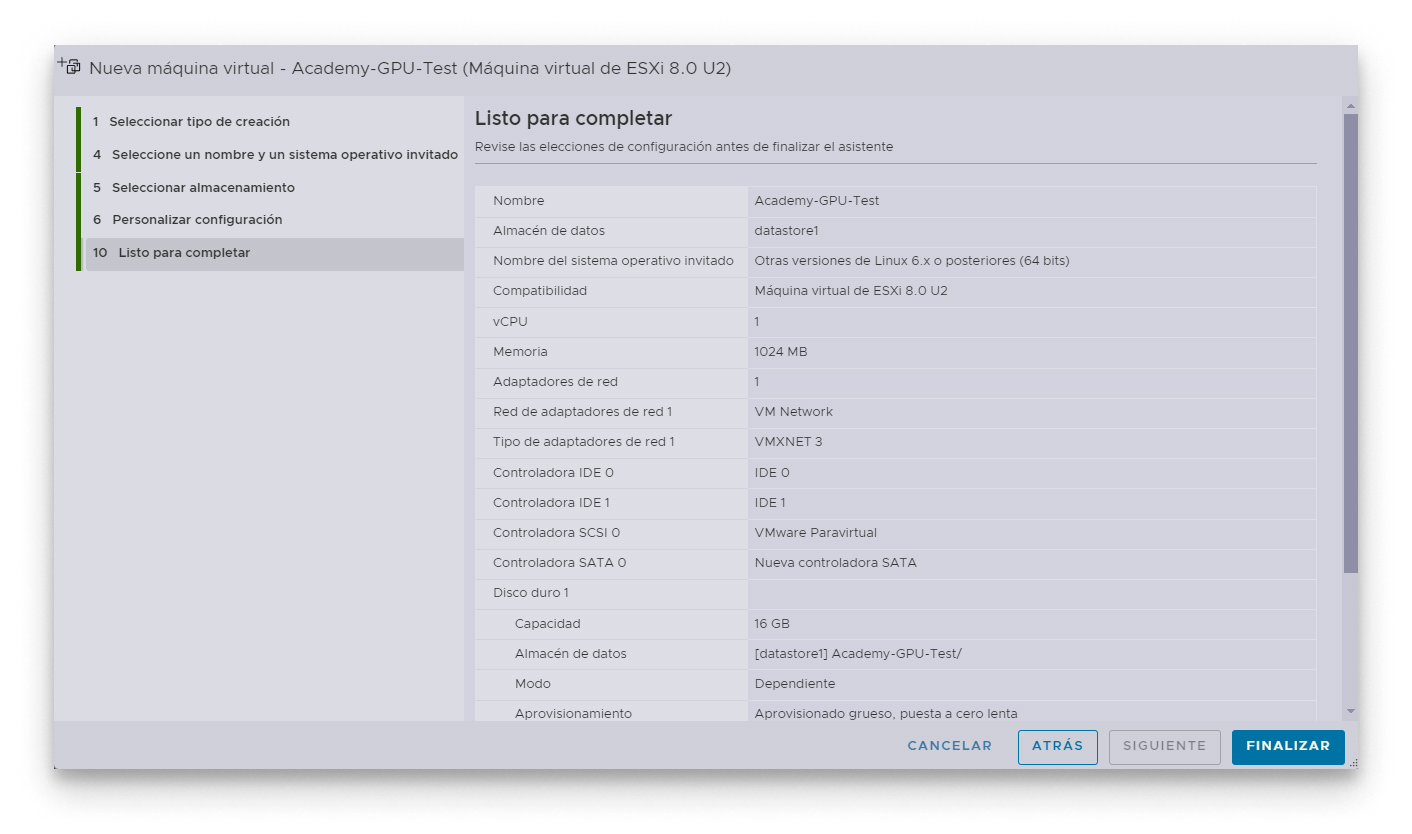
- Confirm and finish.
Confirm VM settings
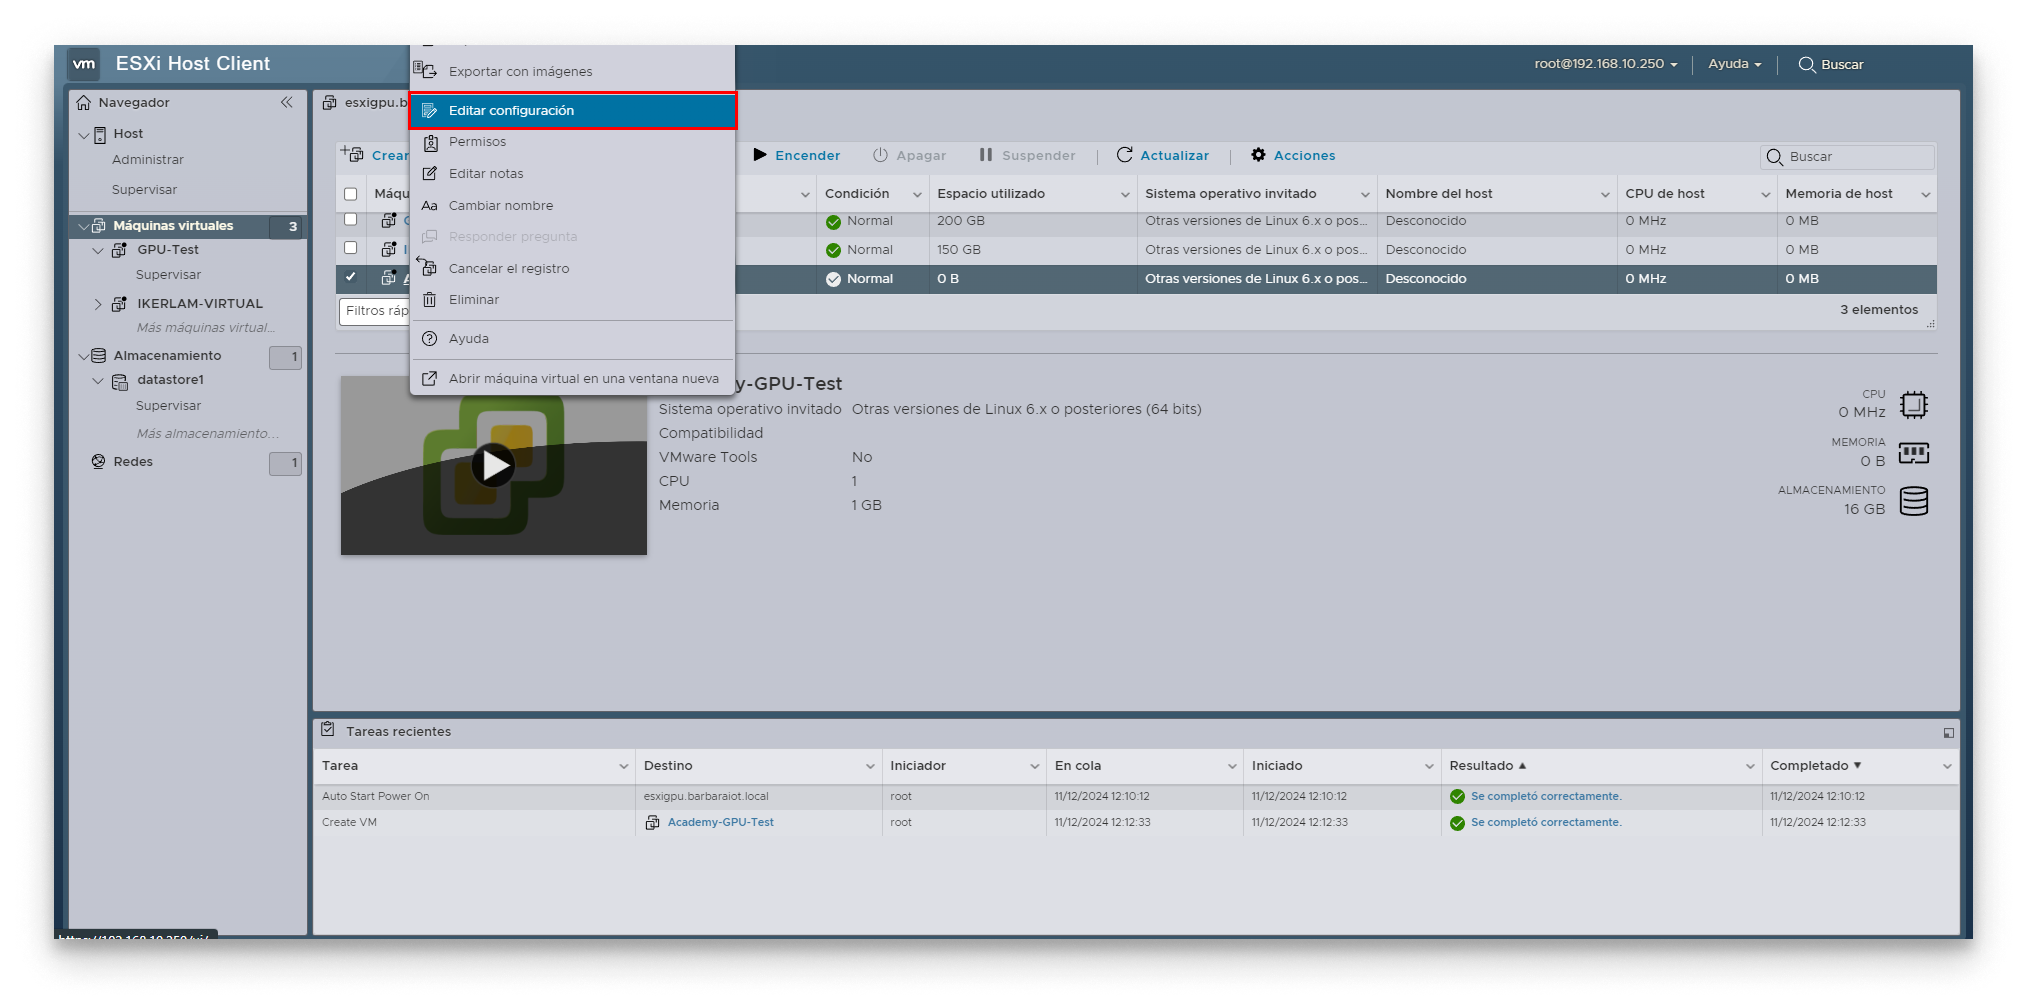
- Re-open Edit settings. The remaining hardware tweaks must happen before the VM is powered on.
Edit VM config
Attach the Barbara OS disk
- Remove the default hard disk and CD/DVD drive.
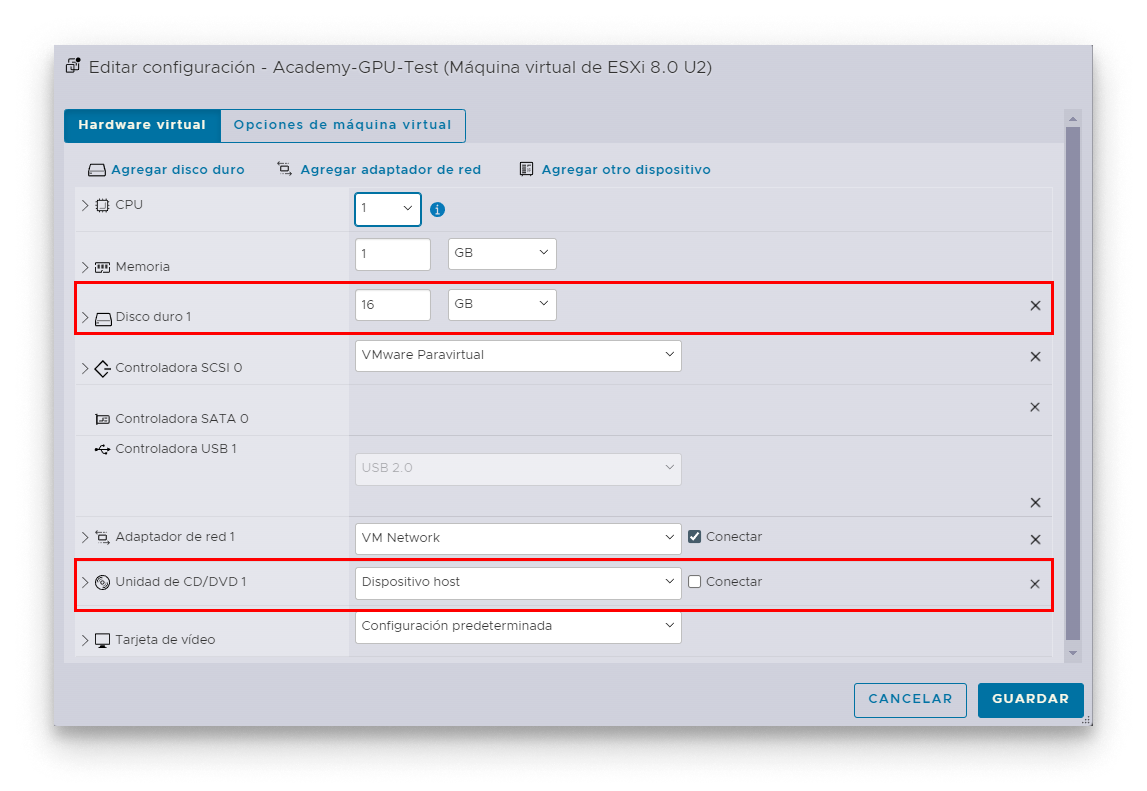
Remove default disk and CD
- Save (click OK), then re-open Edit settings. The removal sometimes is not applied if you immediately continue editing.
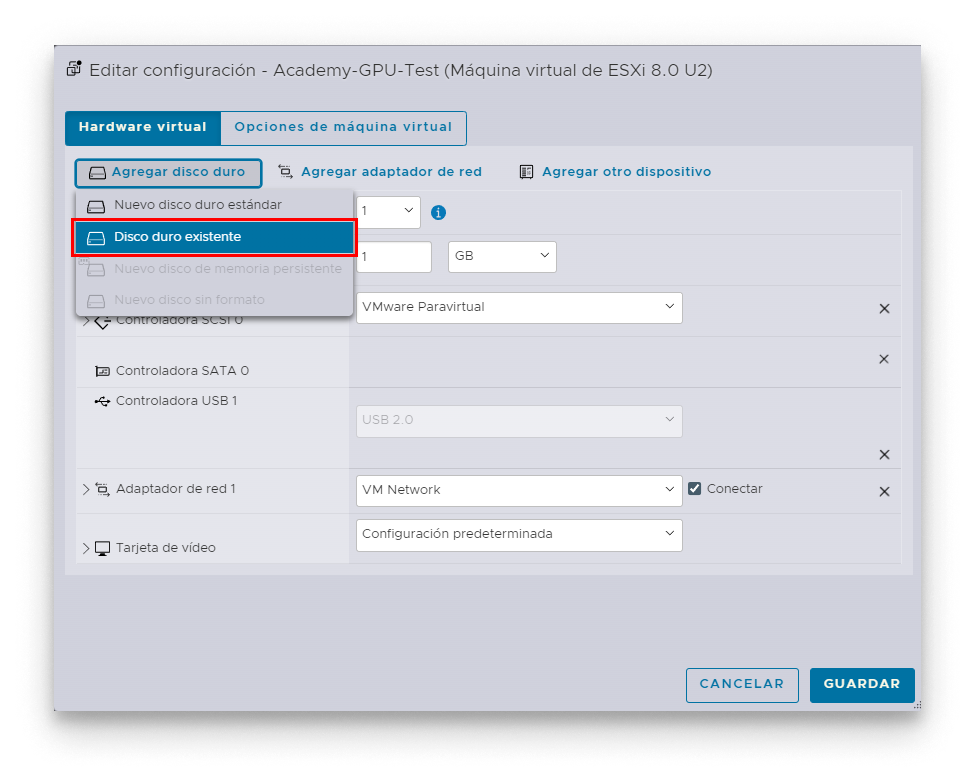
- Add the converted disk. Choose Add Hard Disk → Existing virtual disk and select the converted
.vmdk.
If you skipped the disk conversion step, the disk will not attach correctly. Convert the .vmdk first — see Convert the virtual disk.
Add converted disk
- Add an NVMe controller under Add device.
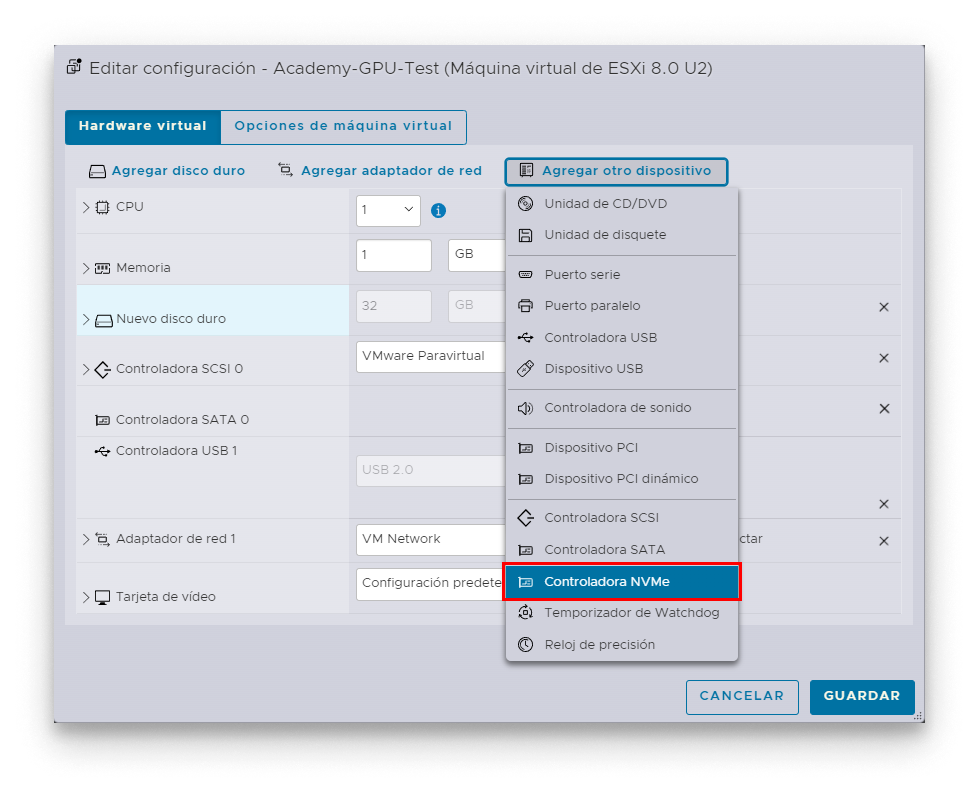
Add NVMe controller
- Attach the disk to the NVMe controller.
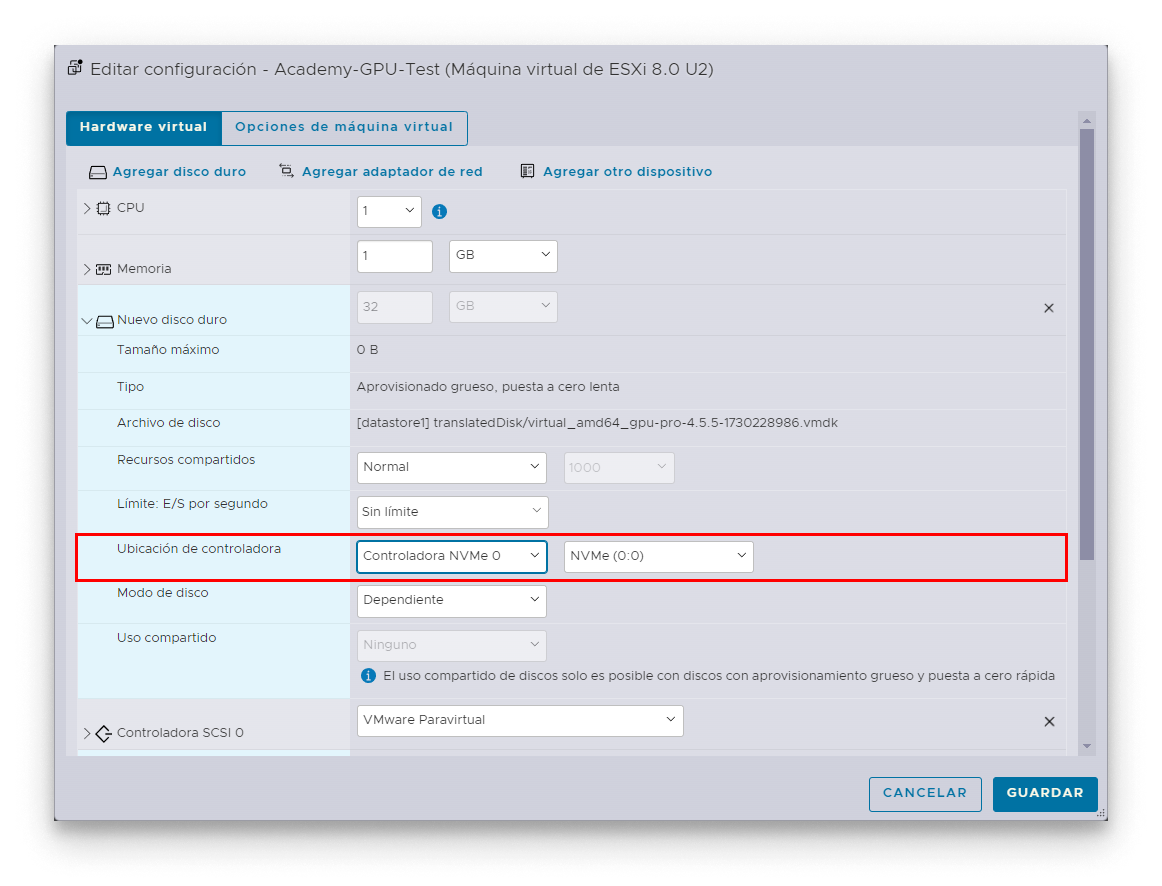
Attach disk to NVMe
- Set the network adapter to VMXNET3.
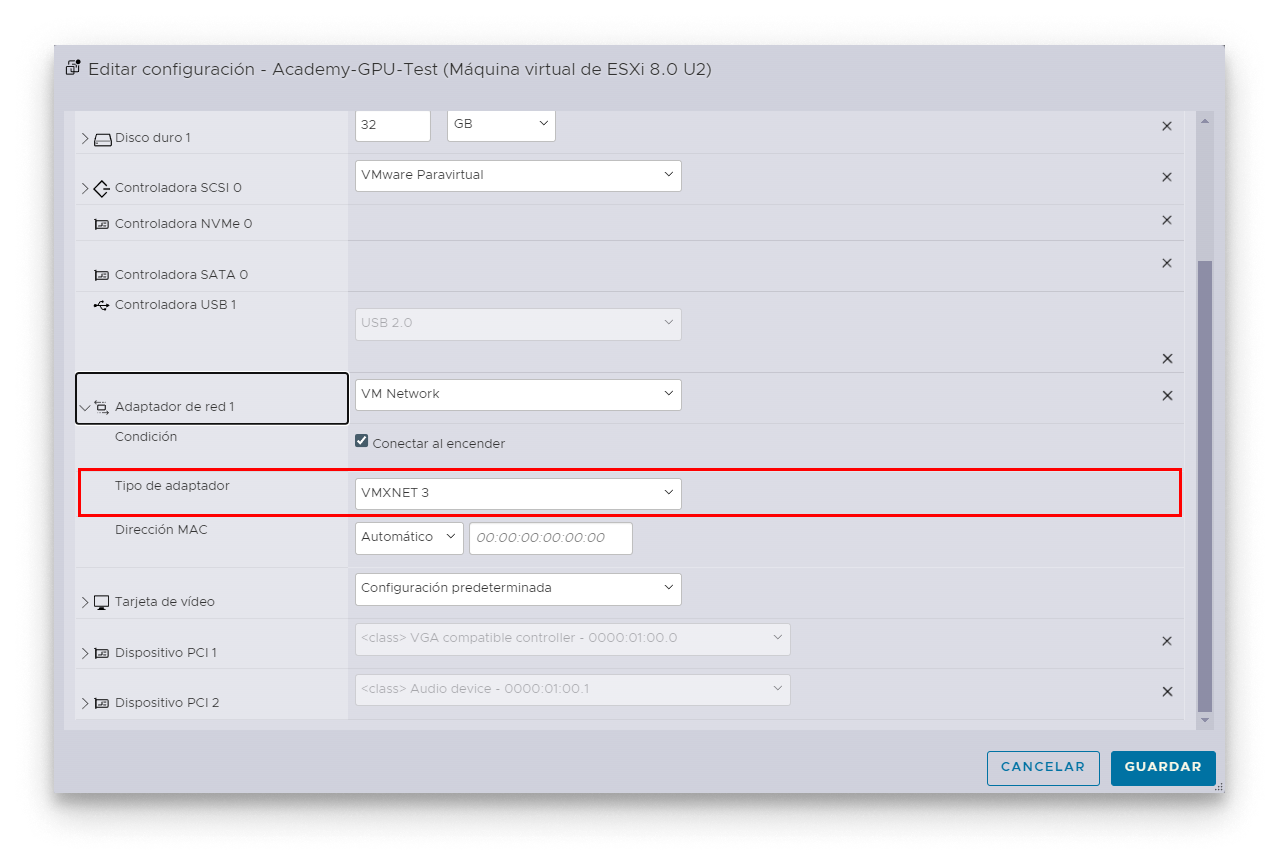
Select VMXNET3 network adapter
Configure GPU passthrough
- Add two PCI devices via Add device → PCI Device:
- A VGA Compatible Controller (the GPU itself).
- The Audio Device that is paired with the GPU on the PCI bus.
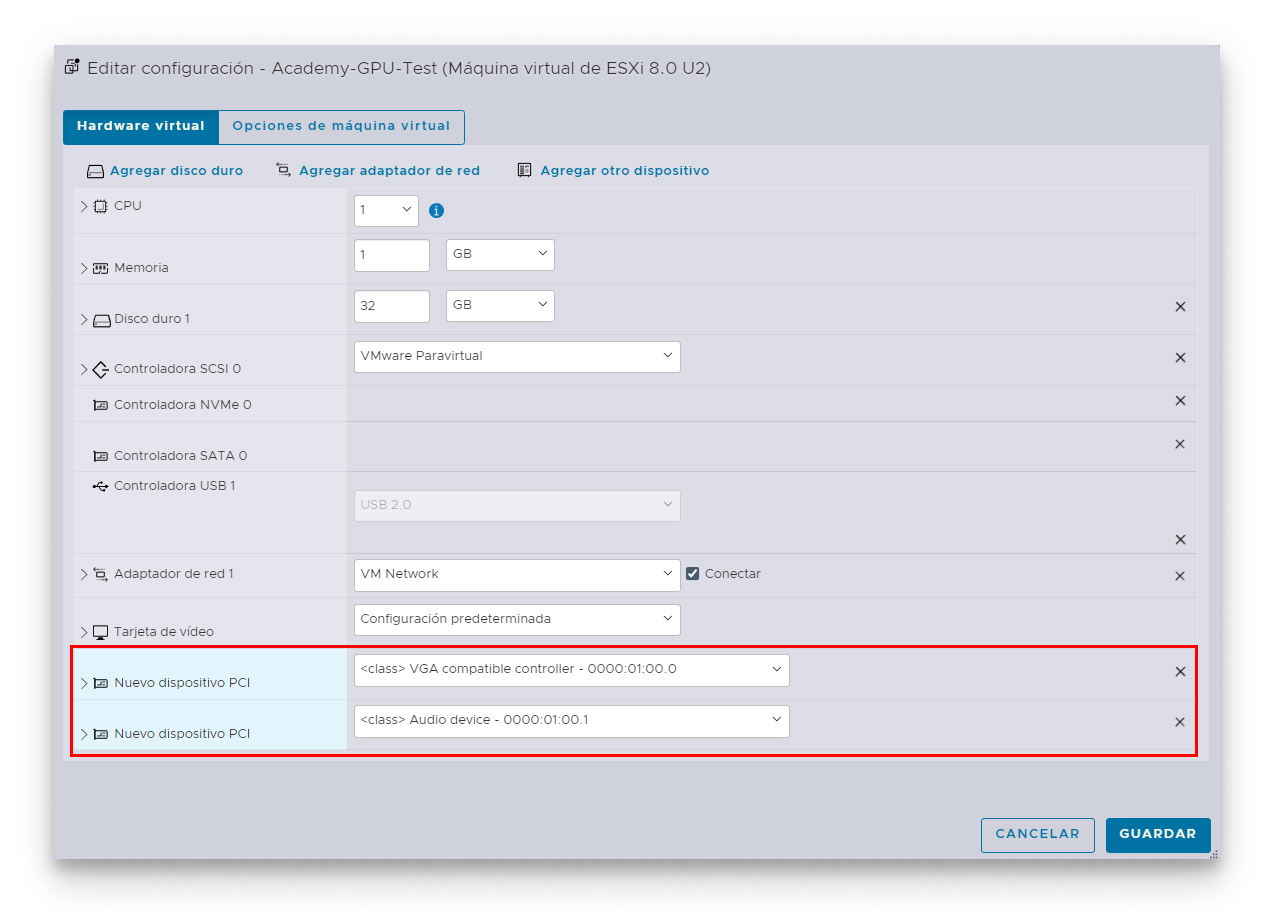
GPU and audio device added as PCI devices
- Open VM Options → Advanced → Edit Configuration Parameters.
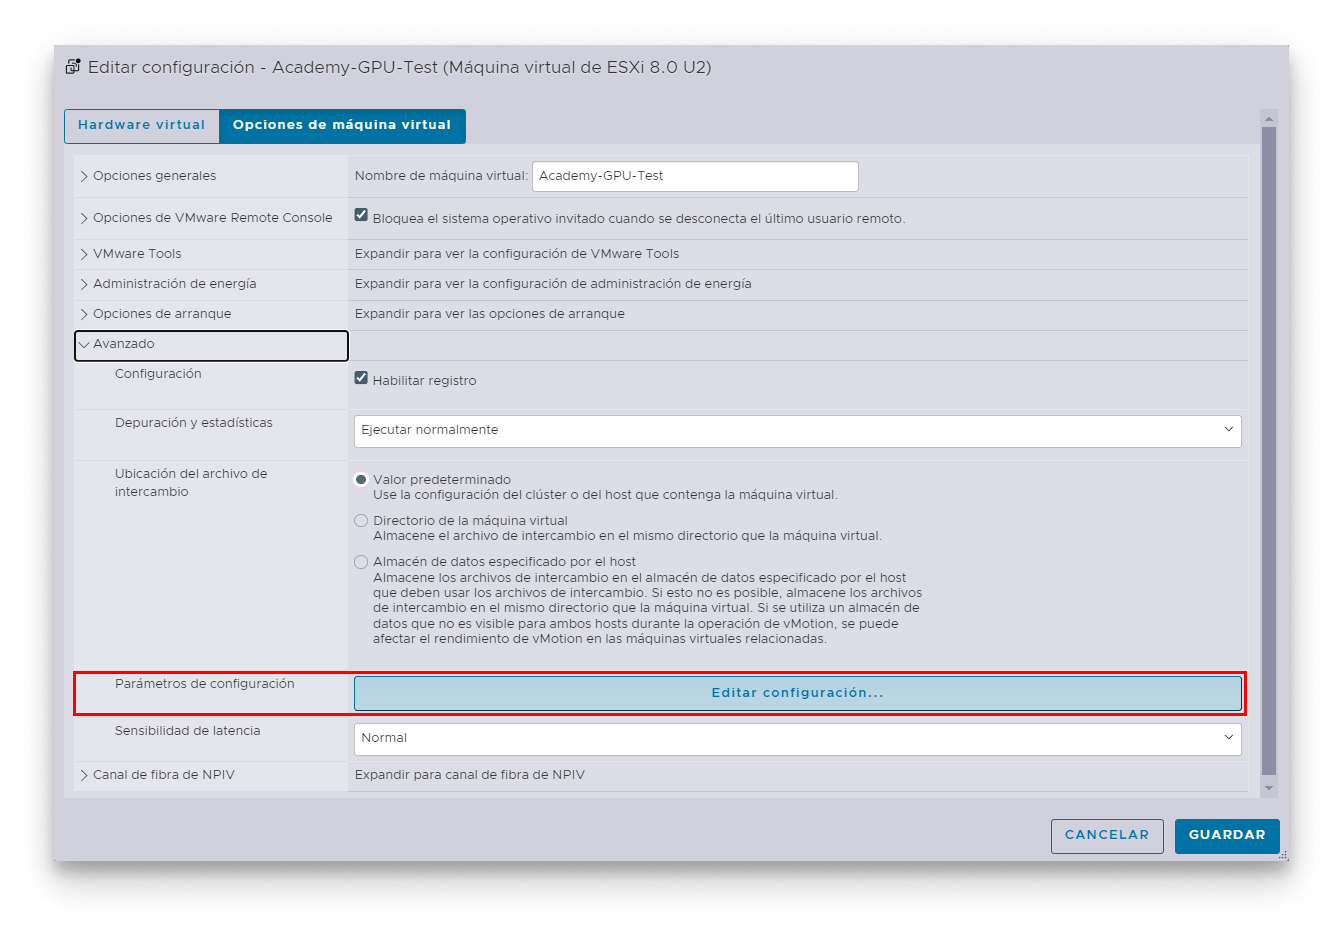
Edit configuration parameters
- Add the following advanced parameters (required for stable GPU passthrough):
| Parameter | Value | Why |
|---|---|---|
pciPassthru.use64bitMMIO | TRUE | Enables 64-bit MMIO for the passthrough device — needed by GPUs that use more than 32 GB of MMIO. |
pciPassthru.64bitMMIOSizeGB | 128 | Reserves 128 GB of 64-bit MMIO space for the device. |
pciPassthru.msiEnabled | FALSE | Disables Message-Signaled Interrupts for the device (improves stability with some GPUs). |
hypervisor.cpuid.v0 | TRUE | Tweaks the CPUID information the VM sees, improving driver compatibility for many NVIDIA GPUs. |
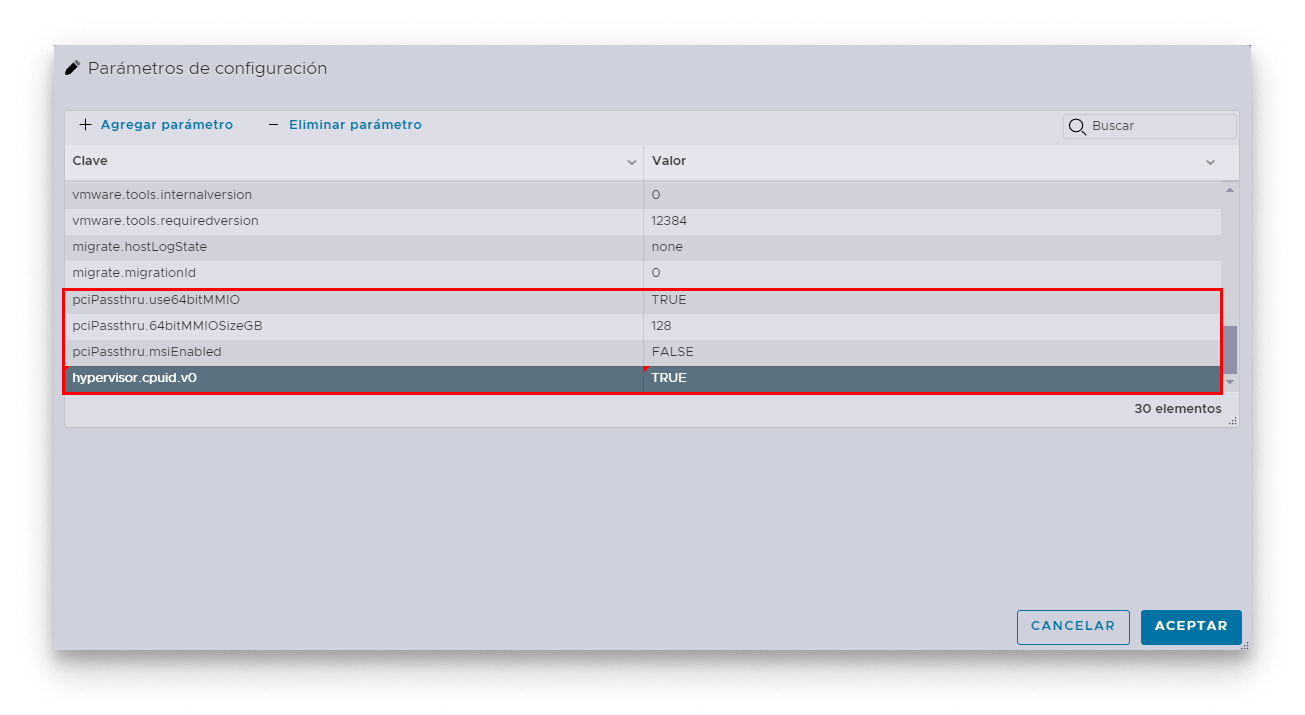
Configuration parameters added
- Save the changes. The VM is ready for first boot.
Start the virtual machine
- Power on the VM and wait until Barbara OS prints the Barbara ID and a QR code on the console.
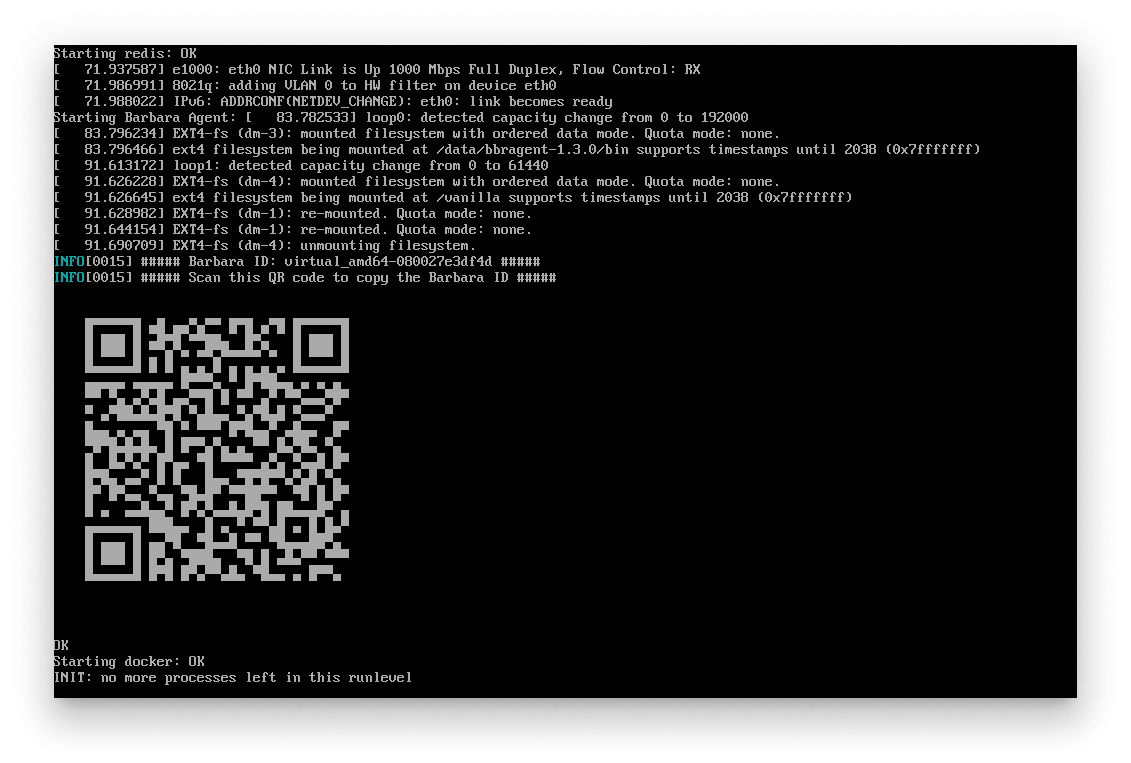
Barbara ID QR code on first boot
- Scan the QR or read the Barbara ID directly from the console.
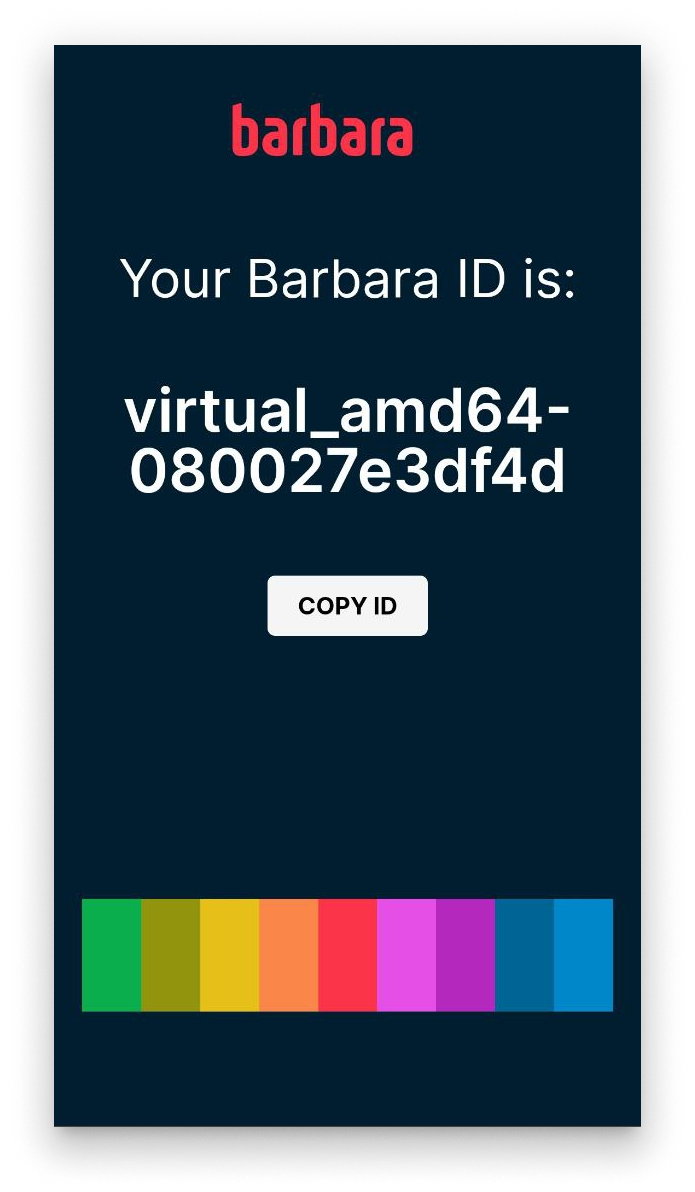
Barbara ID page
- In Barbara Panel, open the Nodes List and click + Add Node to register the VM.
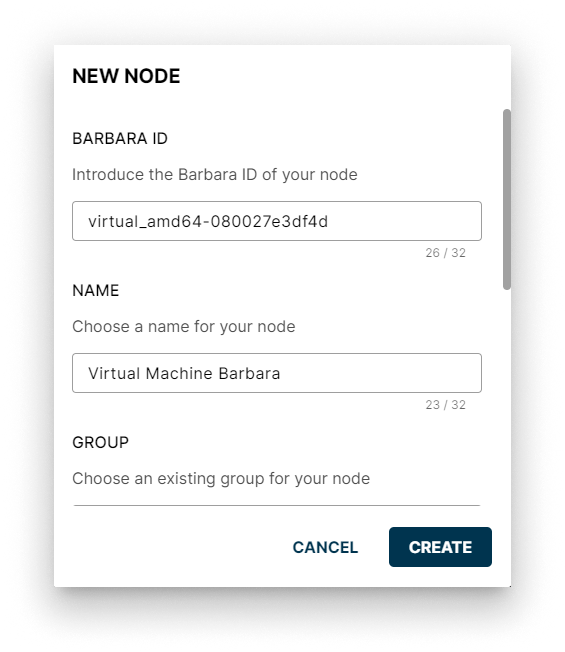
Add Node in Panel
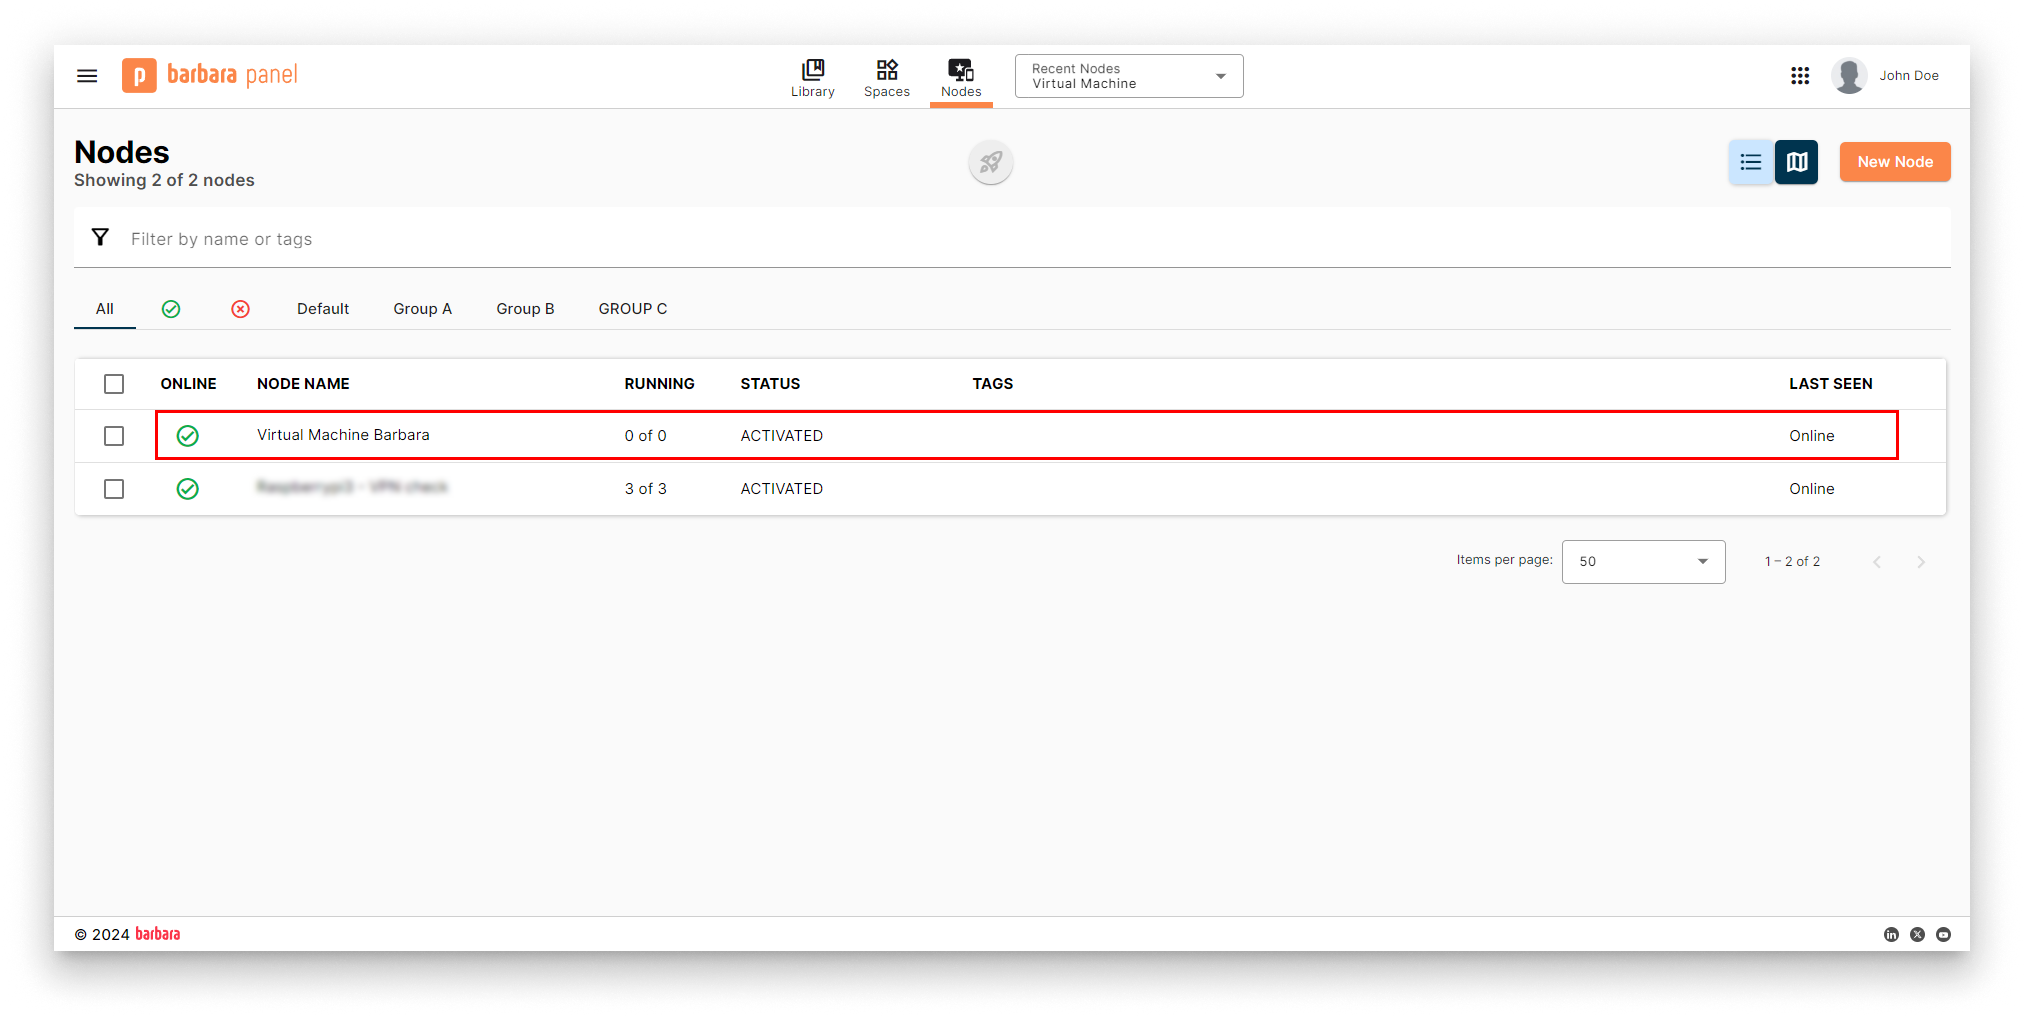
- Paste the Barbara ID, give the node a name, and complete the form. After the activation reboot and the disk encryption complete, the VM appears as online.
VM online in Panel
Summary
You have deployed Barbara OS on a vSphere VM with a GPU passed through, applied the advanced configuration parameters required for stable passthrough, and registered the VM in Barbara Panel. From here, you can deploy GPU-accelerated workloads — see the Compute Vision solution for an end-to-end example, or jump straight to deploying applications from the App Library.