Adding applications to a cluster
This article refers to Platform v3.1.0. The current Platform version is v3.3.0.
Overview
Deploying an application to a cluster uses the same Library + installation pattern as a single-node deployment, but the cluster installation wizard exposes two extra steps that are specific to Docker Swarm: deployment mode + replicas and placement constraints. This article walks through the six wizard steps and shows what the resulting cluster workload card looks like.
If you need to add a Marketplace application to your Library first, see Add a Marketplace app to your Library.
Step 1 — Select application
Pick the Marketplace application and the version to install across the cluster. The form also exposes advanced toggles for initial behaviour after install.
For security and compatibility, pick the latest available version unless you have a specific reason not to.
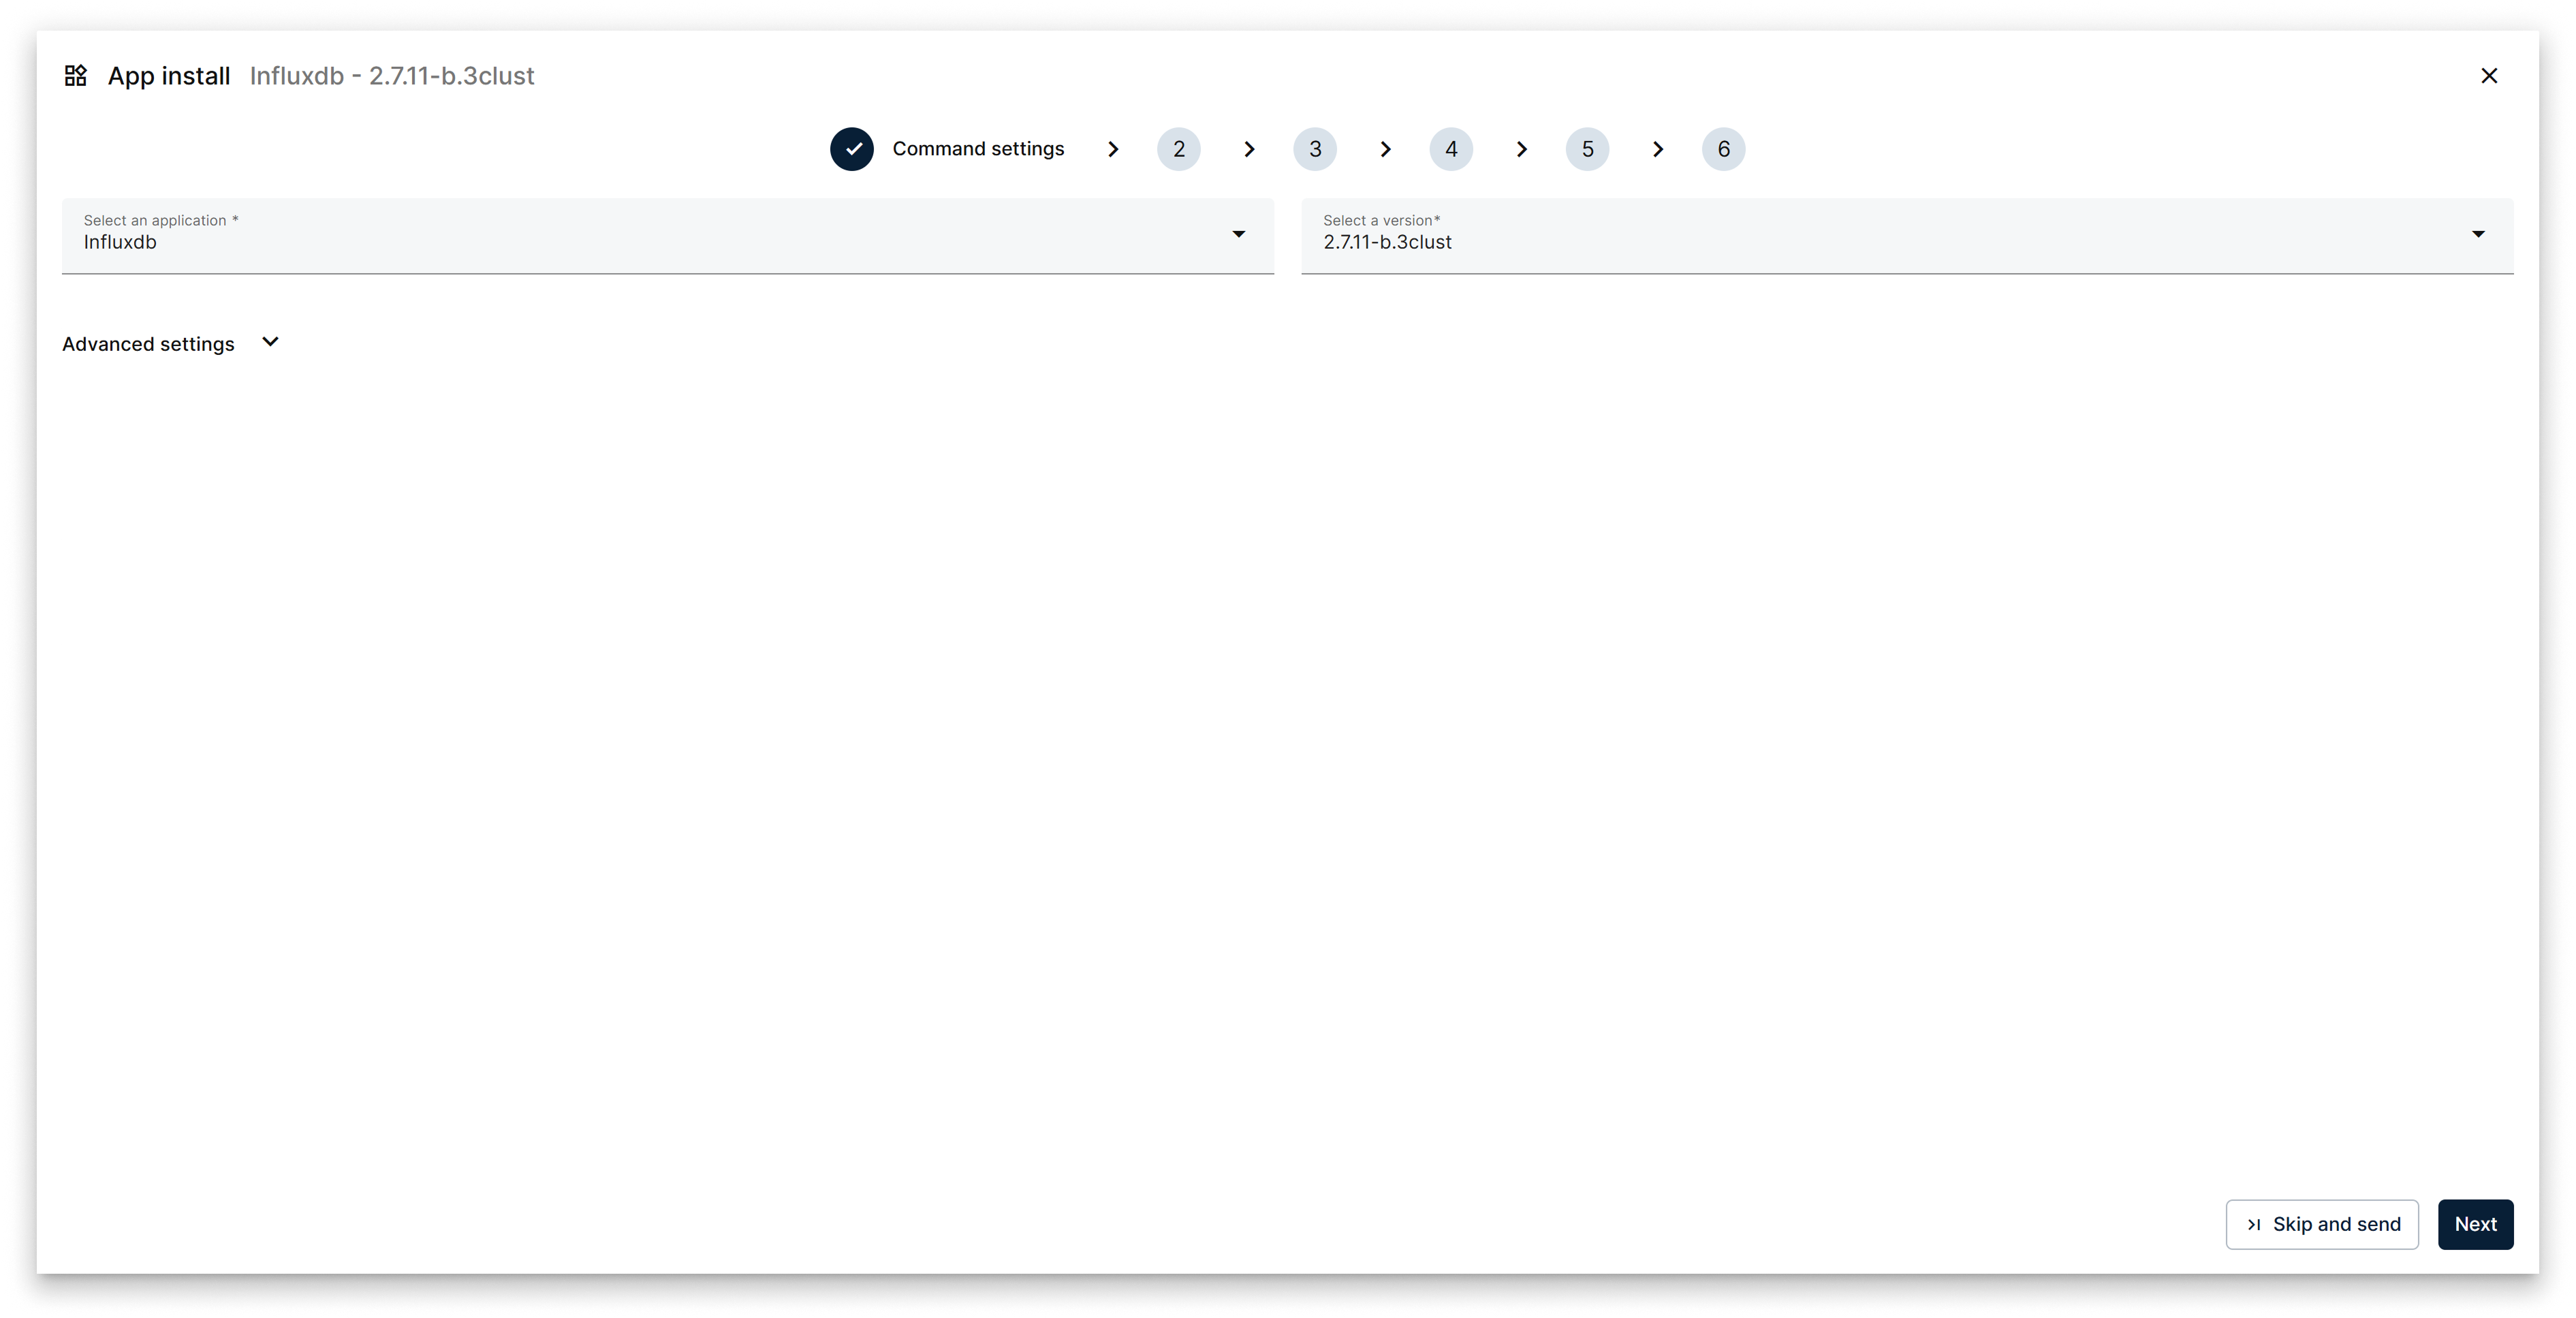
Wizard step 1: select application and version
Wizard actions on this step: Back, Next, Skip and send.
Step 2 — Configure App Secrets
Set the secrets the application needs (admin tokens, TLS material, credentials…). The exact fields are app-specific and documented in the app's README.
- Fill in the required fields (marked with an asterisk) and the optional ones you want.
- Use the inline info icons for per-field help.
- Use Upload / Download to import or export the full secret set in one click.
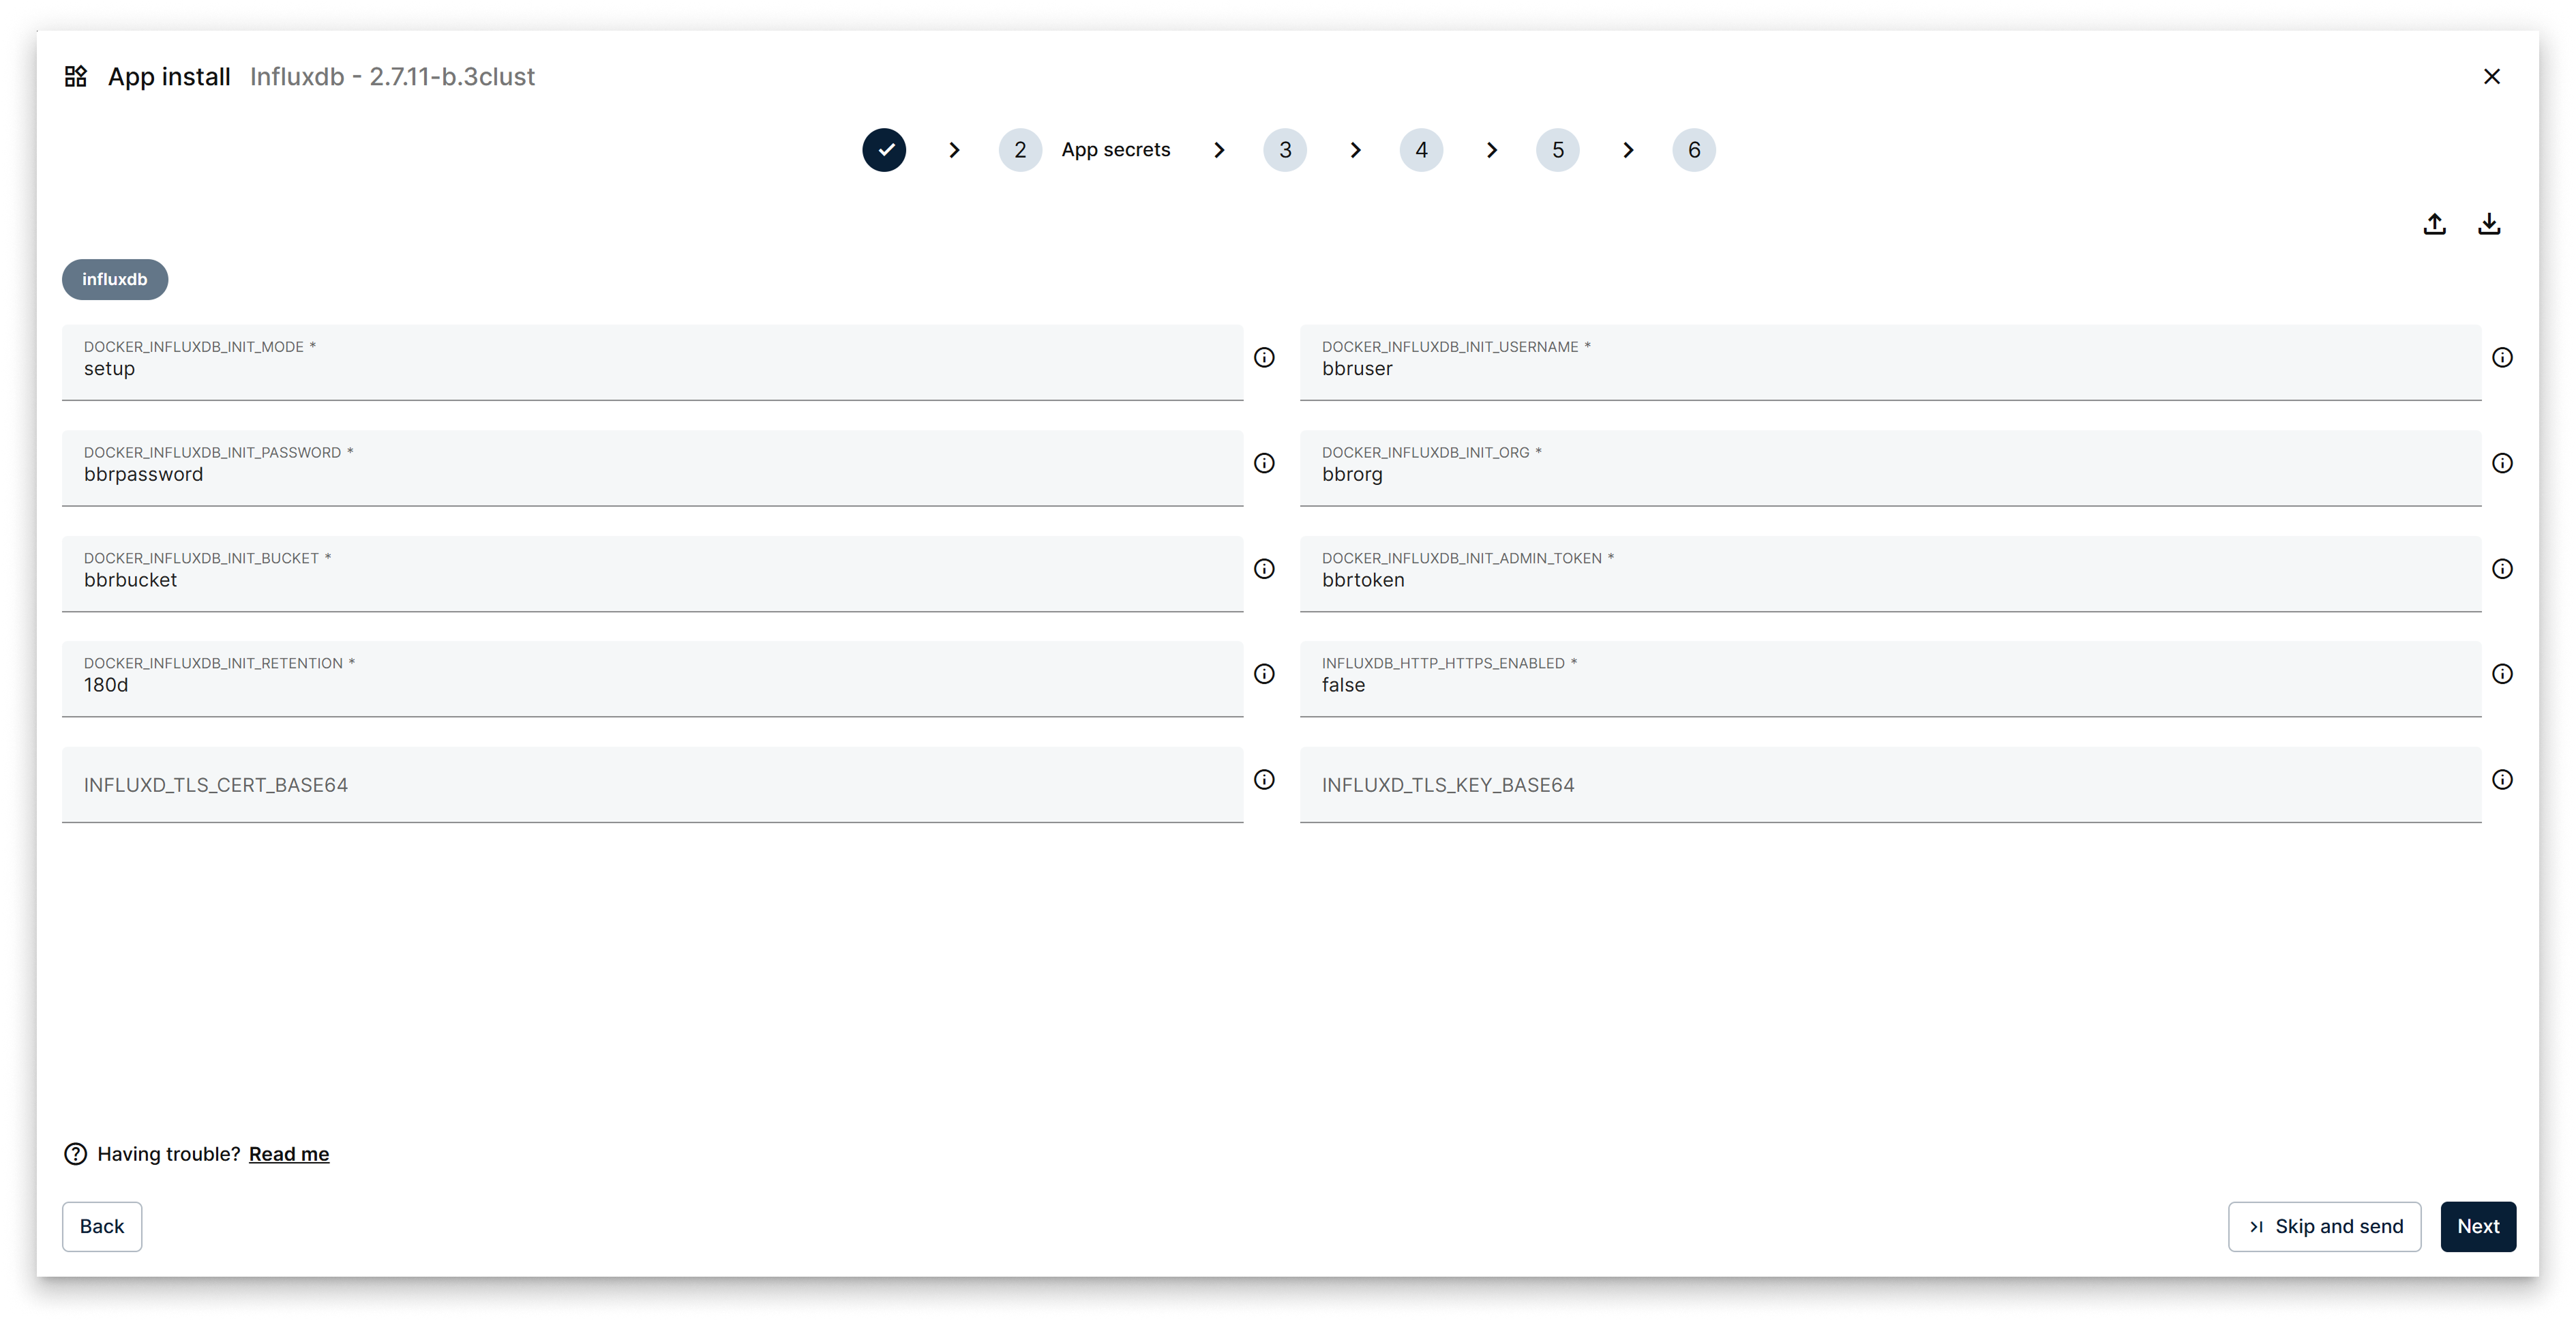
Wizard step 2: configure app secrets
Step 3 — Configure Compose Config
Set the Docker ports and volumes for the services that make up the application. These values are exposed to every service in the stack and determine how the app is reachable from the rest of the network.
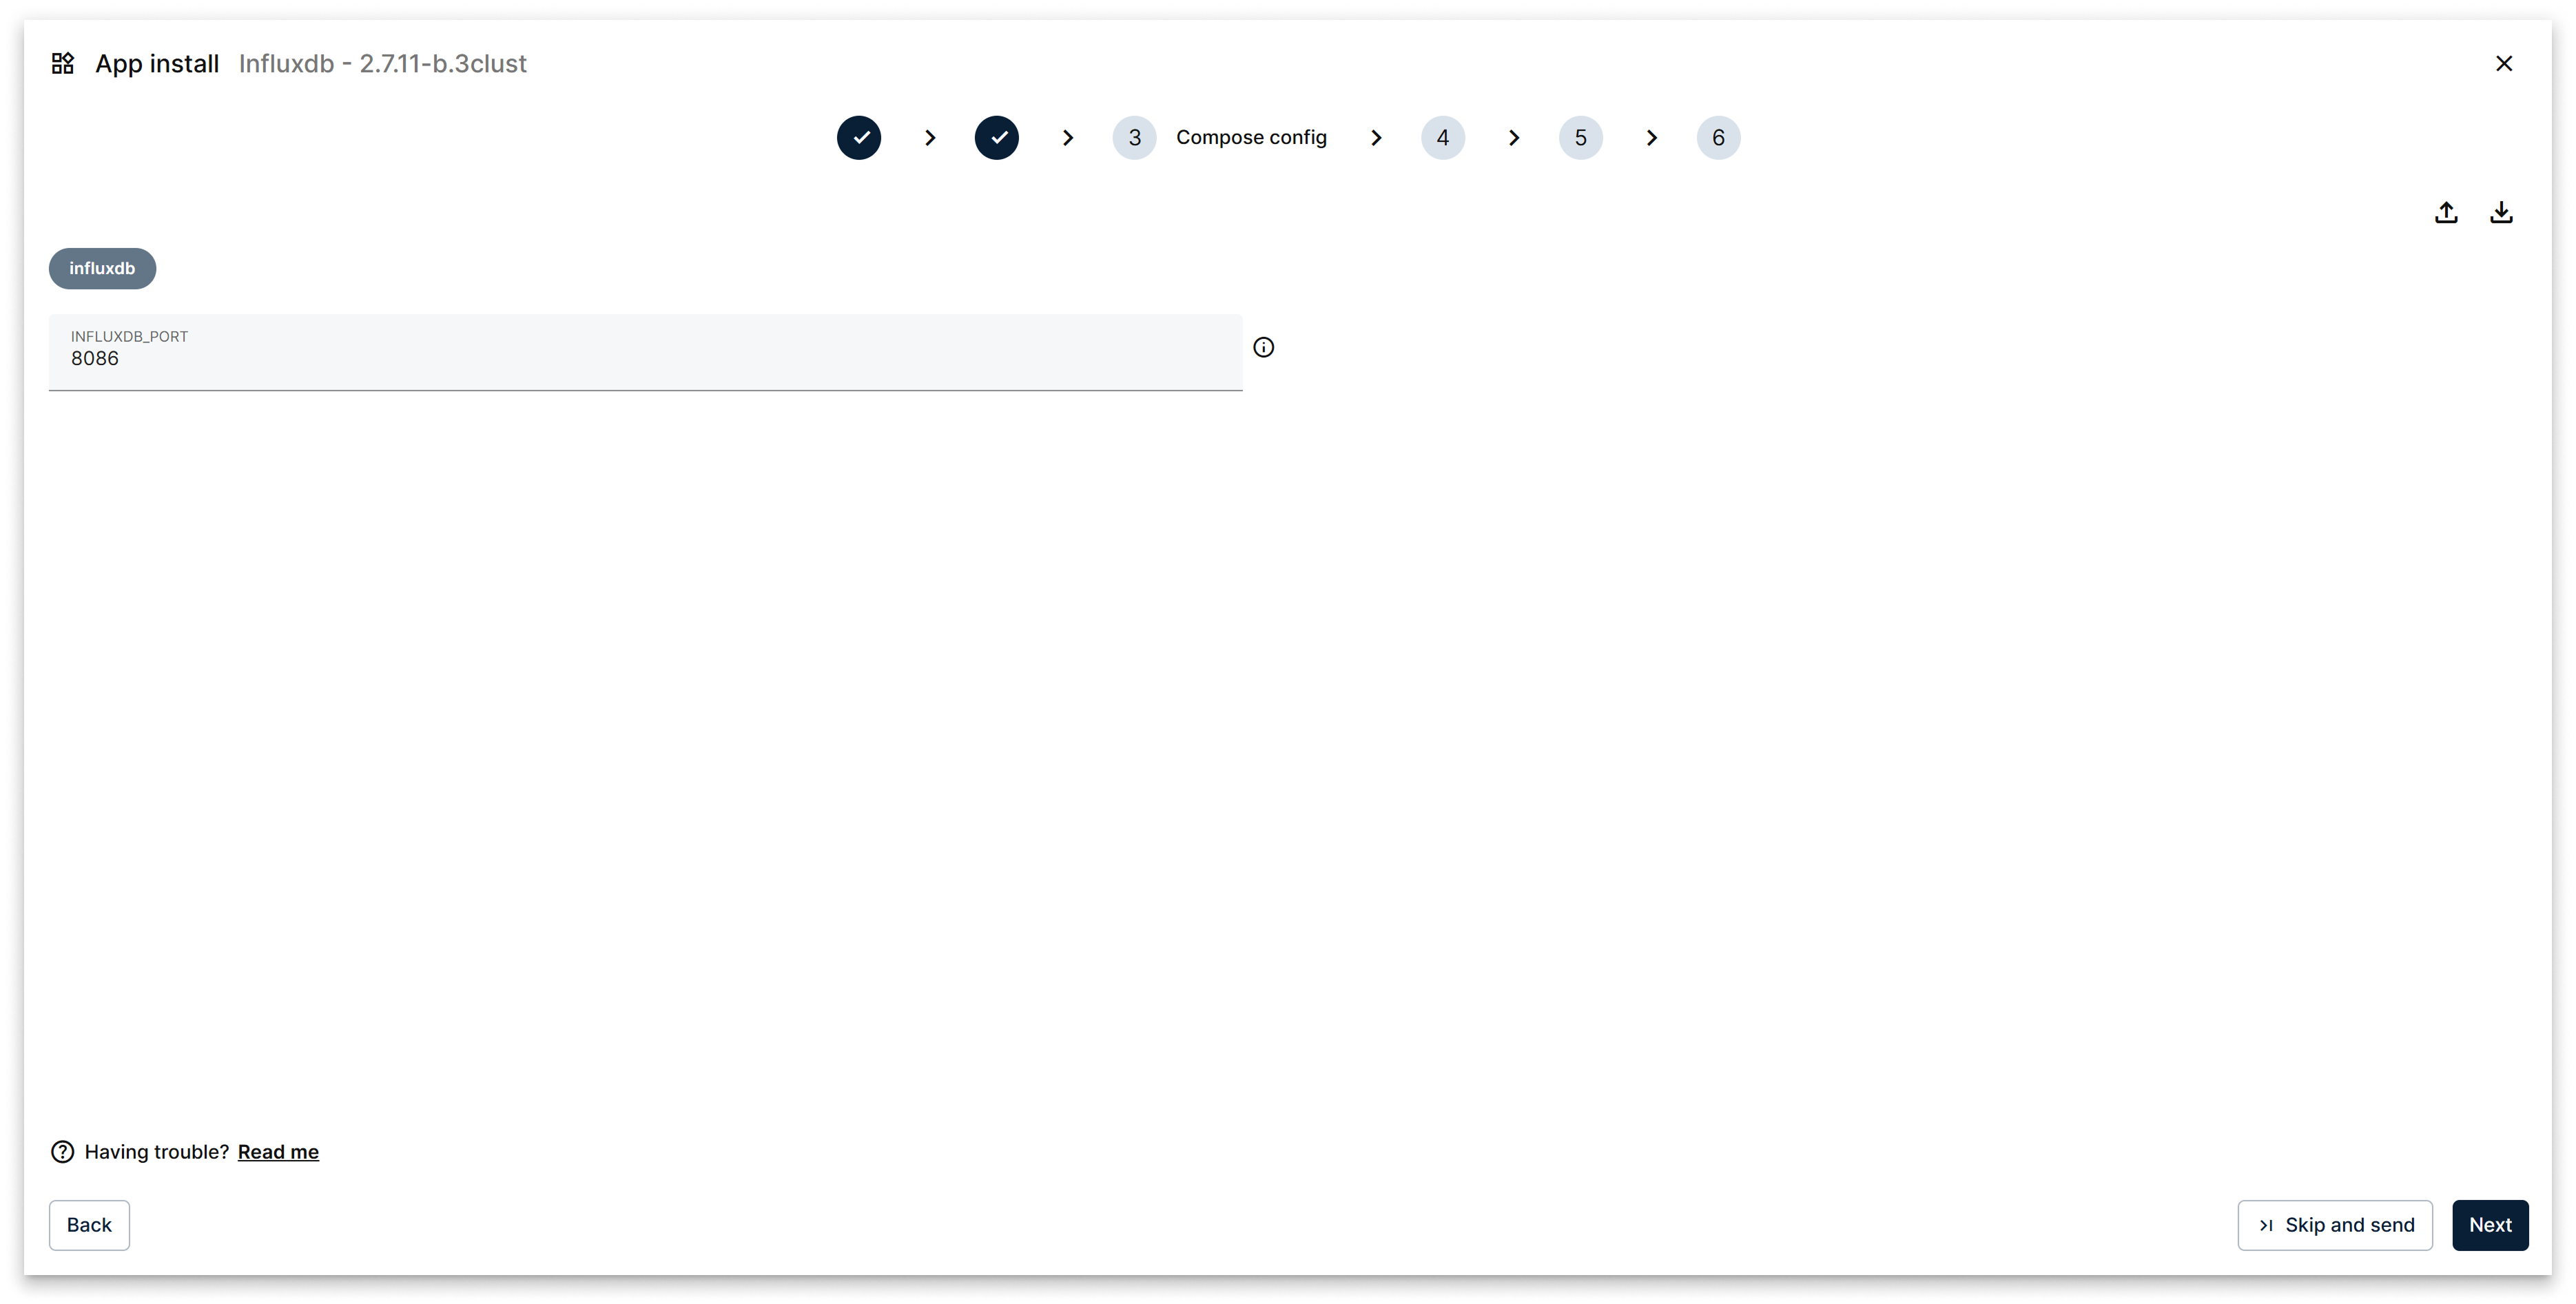
Wizard step 3: compose config
Step 4 — Deployment and Replicas
This step is cluster-specific. Pick how each service runs across the cluster and, when applicable, how many replicas.
Deployment modes:
- Replicated — schedules the specified number of replicas across eligible nodes.
- Global — runs exactly one task per eligible node.
- Replicated Job — runs a finite parallel job until it completes.
- Global Job — runs the job once on every eligible node.
When you pick Replicated or Replicated Job, set the Number of replicas. Each service in the app has its own tab so you can configure its strategy independently.
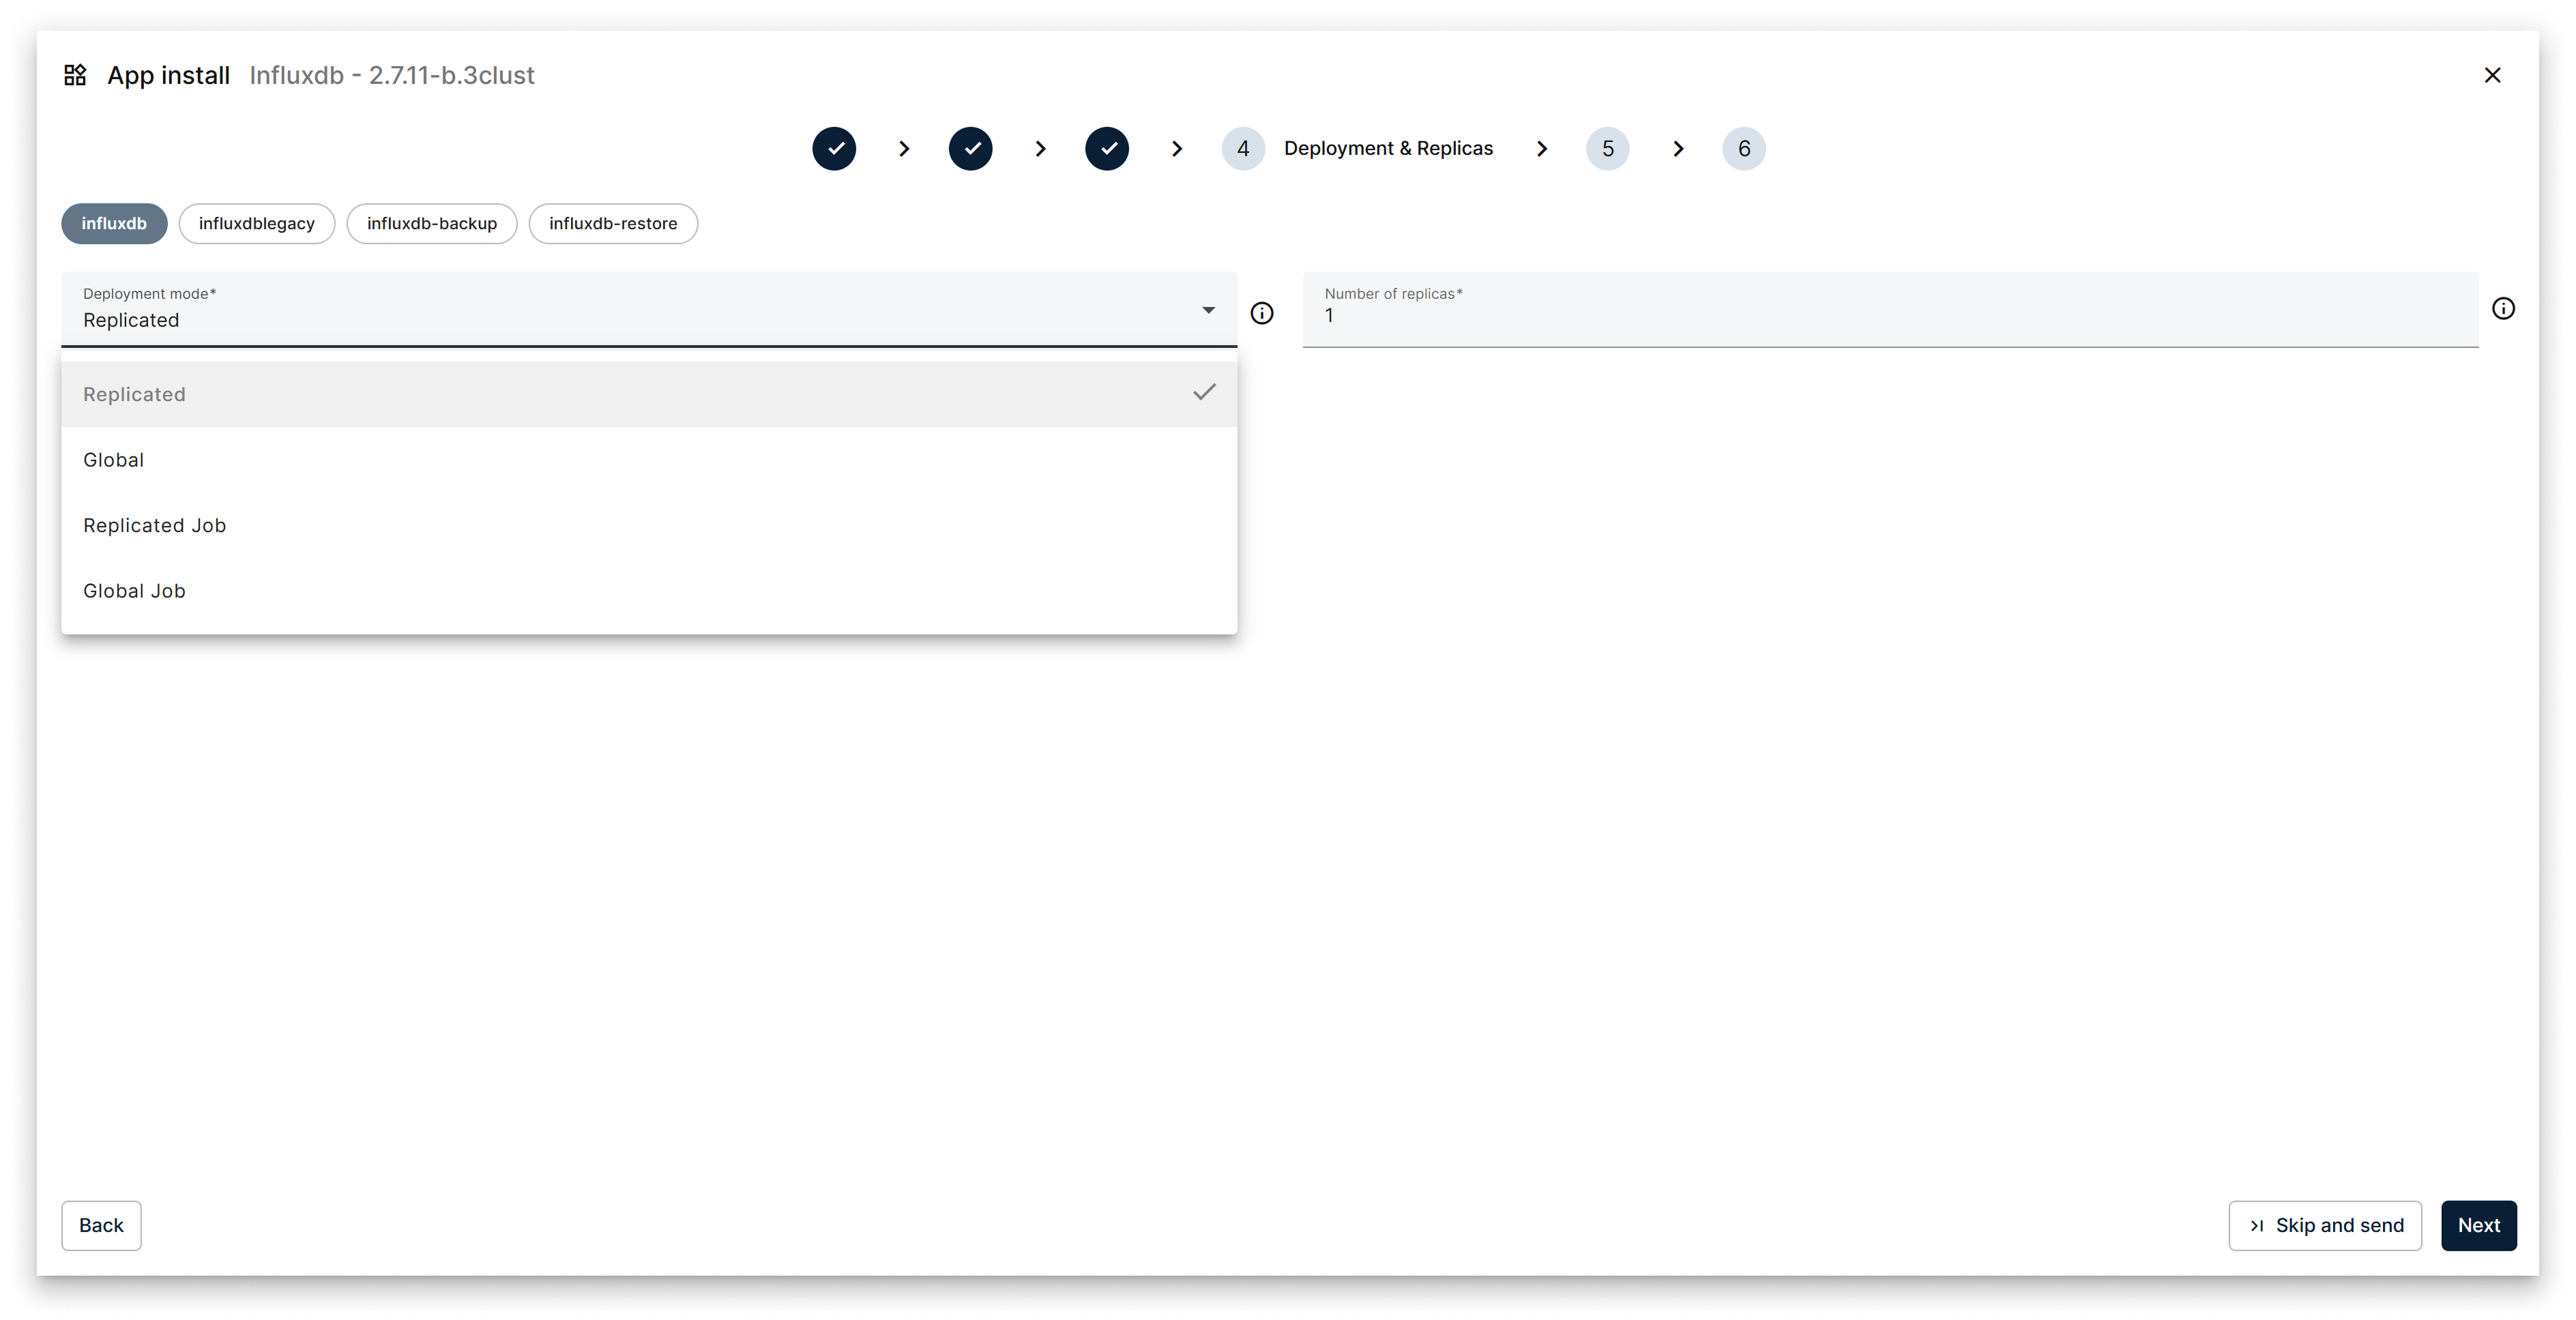
Wizard step 4: deployment and replicas
Step 5 — Placement Constraints
This step is cluster-specific. Restrict where the services may run by selecting one or more node labels declared when each node was added to the cluster.
Use cases:
- Schedule on nodes with specific hardware (GPU, more RAM, fast disk).
- Pin workloads to a geographic site or environment.
- Separate workloads by role.
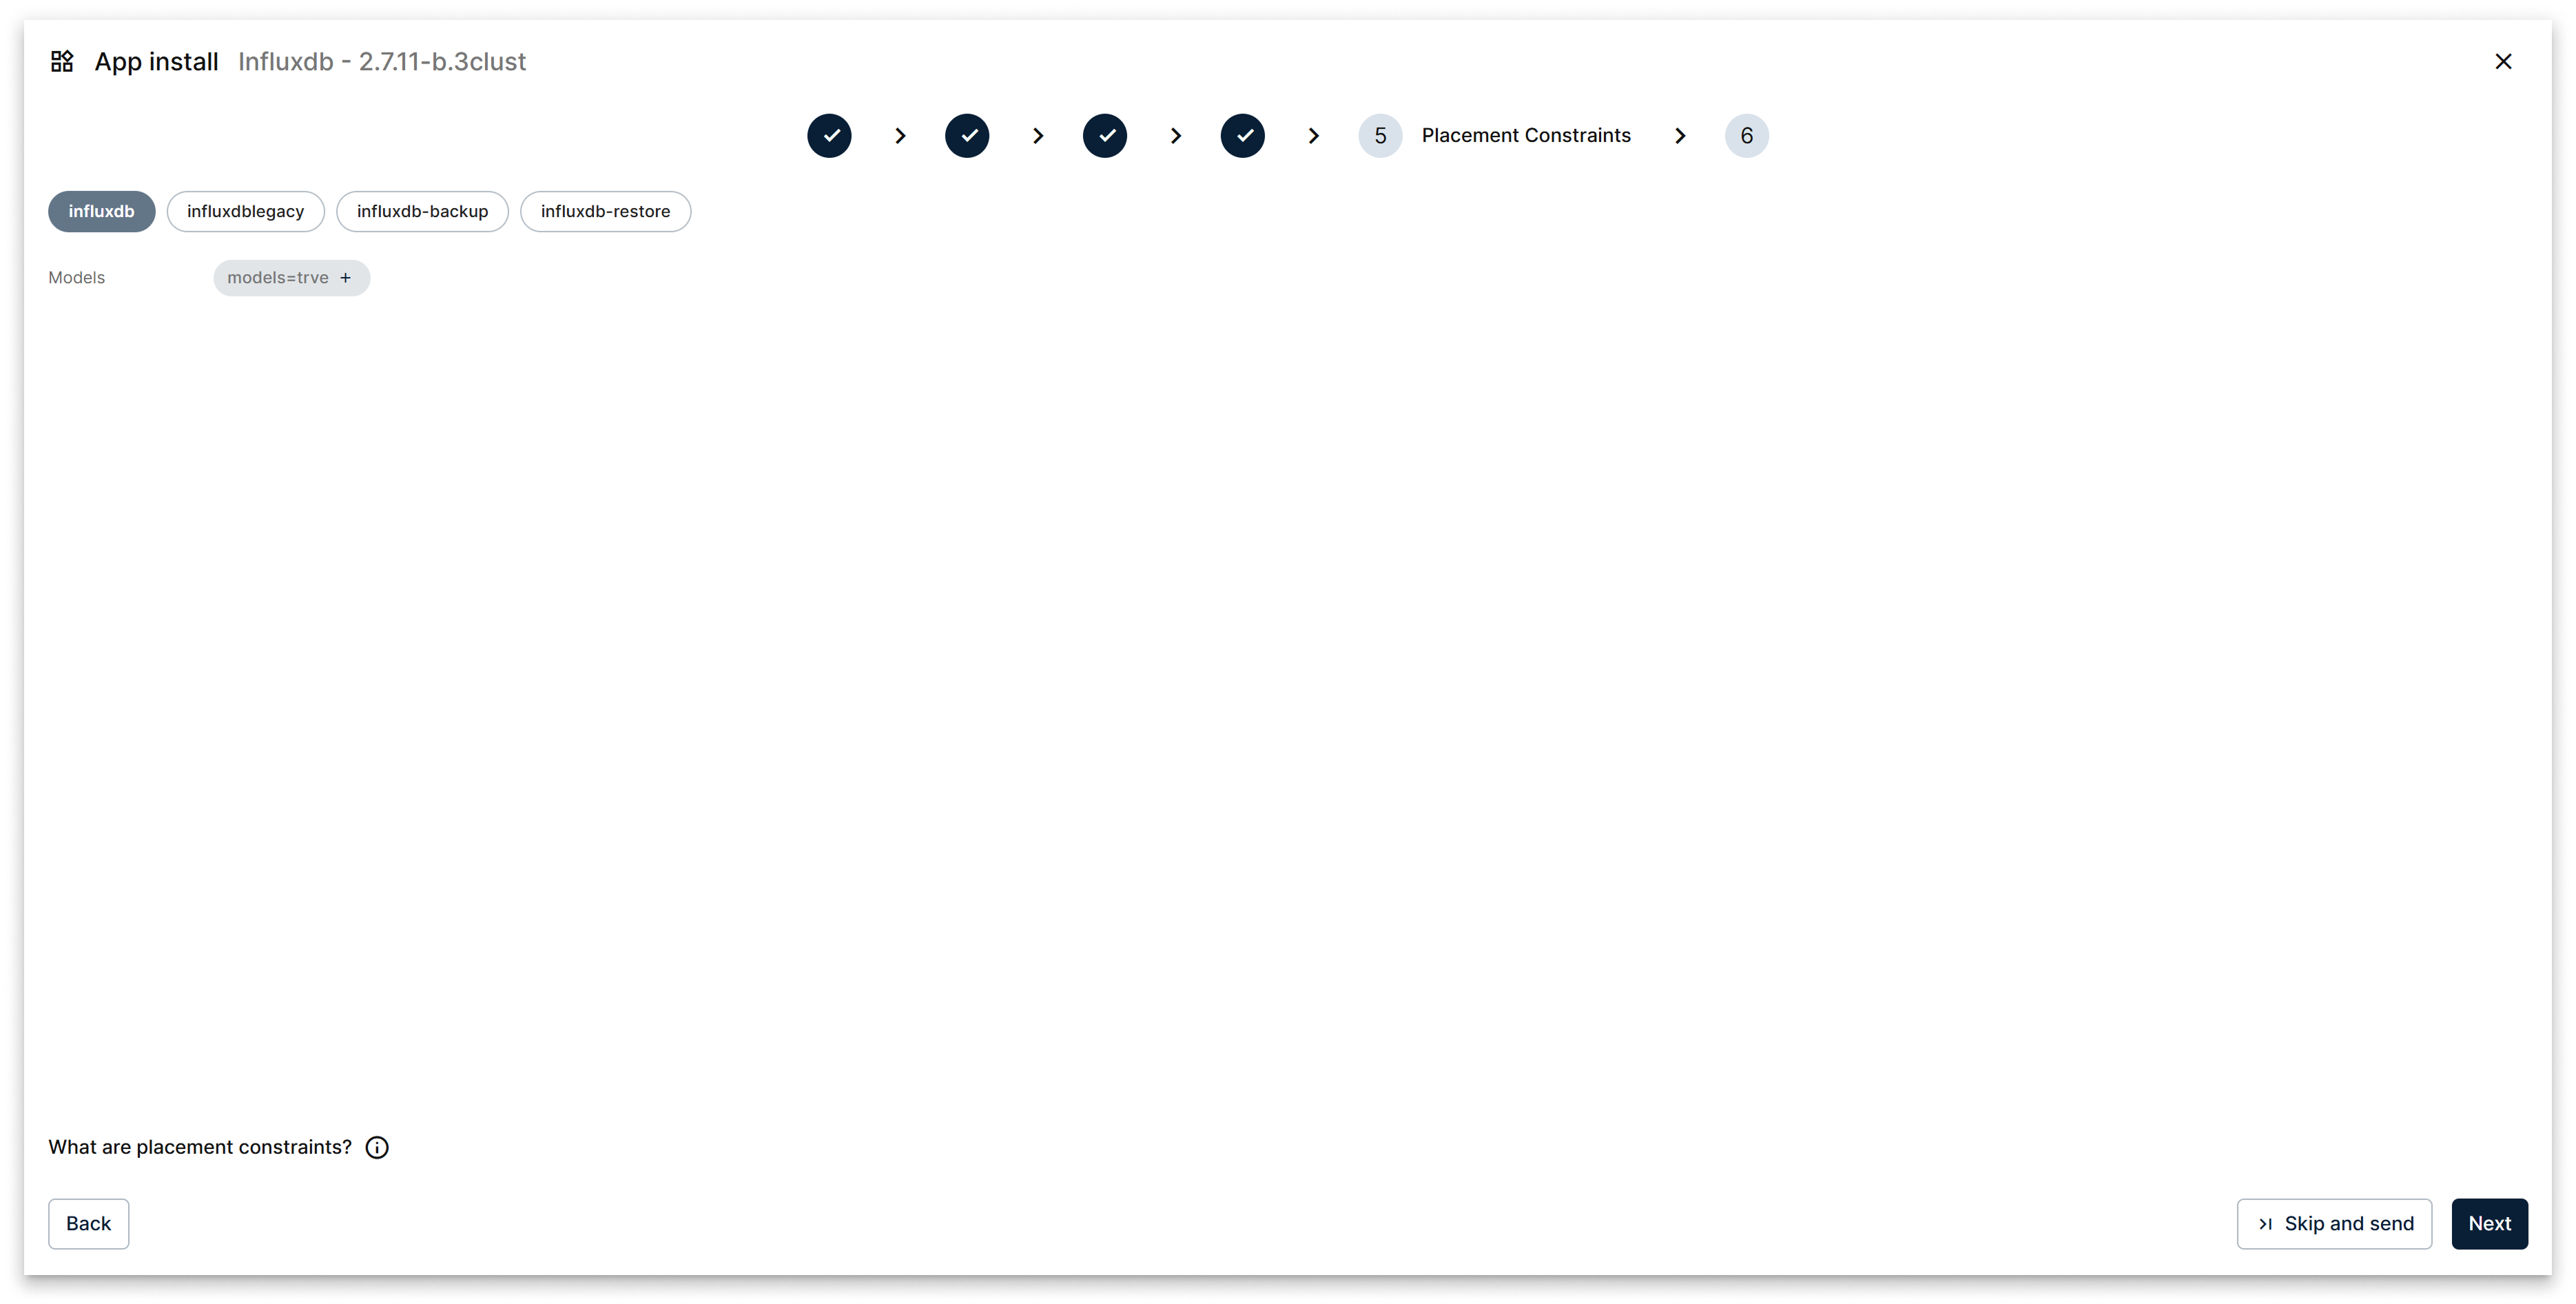
Wizard step 5: placement constraints
Step 6 — Configure App Config
Provide the JSON application configuration. The schema is defined by the app — read its README for the available fields.
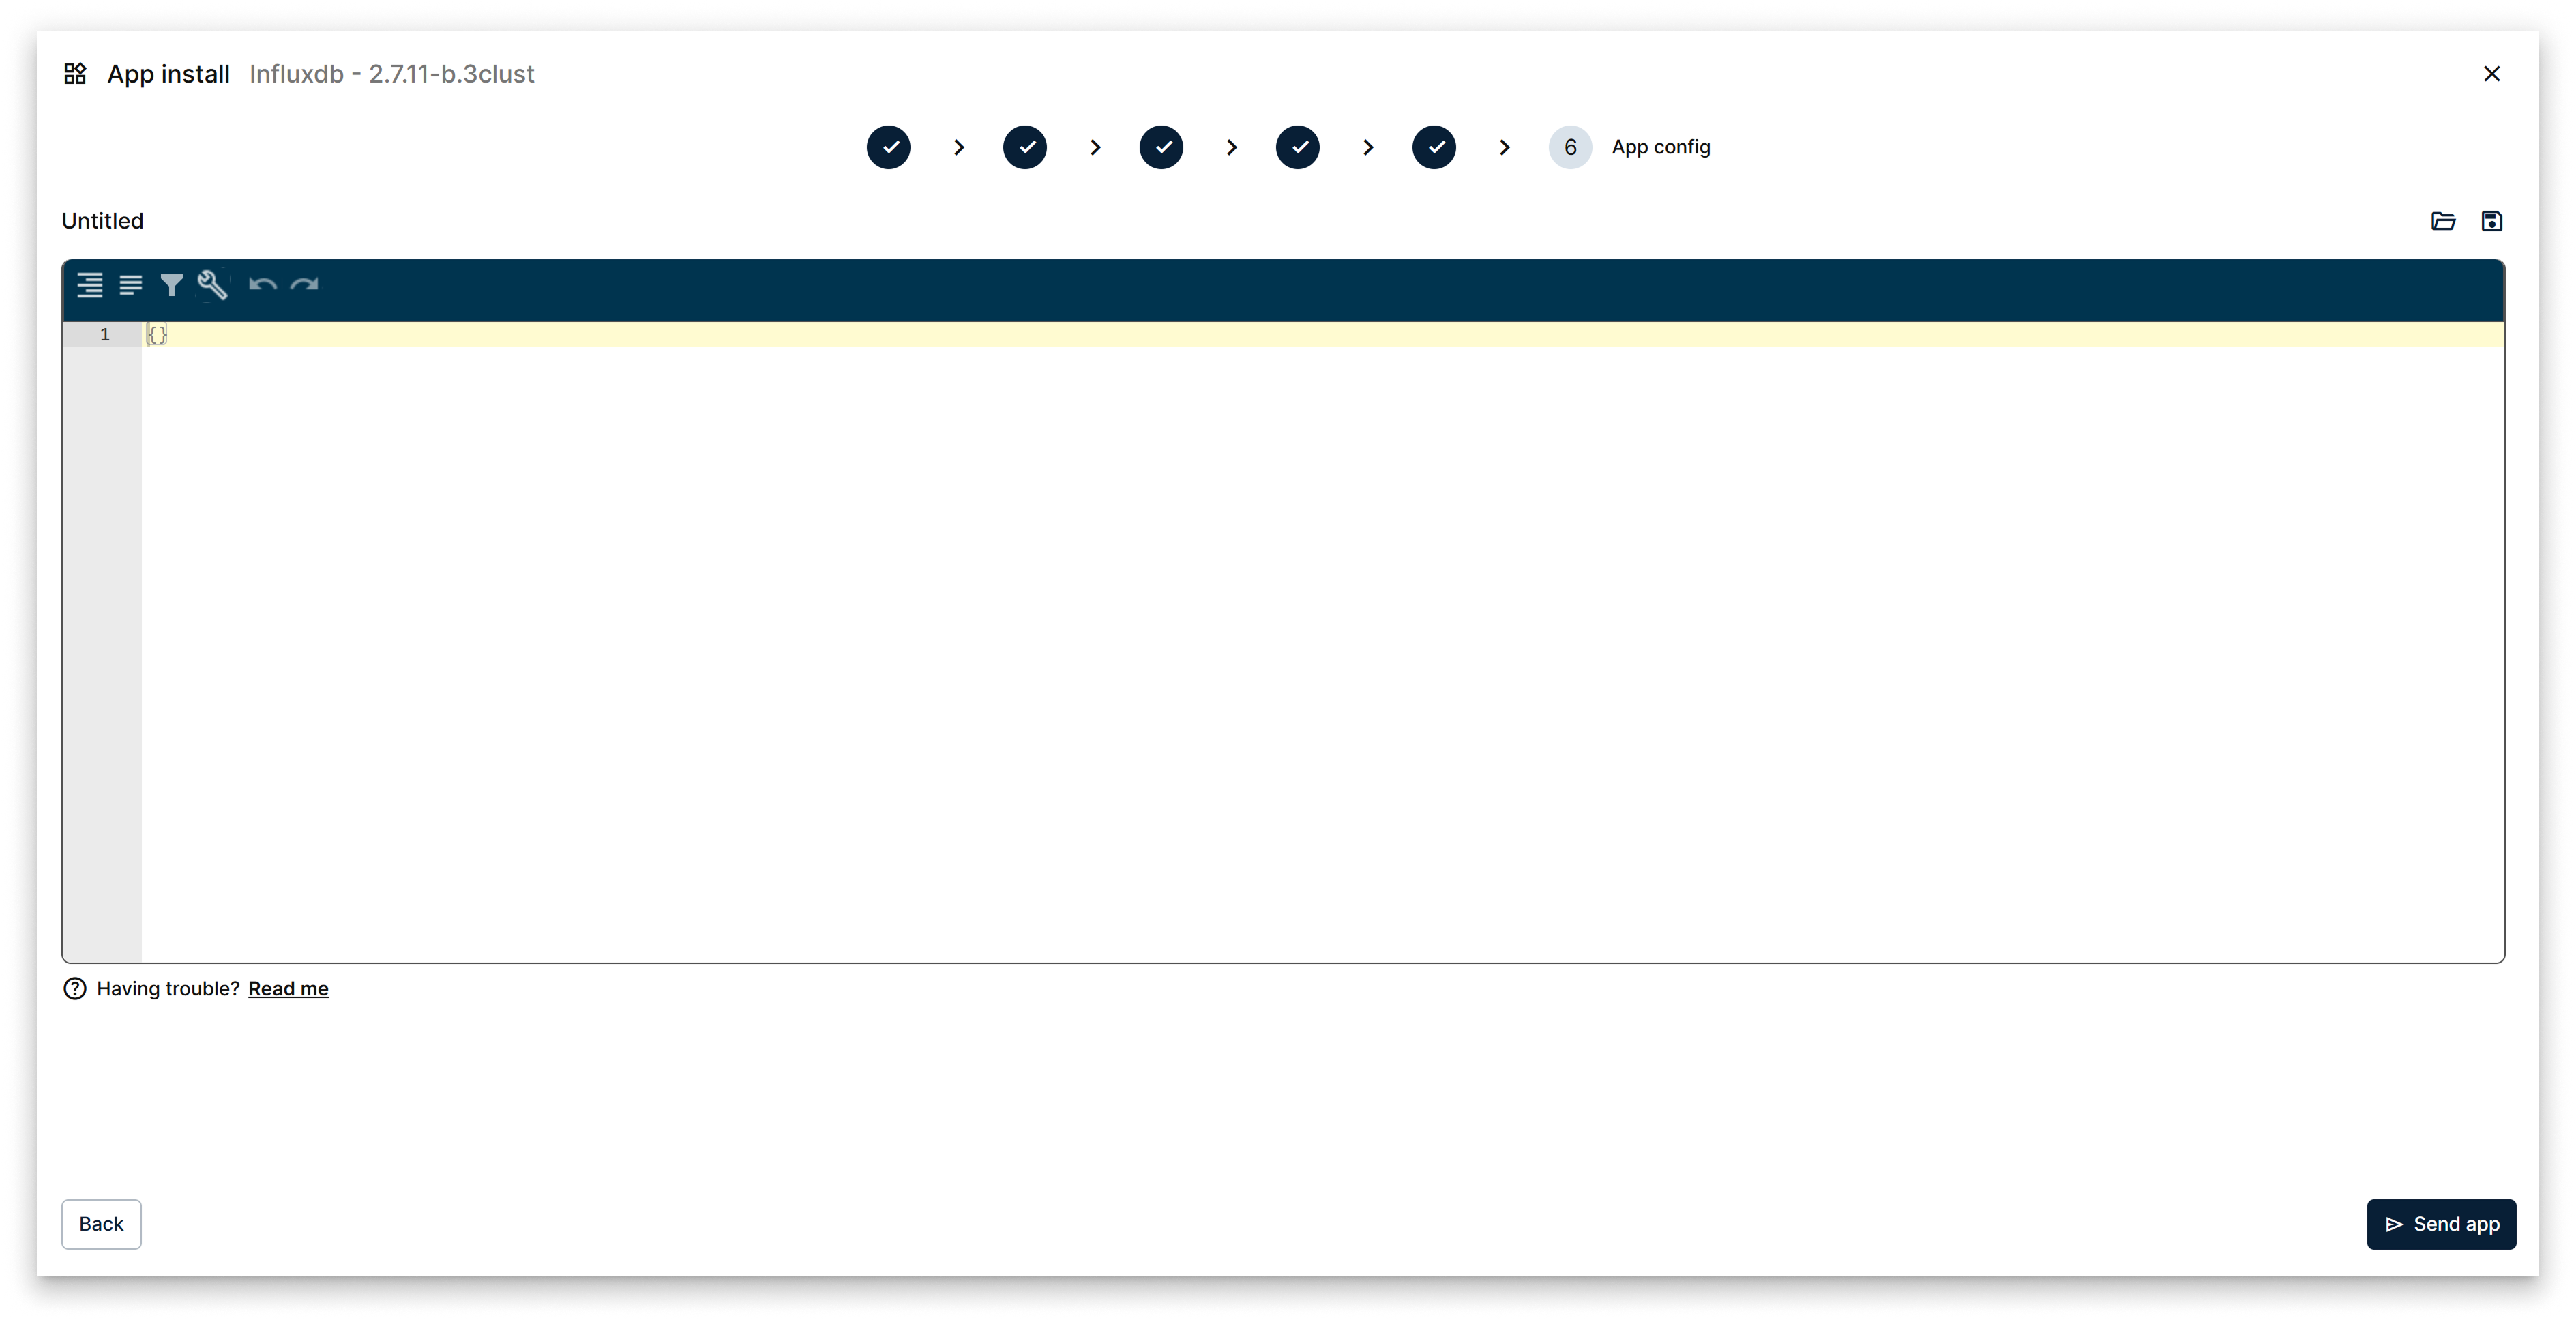
Wizard step 6: app config
Click Send to deploy. A workload card for the app appears on the Workloads tab of the cluster.
Cluster workload card
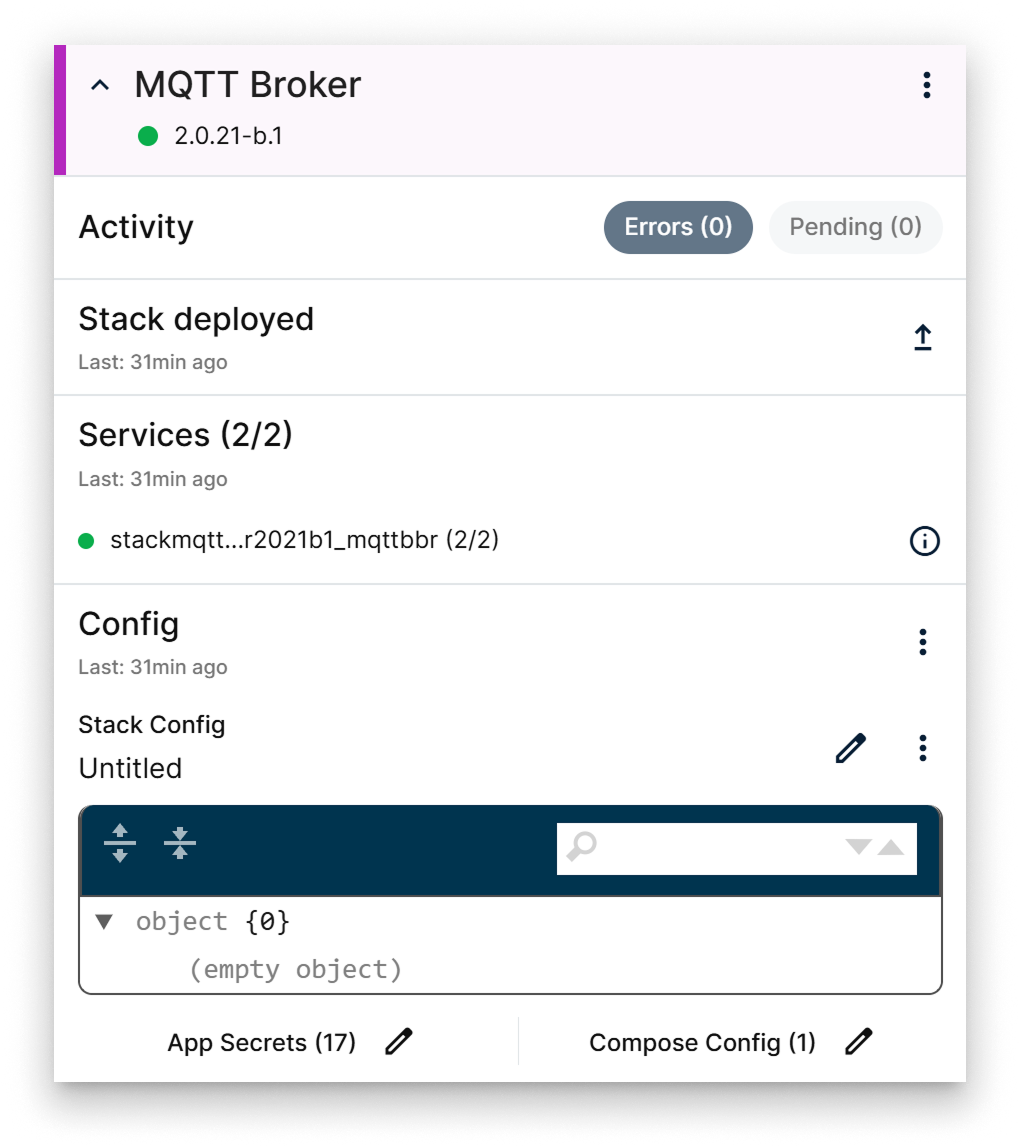
Cluster workload card
The card centralises every operation on the deployed stack:
- Activity — pending commands and operations that finished with errors.
- Status — the stack state (for example, deployed) and a New Version button that re-opens the install wizard to update the app.
- Services — lists every service in the application with its tasks. Click into a service to open the Tasks per service popup for runtime detail.
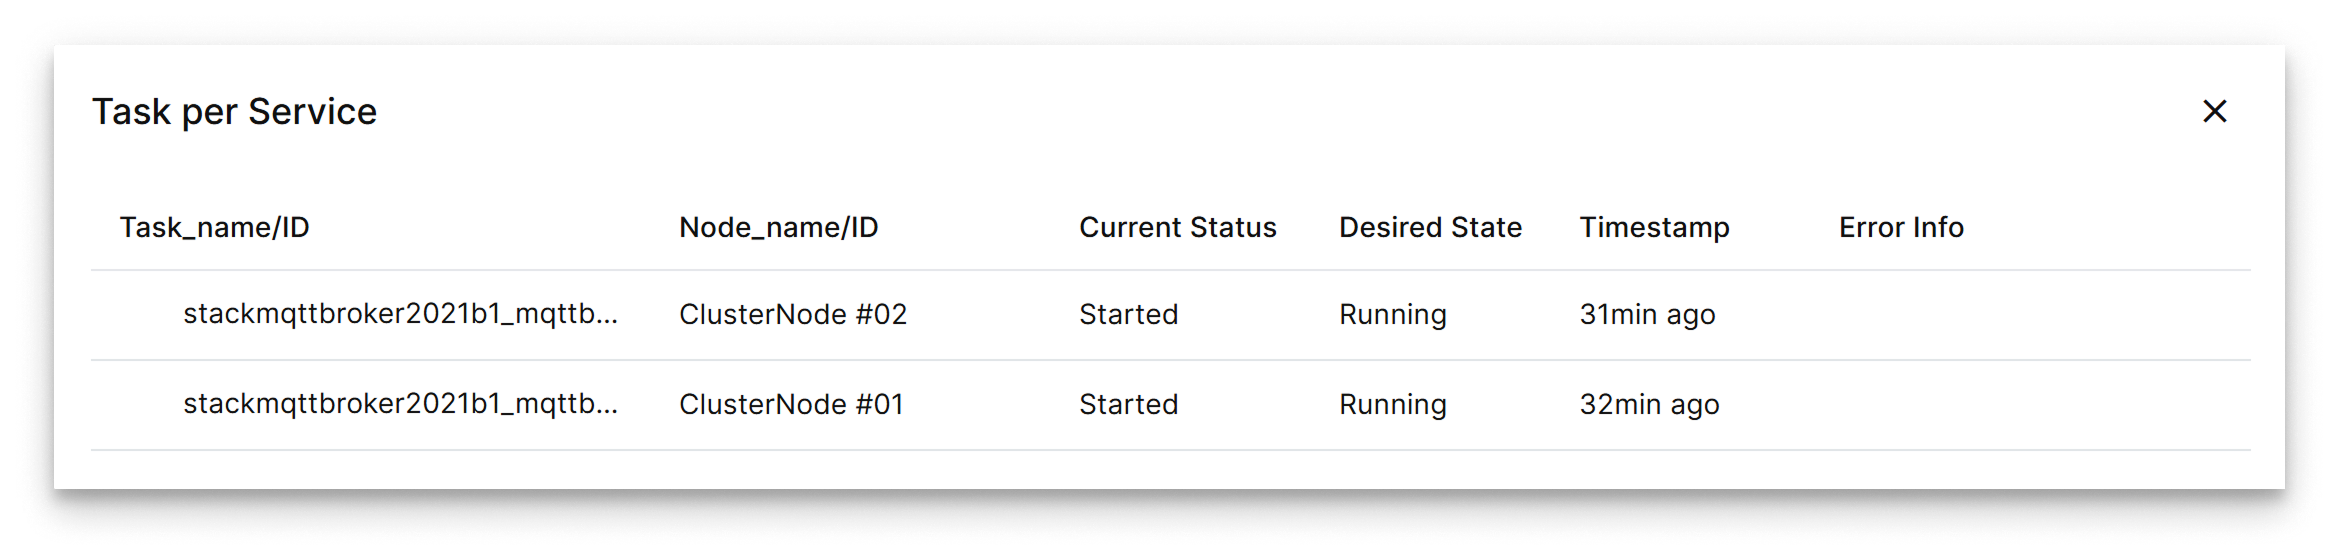
Tasks per service popup
- Config — exposes the application configuration with quick access modals to the post-install editors.
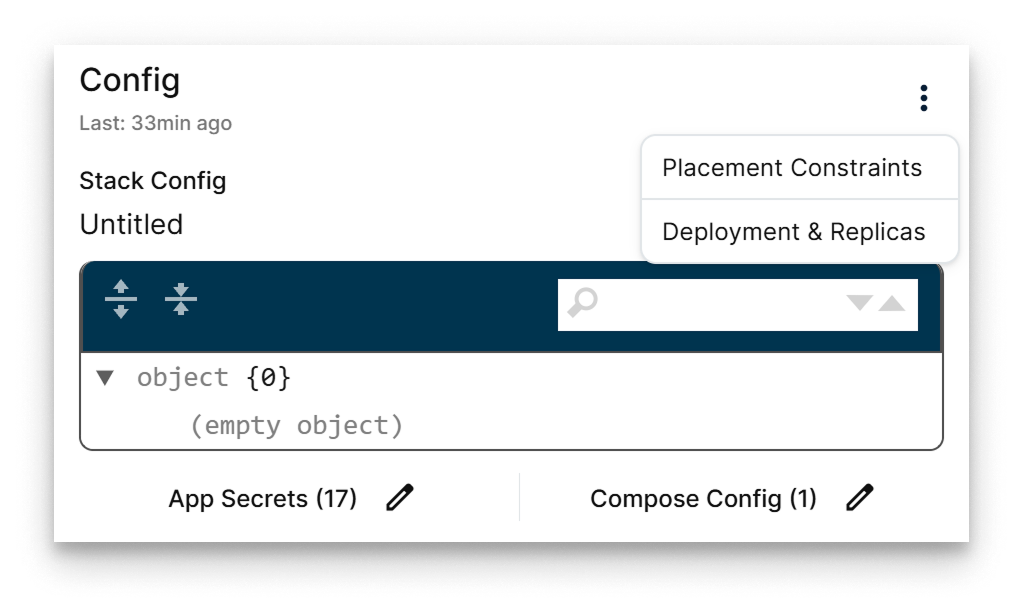
Config segment on the card
From the Config segment you can re-open:
- Placement Constraints
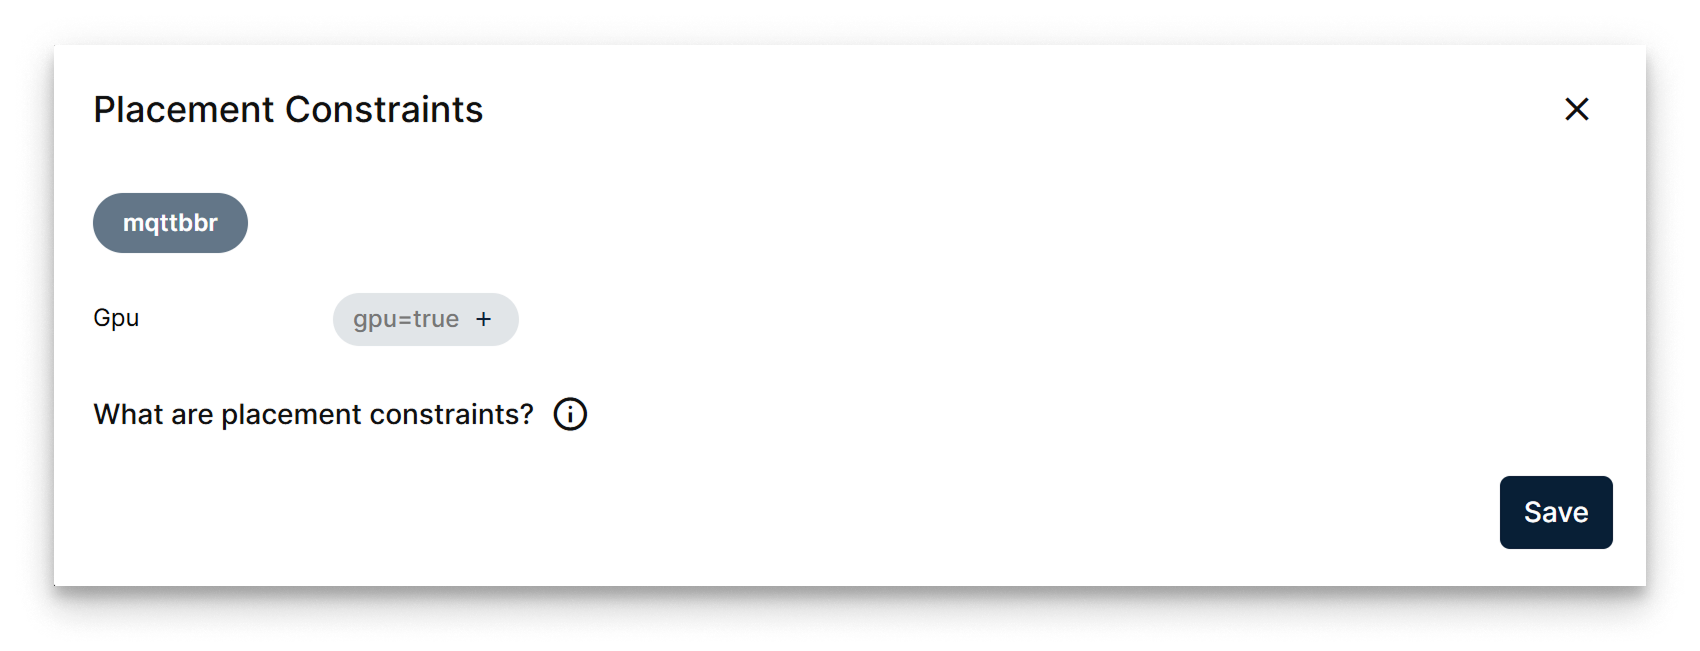
Placement constraints popup
- Deployment and Replicas
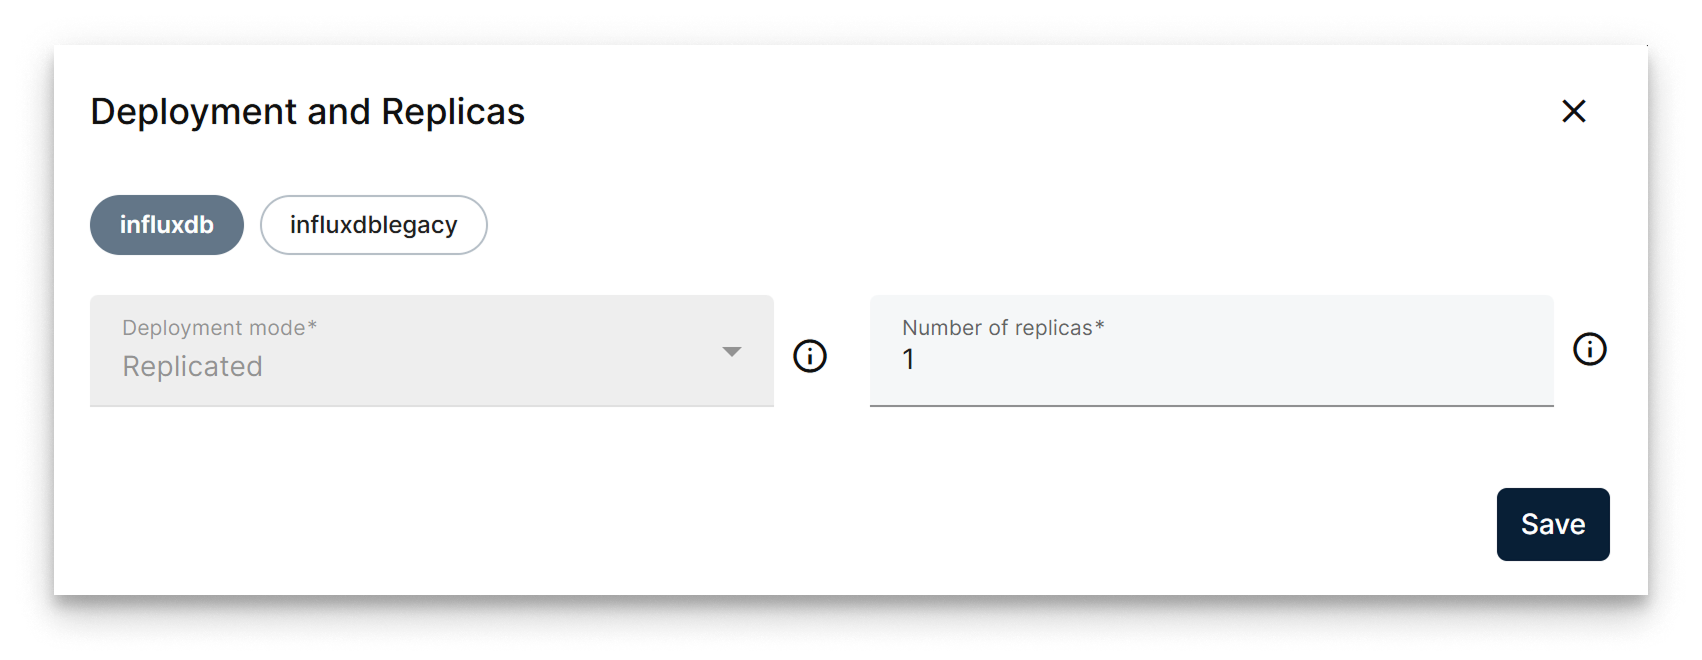
Deployment and replicas popup
- App Config
- App Secrets
- Compose Config
Use them to tune a running app without re-running the full wizard.
Summary
Cluster installs run through the same Marketplace pattern as single-node installs plus two cluster-specific steps — Deployment & Replicas and Placement Constraints — that determine how many tasks run, where, and under what conditions. After deployment, the workload card lets you re-open each popup to adjust the stack without re-running the wizard.