General Info
This article refers to Platform v2.9.0. The current Platform version is v3.3.0.
Overview
Once an edge node is registered in Barbara Panel, you can fill in the General Info card to record what the node is, where it sits, and how it should be grouped. The fields you set here drive searching, filtering, and batch operations across the Nodes list.
Open the General Info card
From the Node Details page of your node, scroll to the General Info card. If it is not visible, click Add card (the floating + button) and add it.
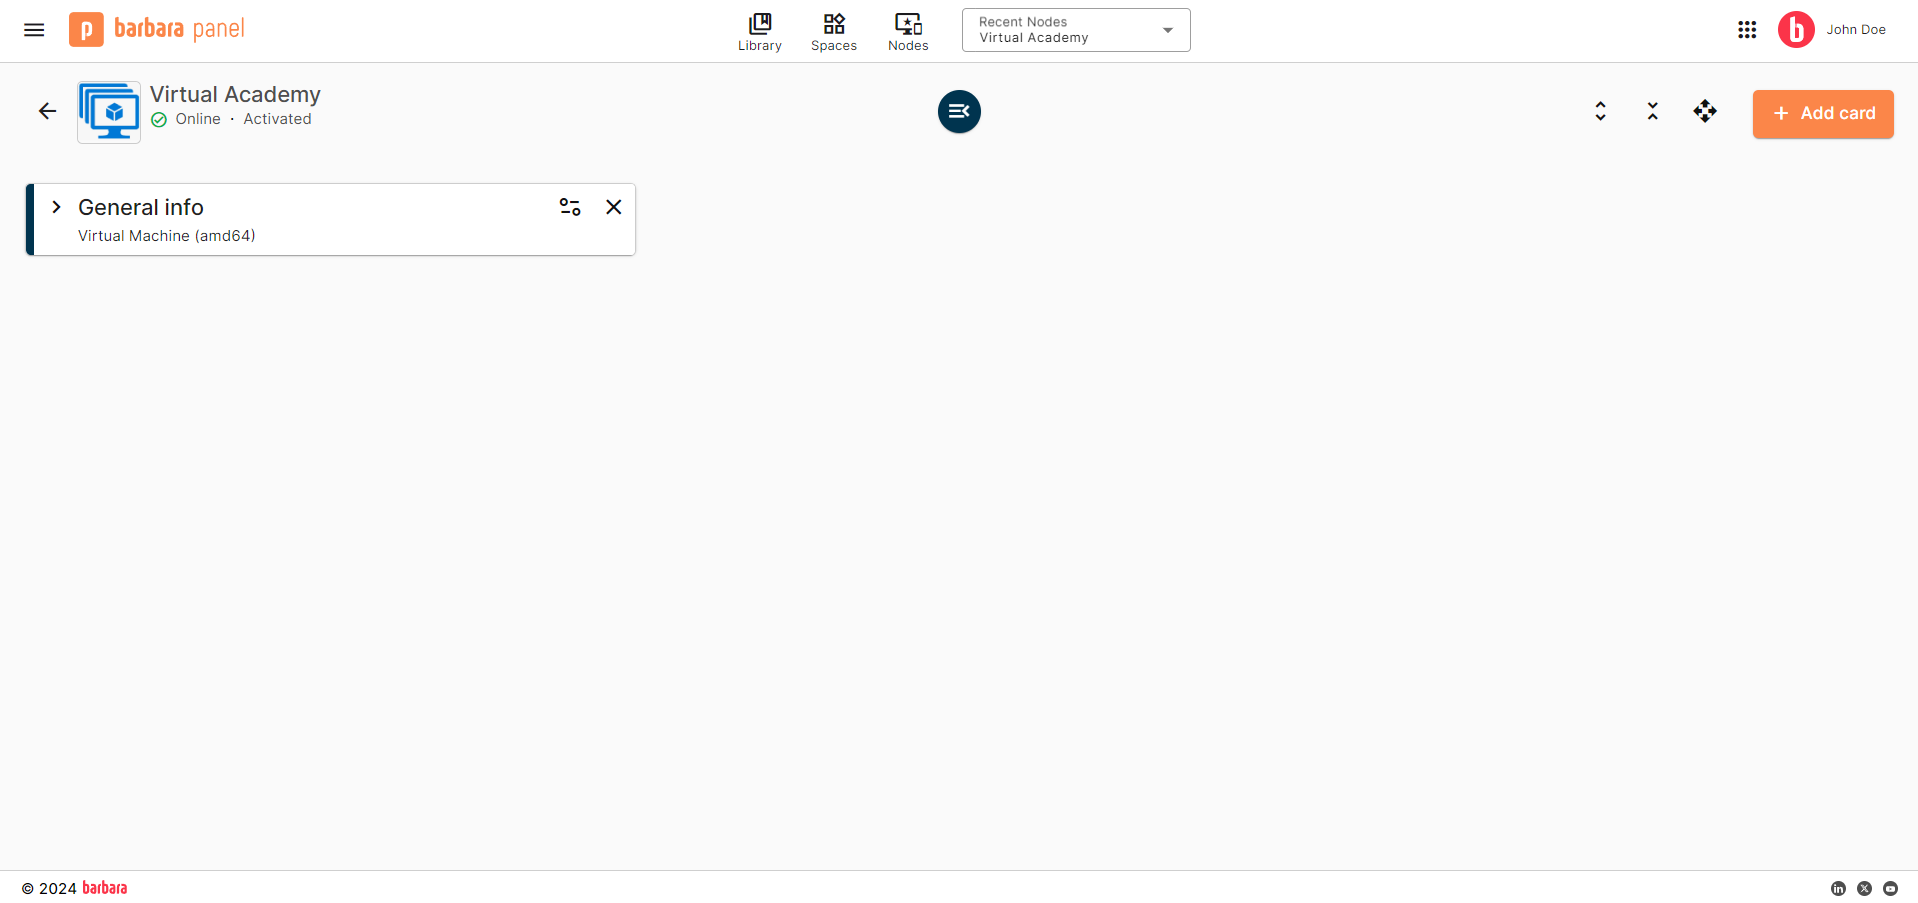
Node Details page
Node identity
The page header shows the node's name and its connectivity / activation status at a glance.

Node name and image in the header
- Click the node name to edit it inline.
- Click the node image to upload a custom picture or remove the existing one (a pencil icon appears on hover).
General Information fields
The General Info card surfaces the identity of the node and the metadata you use to organise it.
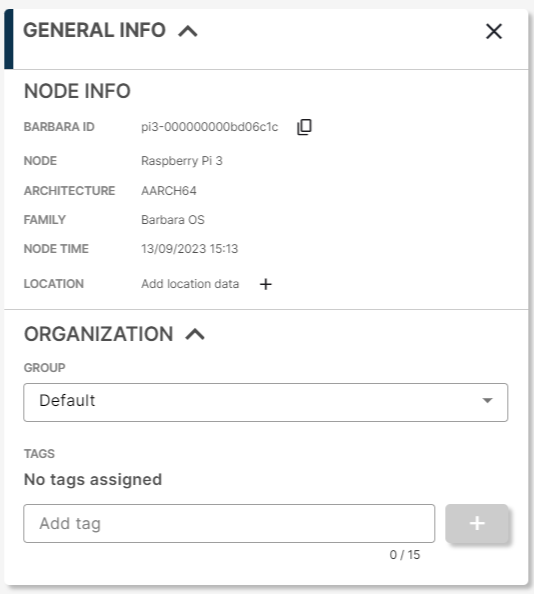
General Info card
- Barbara ID — the unique hexadecimal identifier of the node. See Get the Barbara ID of the node.
- Node — the hardware model or commercial product name of the device.
- Architecture — the CPU architecture of the device.
- OS Family — the operating system family the node runs (Barbara OS for most devices, Yocto for NVIDIA Jetson hardware).
- Node Time — the time zone the node is configured to (typically UTC).
- Location — geographic coordinates. Click the + to open the map picker.
The Node Time field reflects real-time data only when the node is online. When the node is offline, the field falls back to Not available.
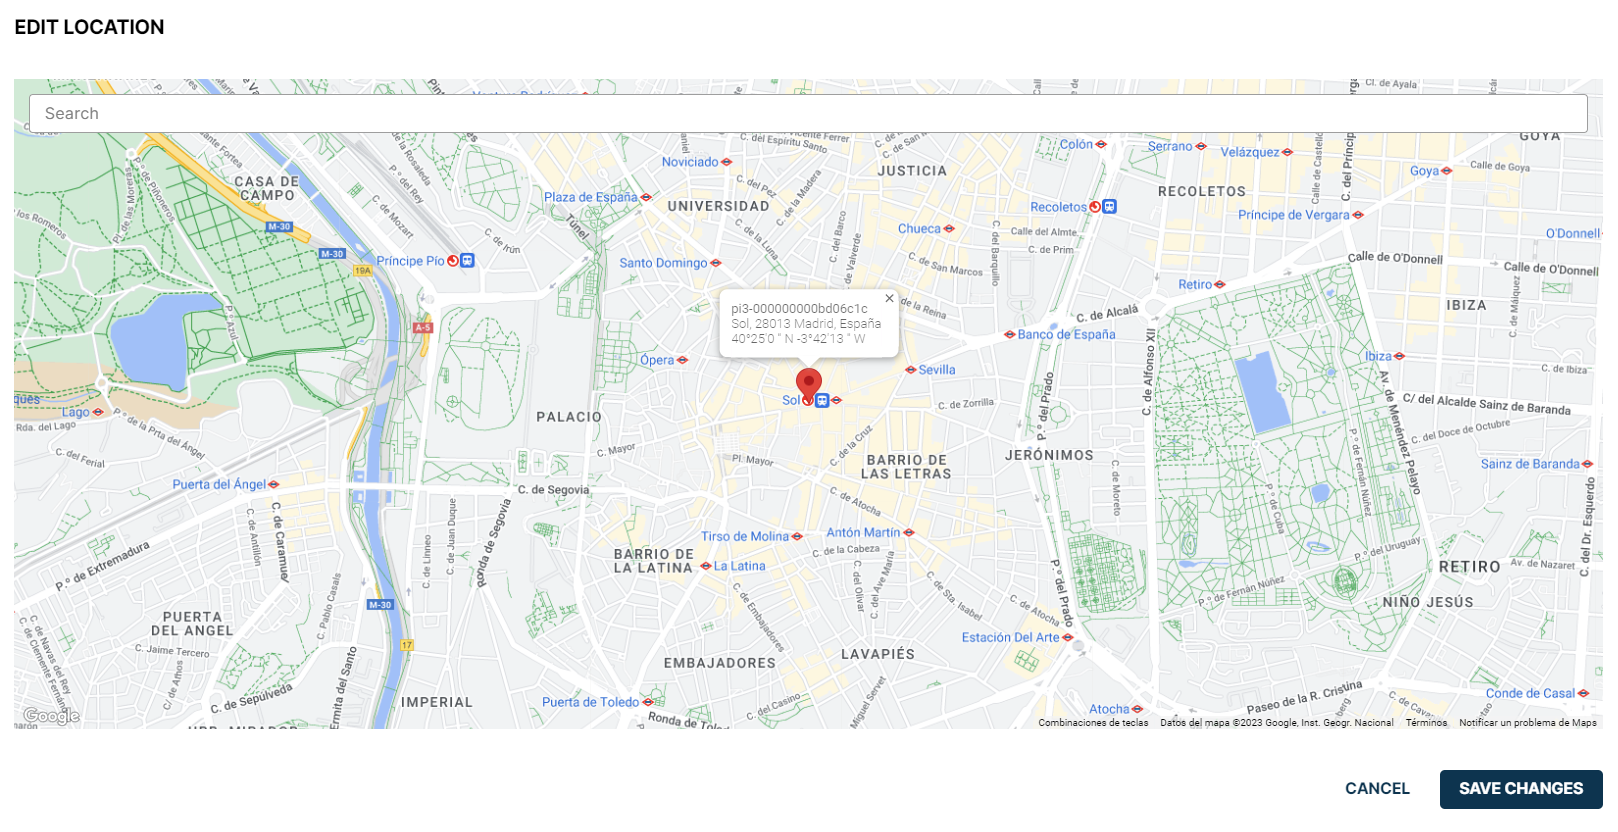
Map picker for the node location
Organization
The Organization section of the card lets you classify the node.
Group
Every node belongs to exactly one group. New nodes are placed in the Default group. To move the node, expand the Group dropdown and pick another group.
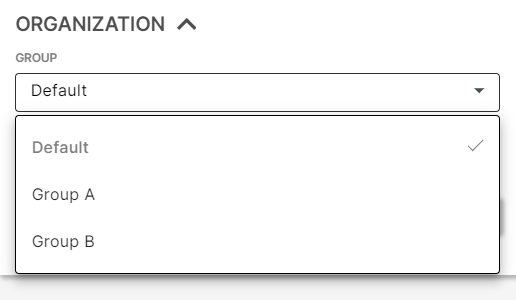
Group selector
Tags
Tags are free-form labels for cross-cutting classification. A node can have any number of tags (including none).

Tag input
- Type the tag in the text field and click + to add it.
- Click the x next to a tag to remove it.
Node Assets
The Node Assets section stores arbitrary files attached to the node — schemas, installation pictures, instructions, tutorial videos, anything that helps operations.
Open it from the Advanced Actions popup: click the wheel icon in the header and scroll to Node Assets.

Advanced Actions button
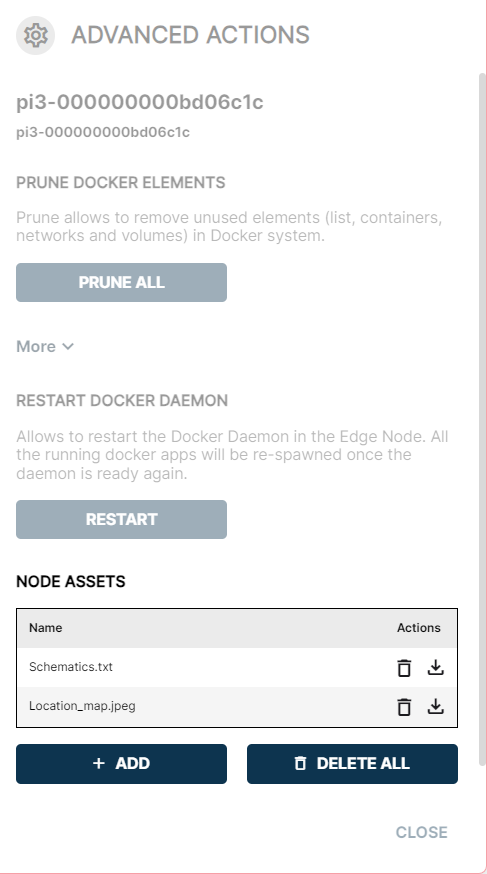
Node Assets list
Click Add to upload a file from your computer; click the trash icon next to an asset to remove it.
For the full reference of the Advanced Actions popup, read Advanced Docker Actions.
Summary
The General Info card is where you record who and what a node is, so the rest of Barbara Panel can find, group, and act on it. Set the name, image, location, OS family, group, and tags up front, and attach any operational documents through Node Assets.