Barbara Visual Studio Code extension
This article refers to Platform v3.0.0. The current Platform version is v3.3.0.
Overview
The Barbara VS Code extension wraps the most common development tasks for a Barbara application into a single integrated environment — scaffold a Node.js or Python project, upload a new version of an application to the App Library, and deploy it to an edge node without leaving VS Code.
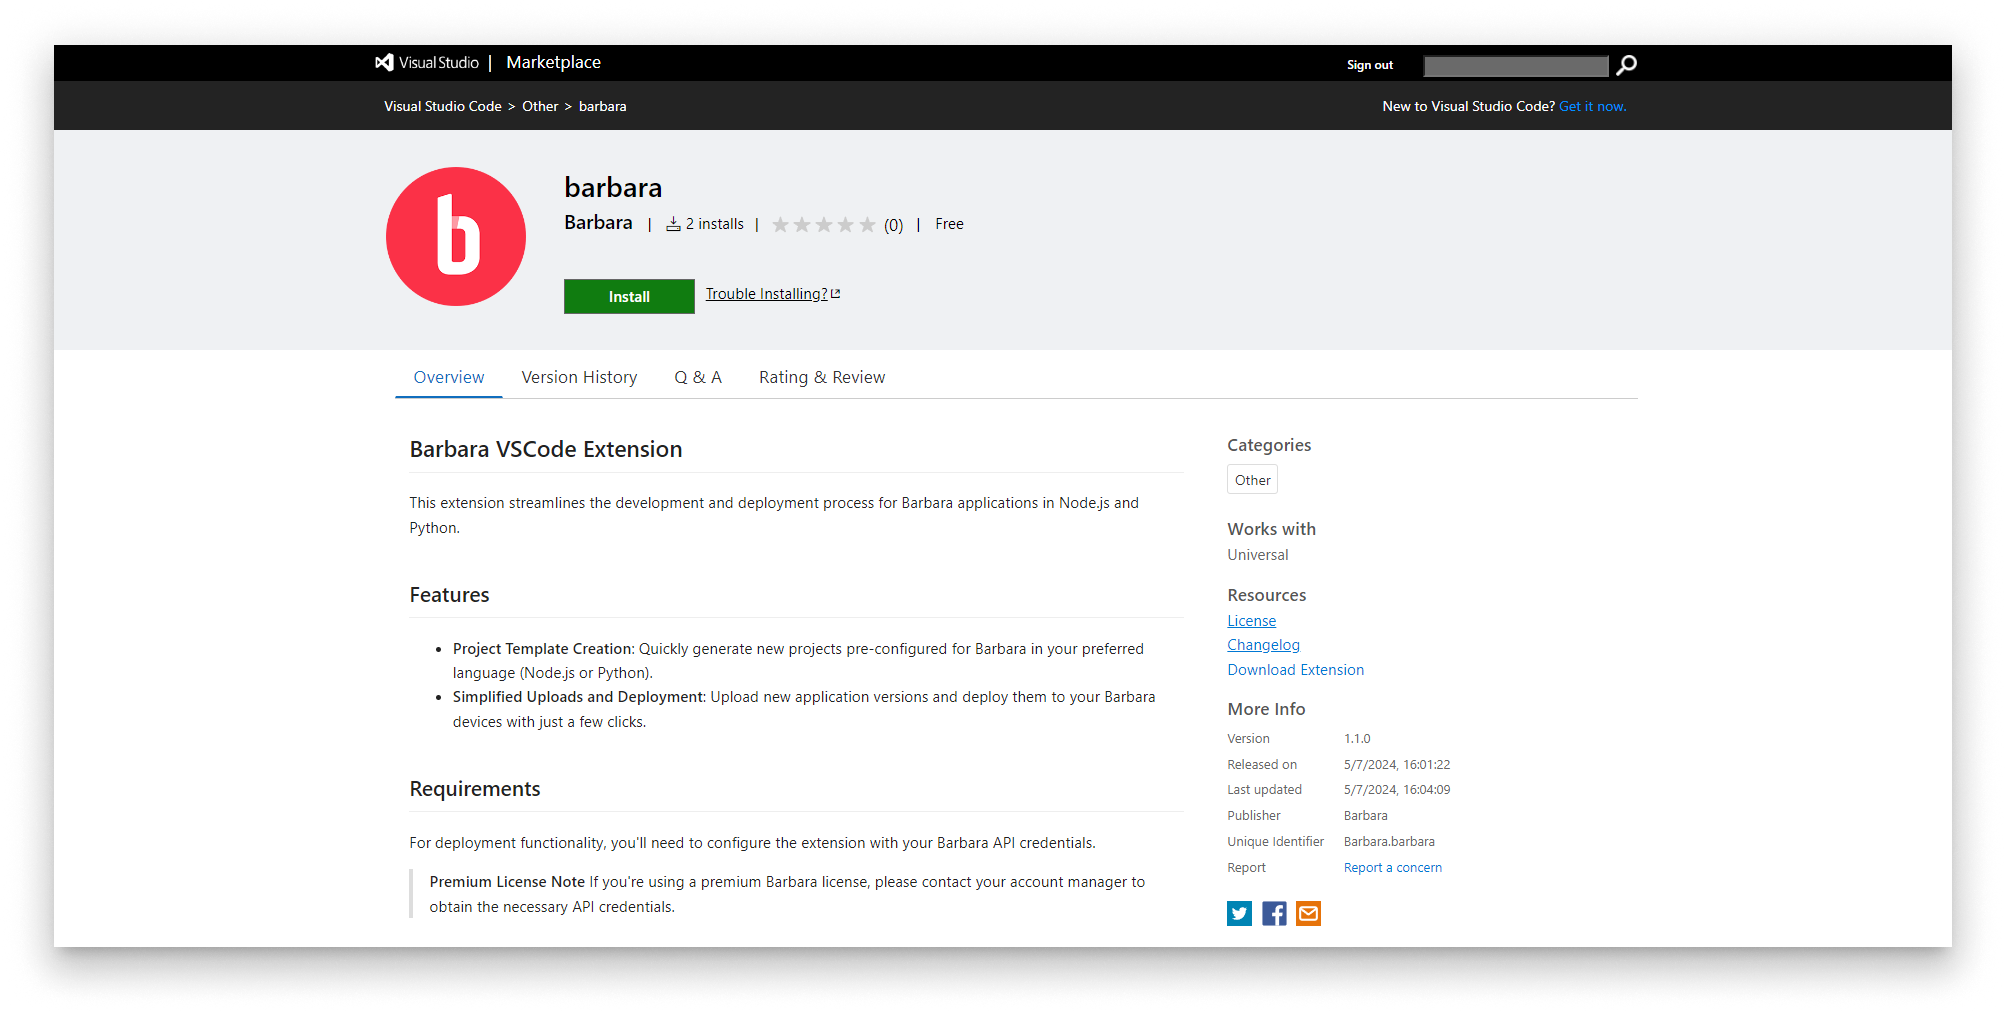
Barbara VS Code extension landing page
Install the extension from the Visual Studio Marketplace.
Features
- Project scaffolding — generate boilerplate Node.js or Python projects ready to deploy to Barbara.
- Application upload — push a new version of an existing application to the Panel Library.
- Application deployment — deploy a newly uploaded version to a specific edge node.
Prerequisites
- Visual Studio Code installed on your laptop.
- A Barbara platform account.
- Barbara API credentials (Client ID + Client Secret).
API credentials are only available with an Enterprise license. Contact the Barbara support team to upgrade if needed.
Installation
- Open the Extensions view in VS Code (
Ctrl+Shift+Xon Windows/Linux,Cmd+Shift+Xon macOS).
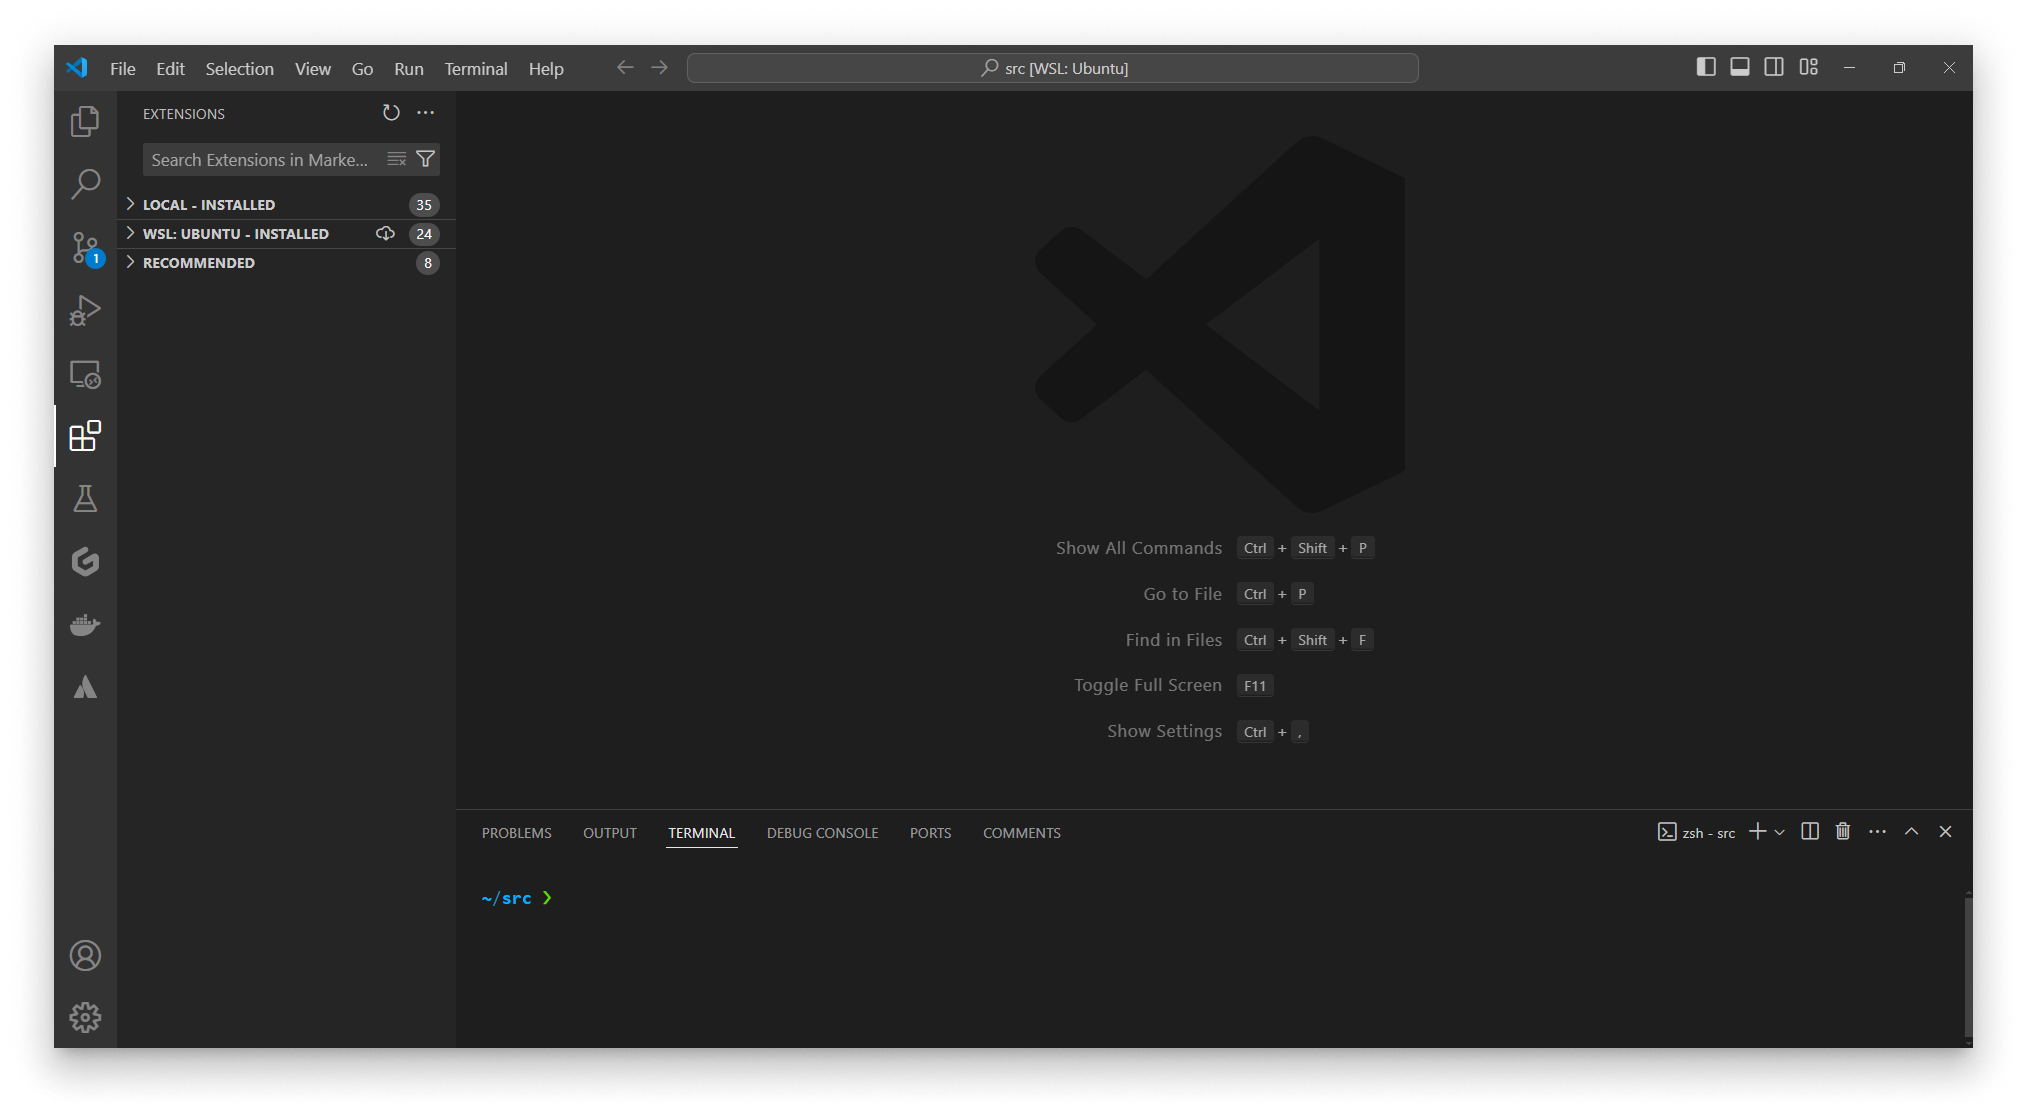
Open the Extensions view
- Search for
Barbaraand click Install.
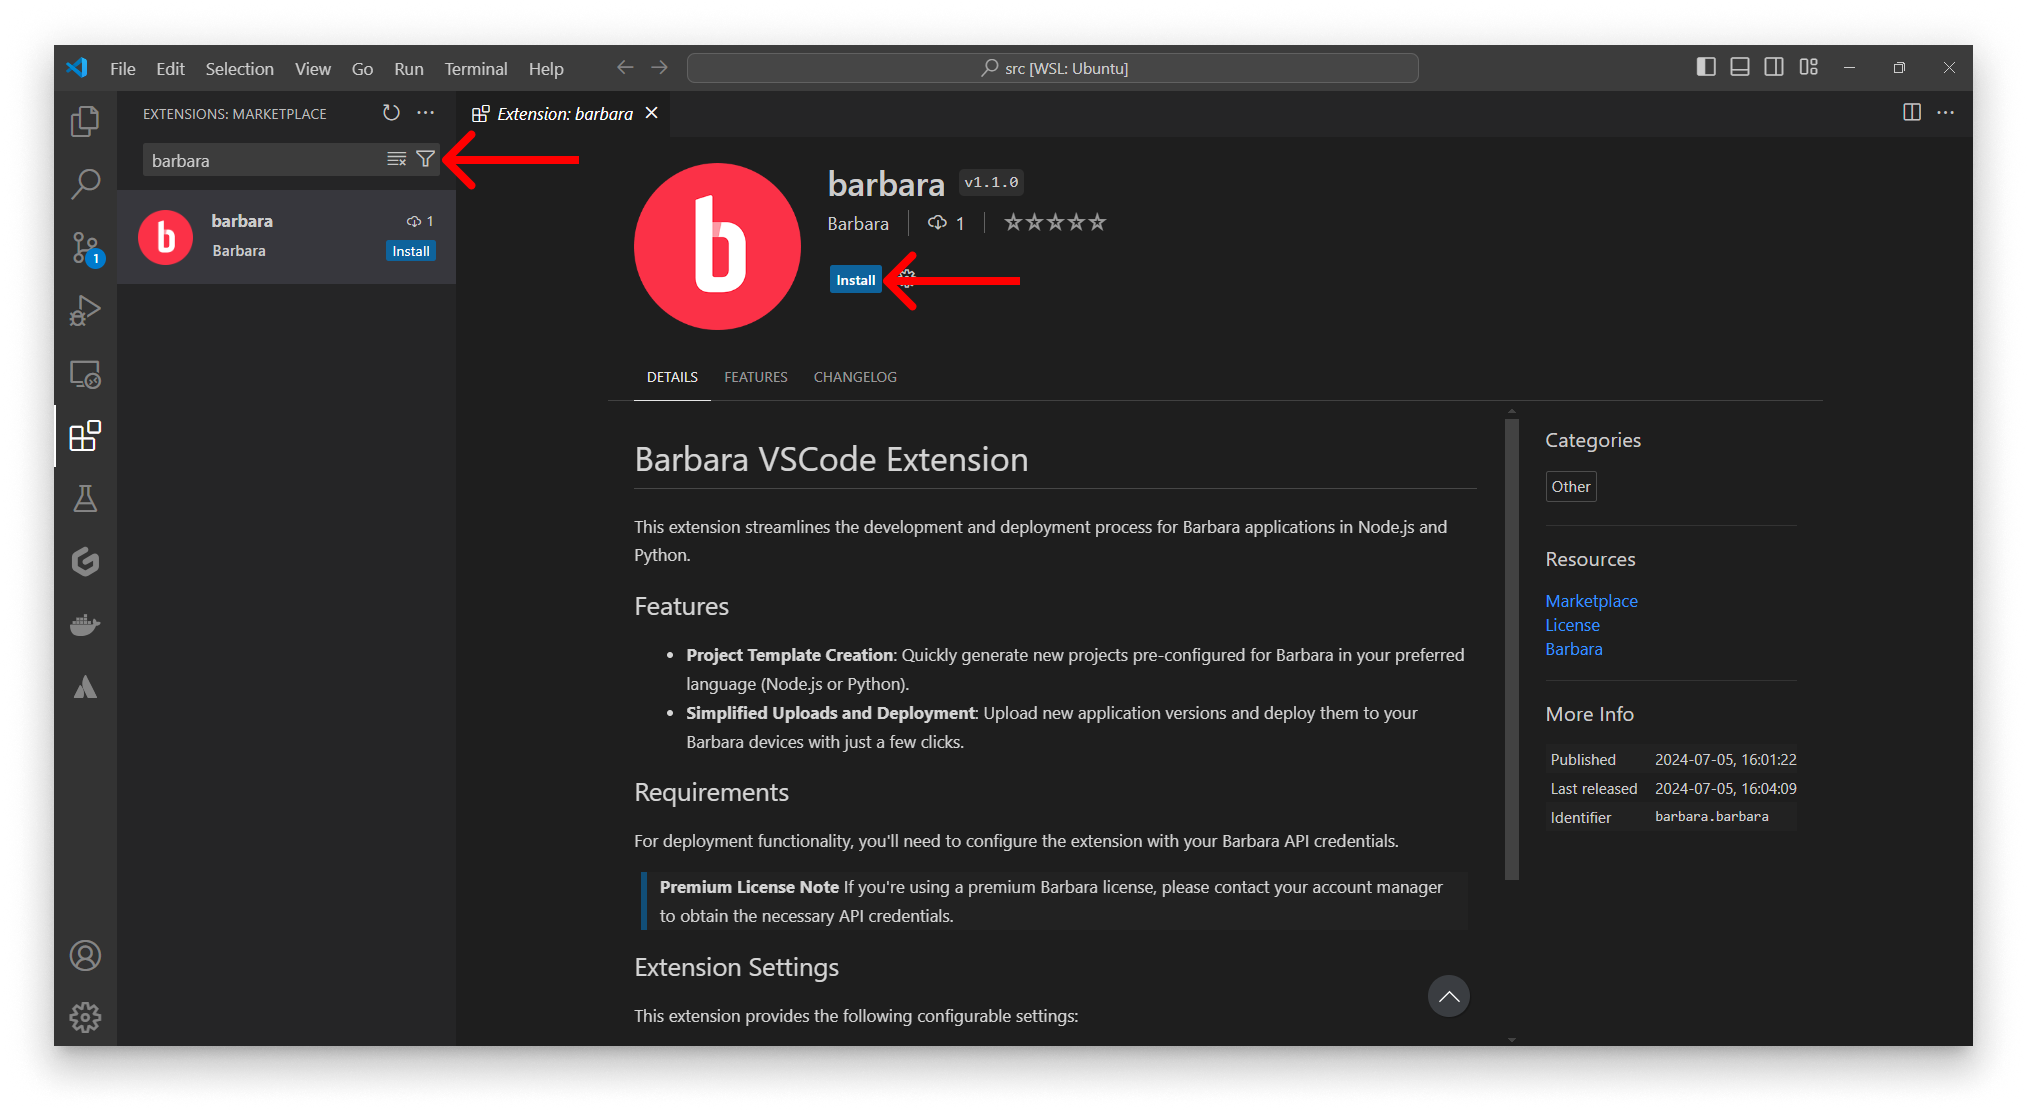
Install the Barbara extension
- Open Extension Settings from the gear icon next to the installed extension.
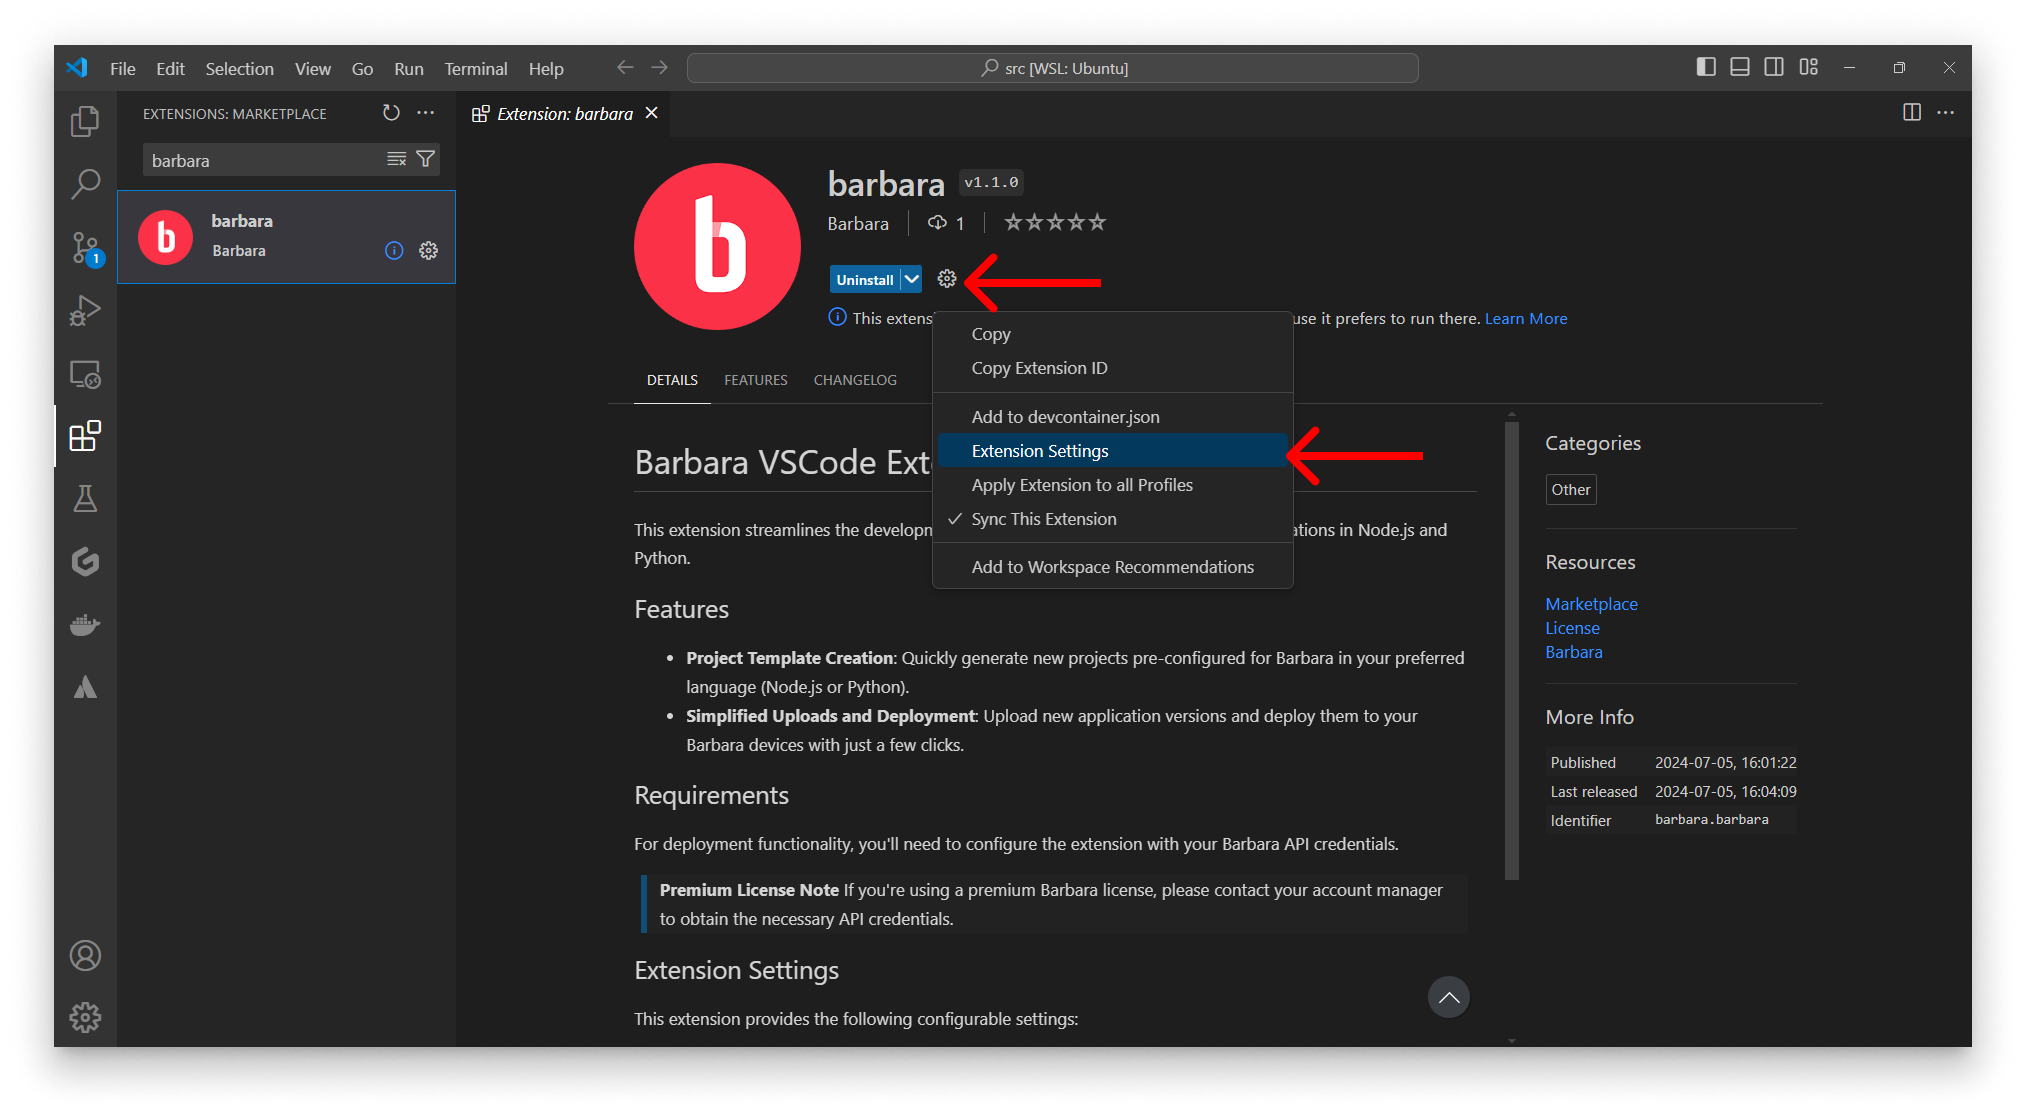
Open extension settings
- Fill in:
Client ID— provided by the Barbara support team.Client Secret— provided by the Barbara support team.Barbara Panel User— your Panel account email.Barbara Password— your Panel account password.
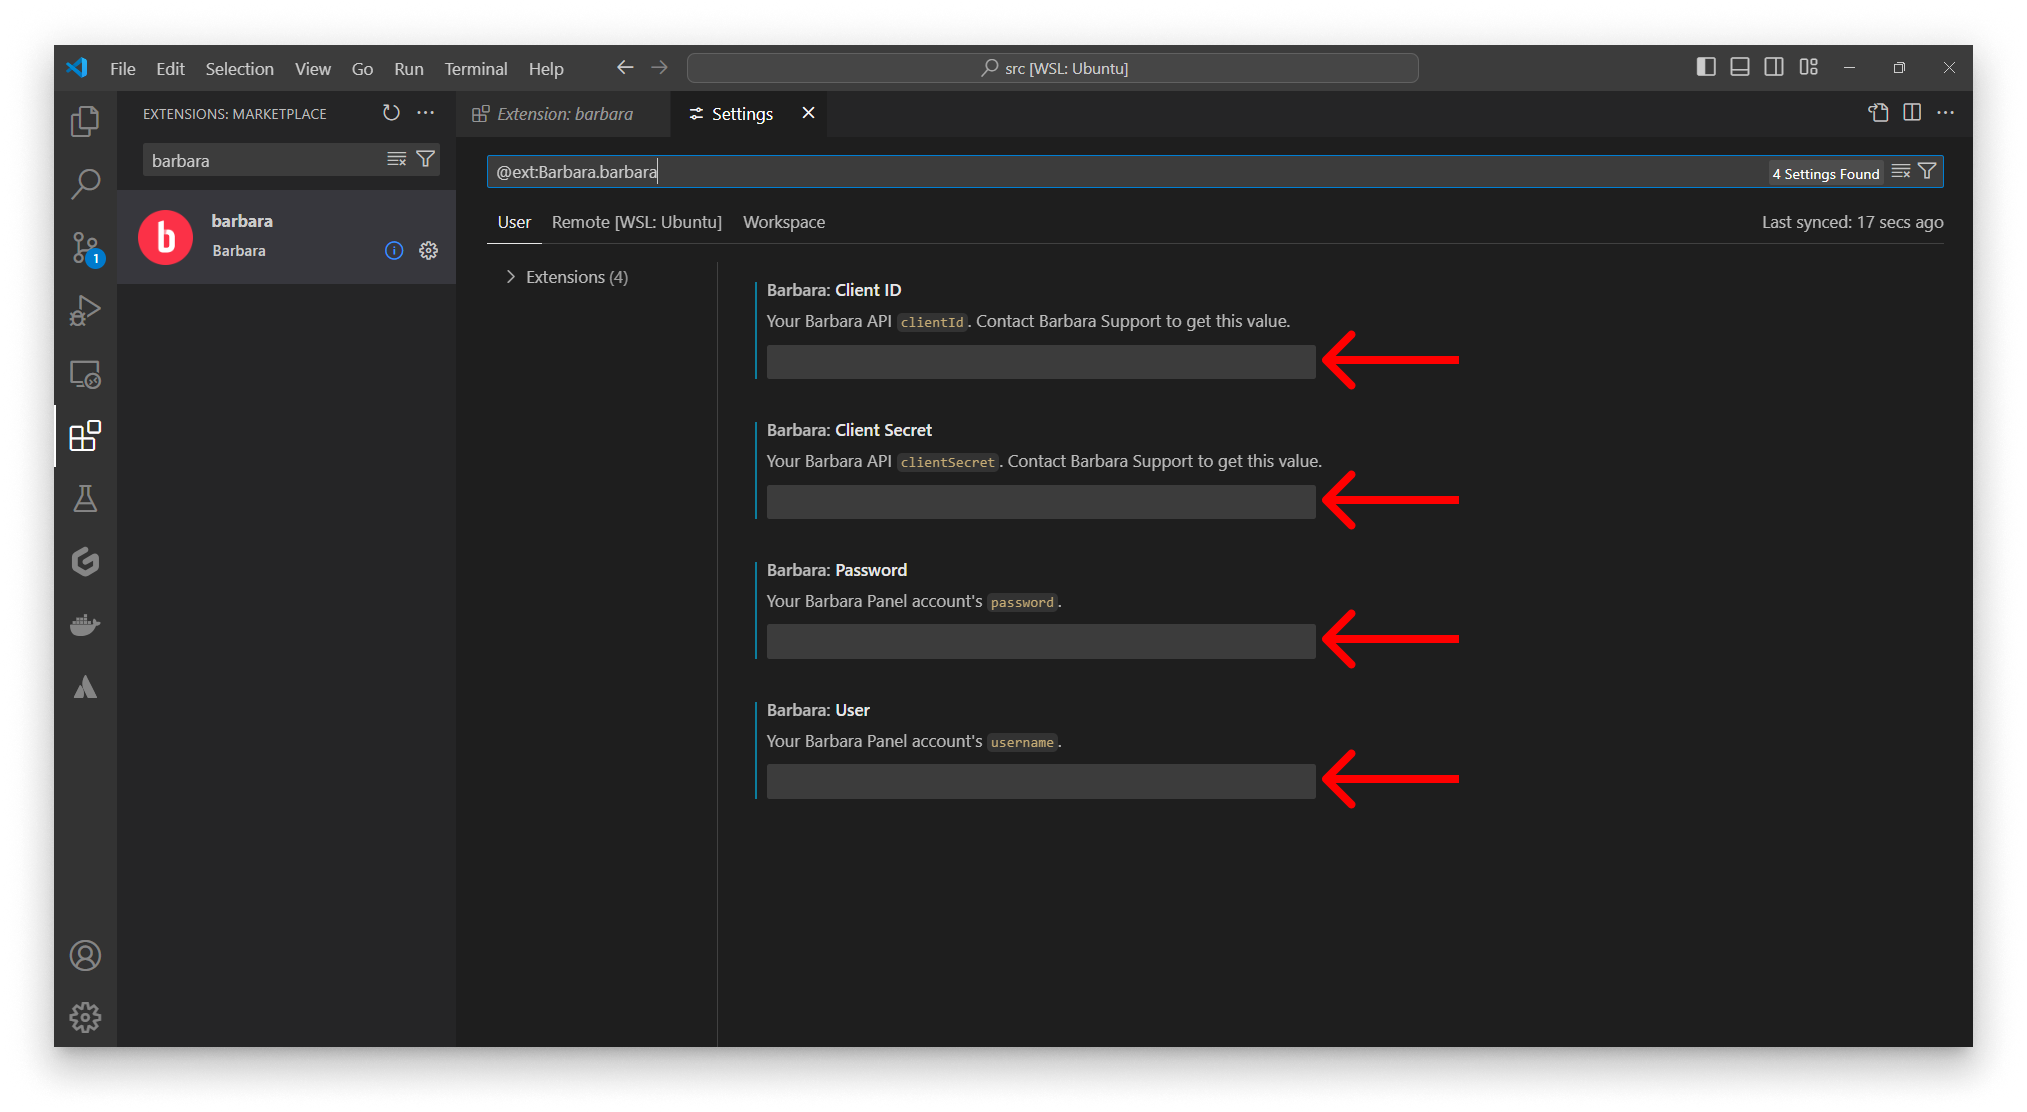
Configure the extension parameters
-
Verify the install by opening the Command Palette (
Ctrl+Shift+P/Cmd+Shift+P) and typingBarbara. You should see the three commands the extension contributes:Barbara: Upload to Panel LibraryBarbara: Create a Python boilerplateBarbara: Create a NodeJS boilerplate
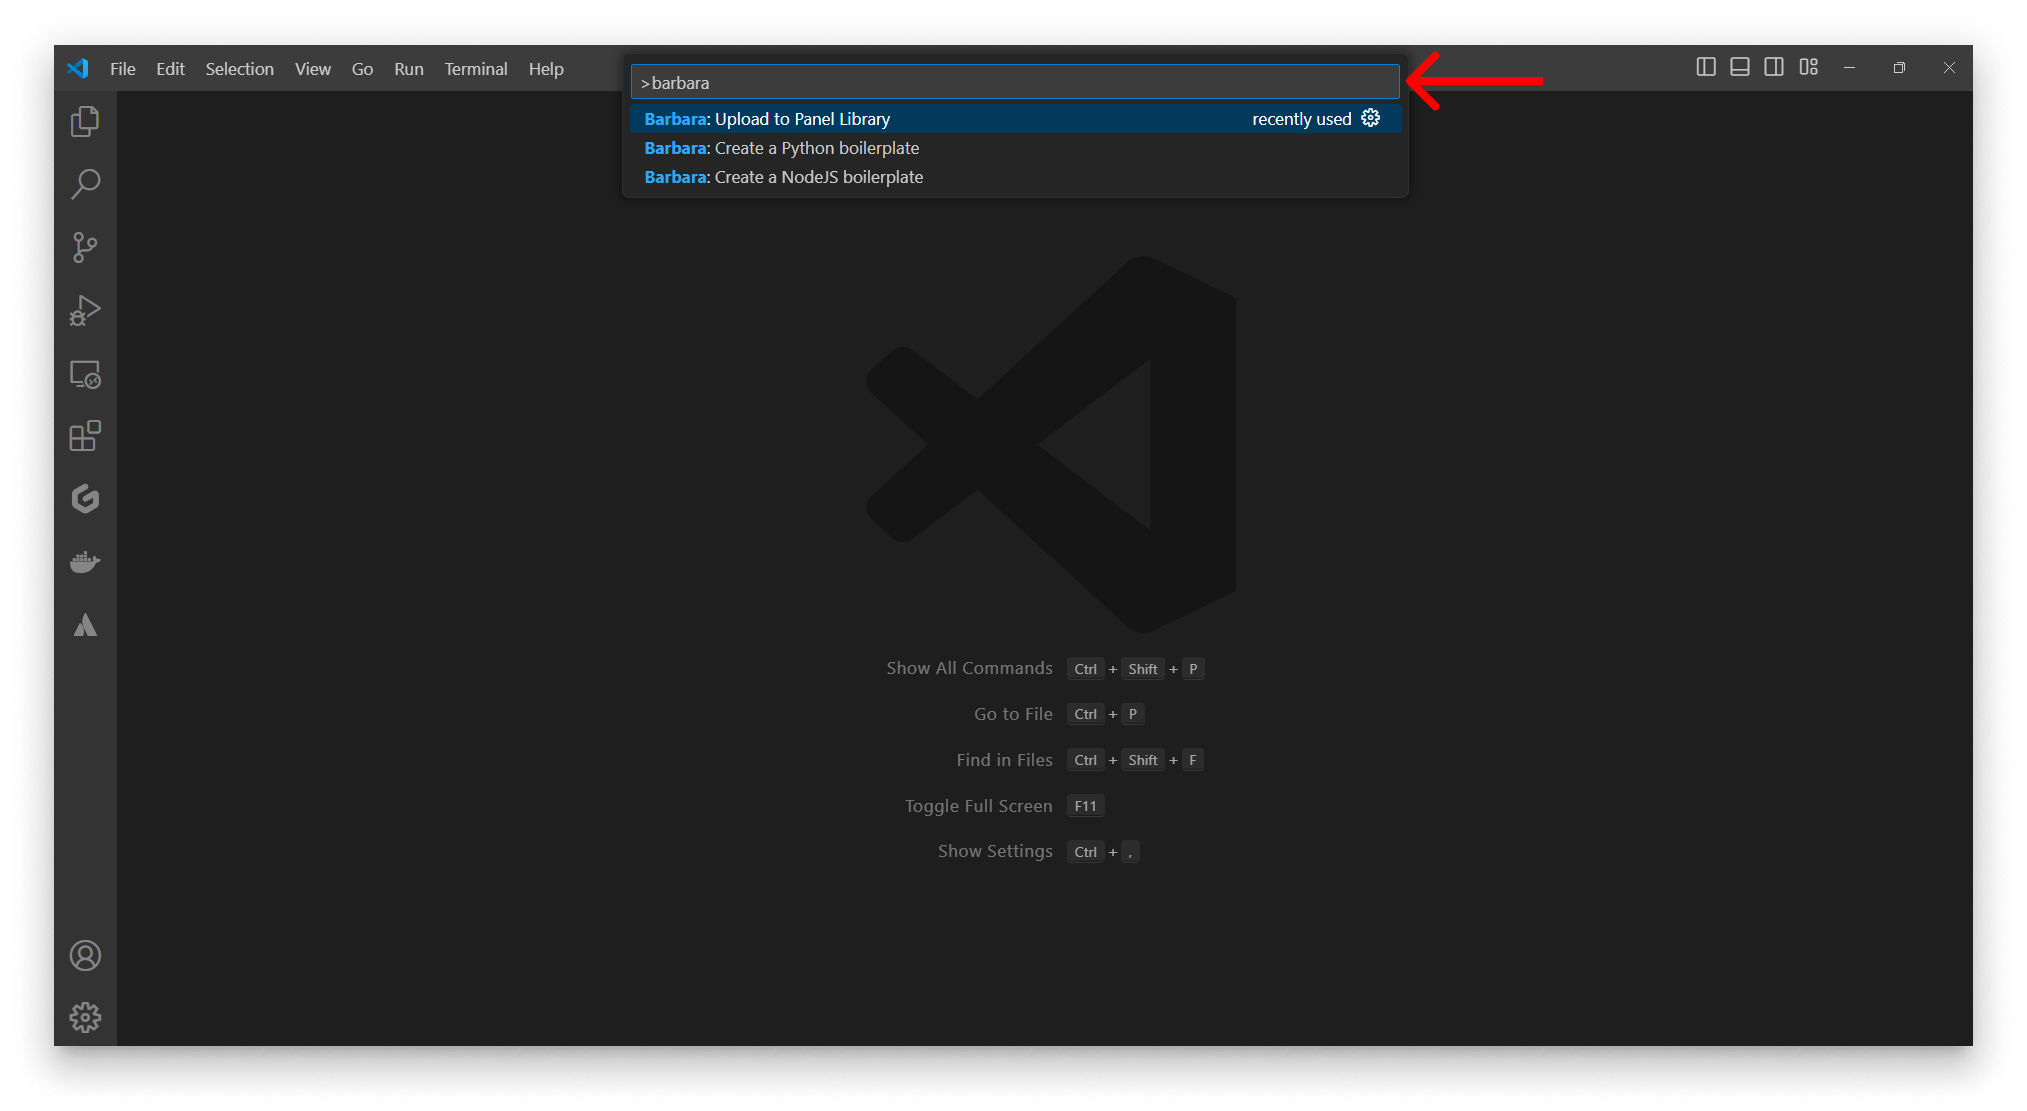
Barbara commands in the Command Palette
Scaffold a new project
The extension can generate a ready-to-deploy boilerplate for Node.js or Python.
- Open the folder where you want the project in VS Code.
- From the Command Palette, run Barbara: Create sample project Python or Barbara: Create sample project NodeJS.
- Pick Yes when prompted to create the project in a sub-folder (recommended).
- Open the new folder in the Explorer.

Node.js boilerplate structure
The boilerplate contains:
| File / folder | Purpose |
|---|---|
docker-compose.yml | Production-grade compose file for deployment to the edge node. |
docker-compose_dev.yml | Development variant — bind-mounts source code and adds debug env vars. |
barbarasecrets.env | Secrets injected into the container at runtime. |
appconfigDev/appconfig.json | Sample App Config payload for local development. |
appconfigDev/globalconfig.json | Sample Global Config payload for local development. |
imageSource/ | Application source code, plus the Dockerfile that builds it. |
README.md | Per-project documentation. |
- To expose communication ports, declare them in
docker-compose.ymlunder the service'sports:key. - To bundle extra files in the image, add them through the
Dockerfile'sCOPYinstructions.
Upload a new application version
The extension pushes the boilerplate (or any folder with a docker-compose.yml) as a new version of an existing application in your Panel Library.
The extension uploads new versions of an existing app. To create a brand-new application entry, do that step in Panel first — see App Library.
- Open the Command Palette and run Barbara: Upload to apps. The extension lists every application in your Library. Pick the target and click Next.
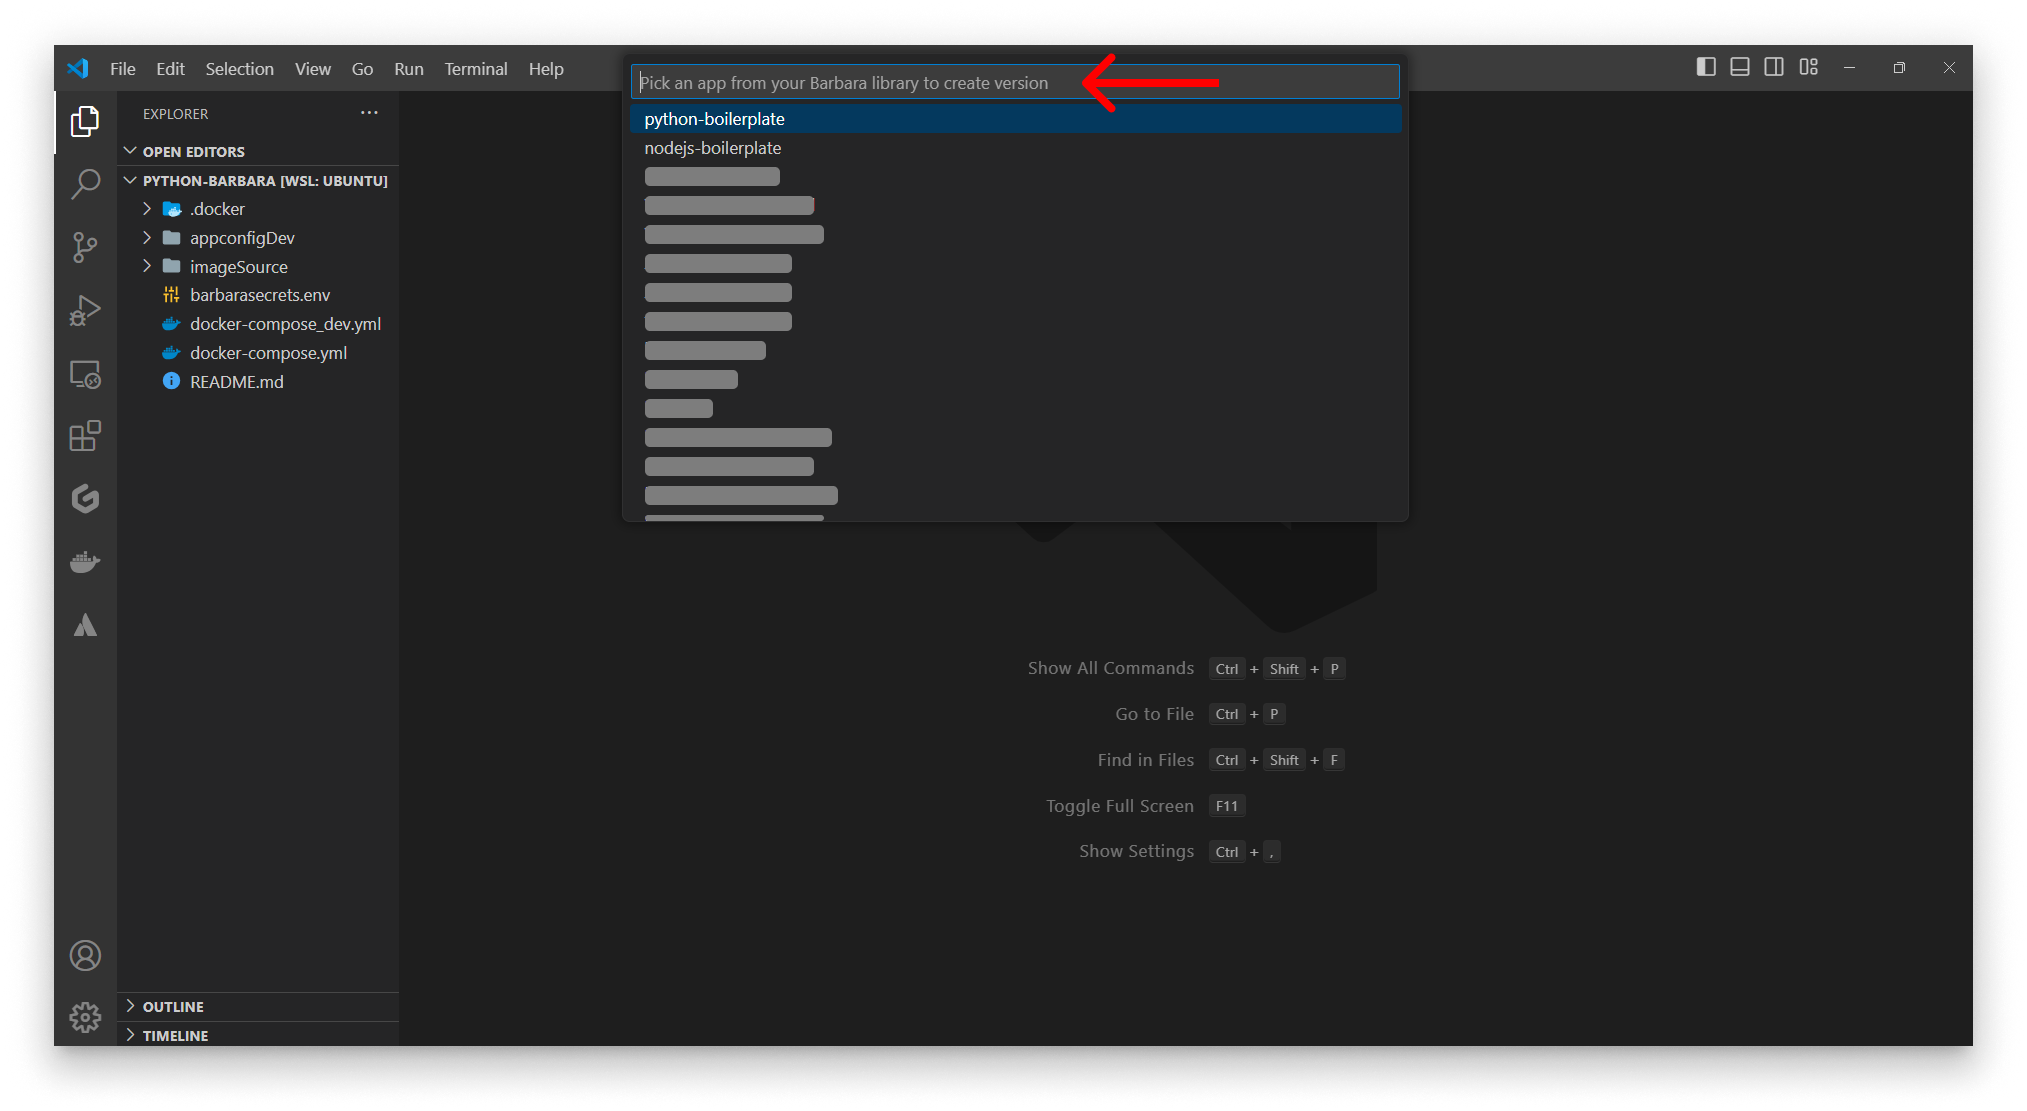
Pick the target application
- Enter the version name (for example
1.0.0) and confirm.
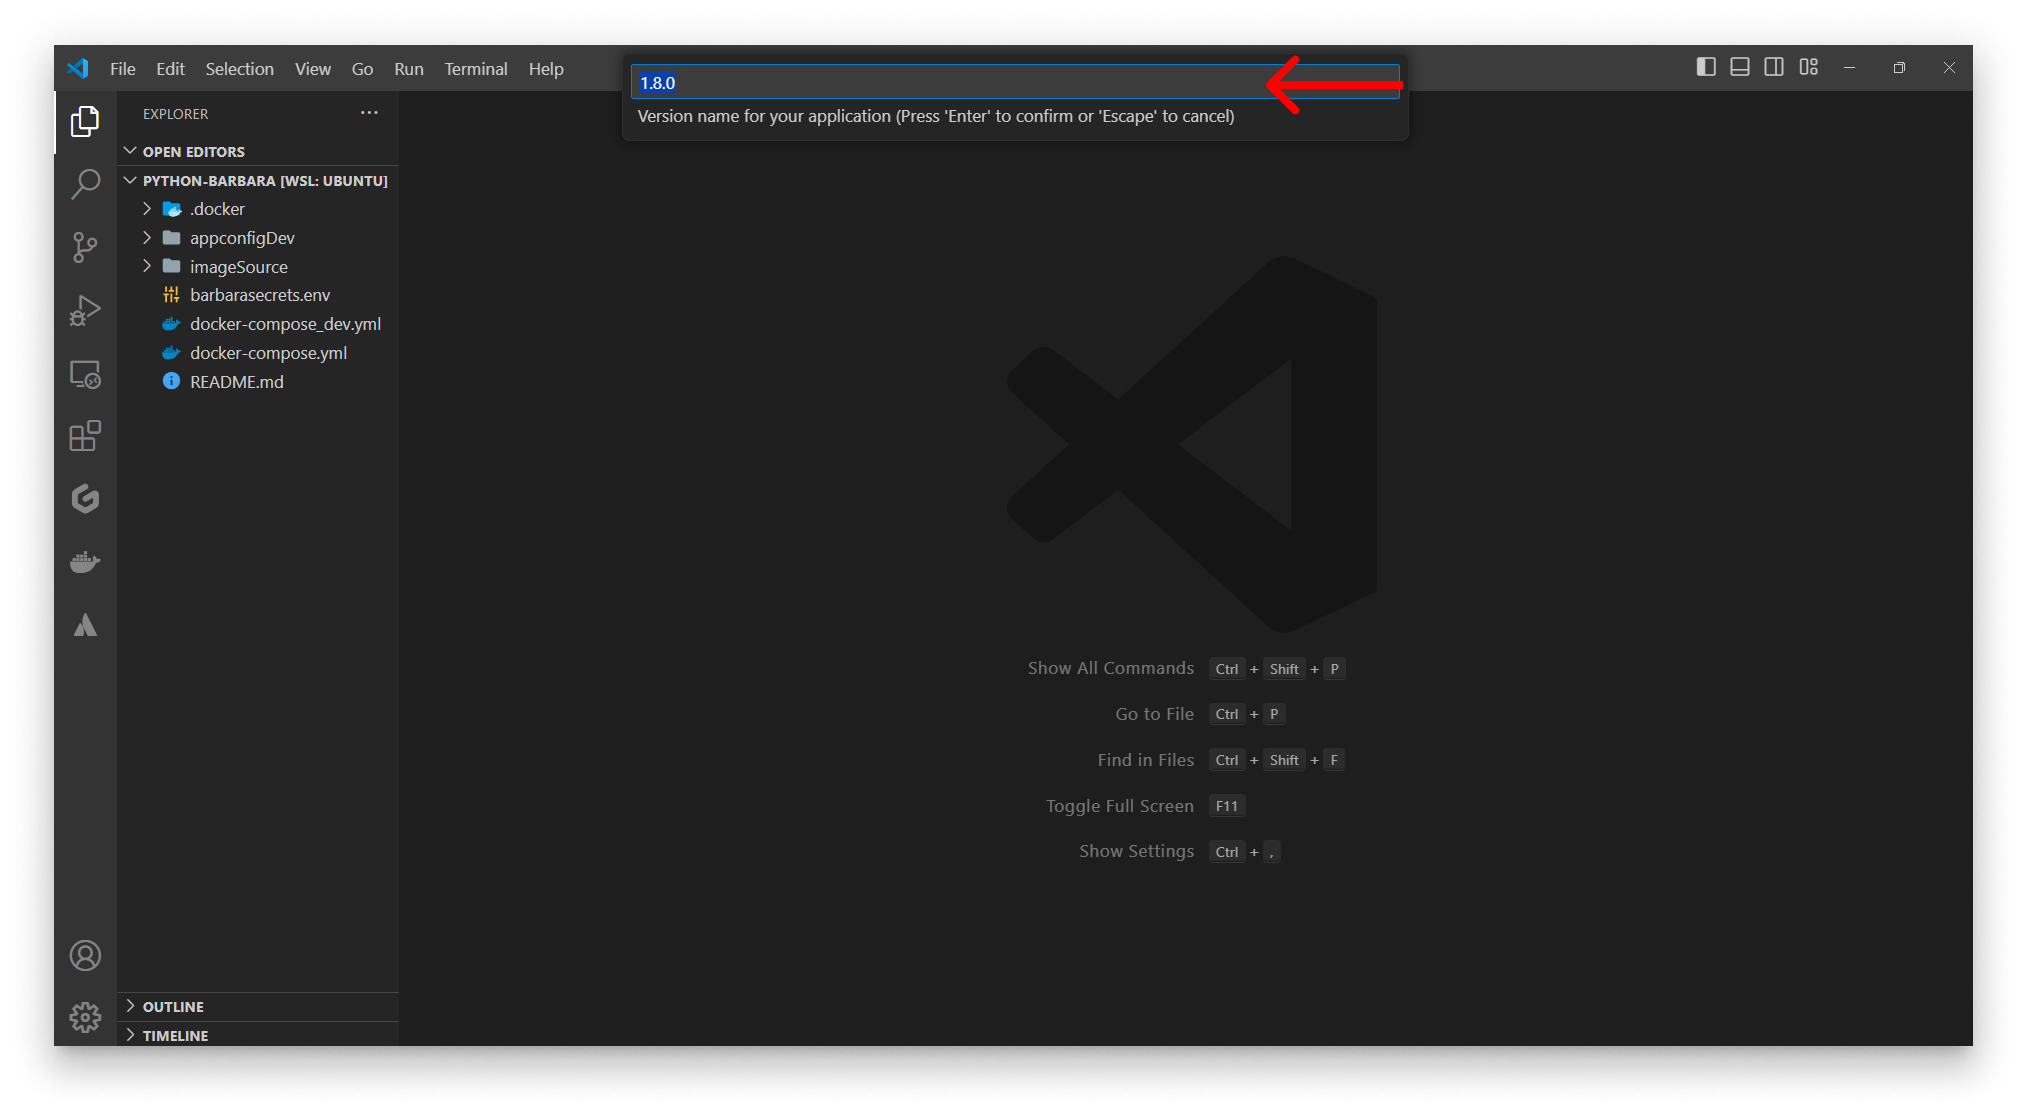
Enter the version name
- Add release notes (optional).
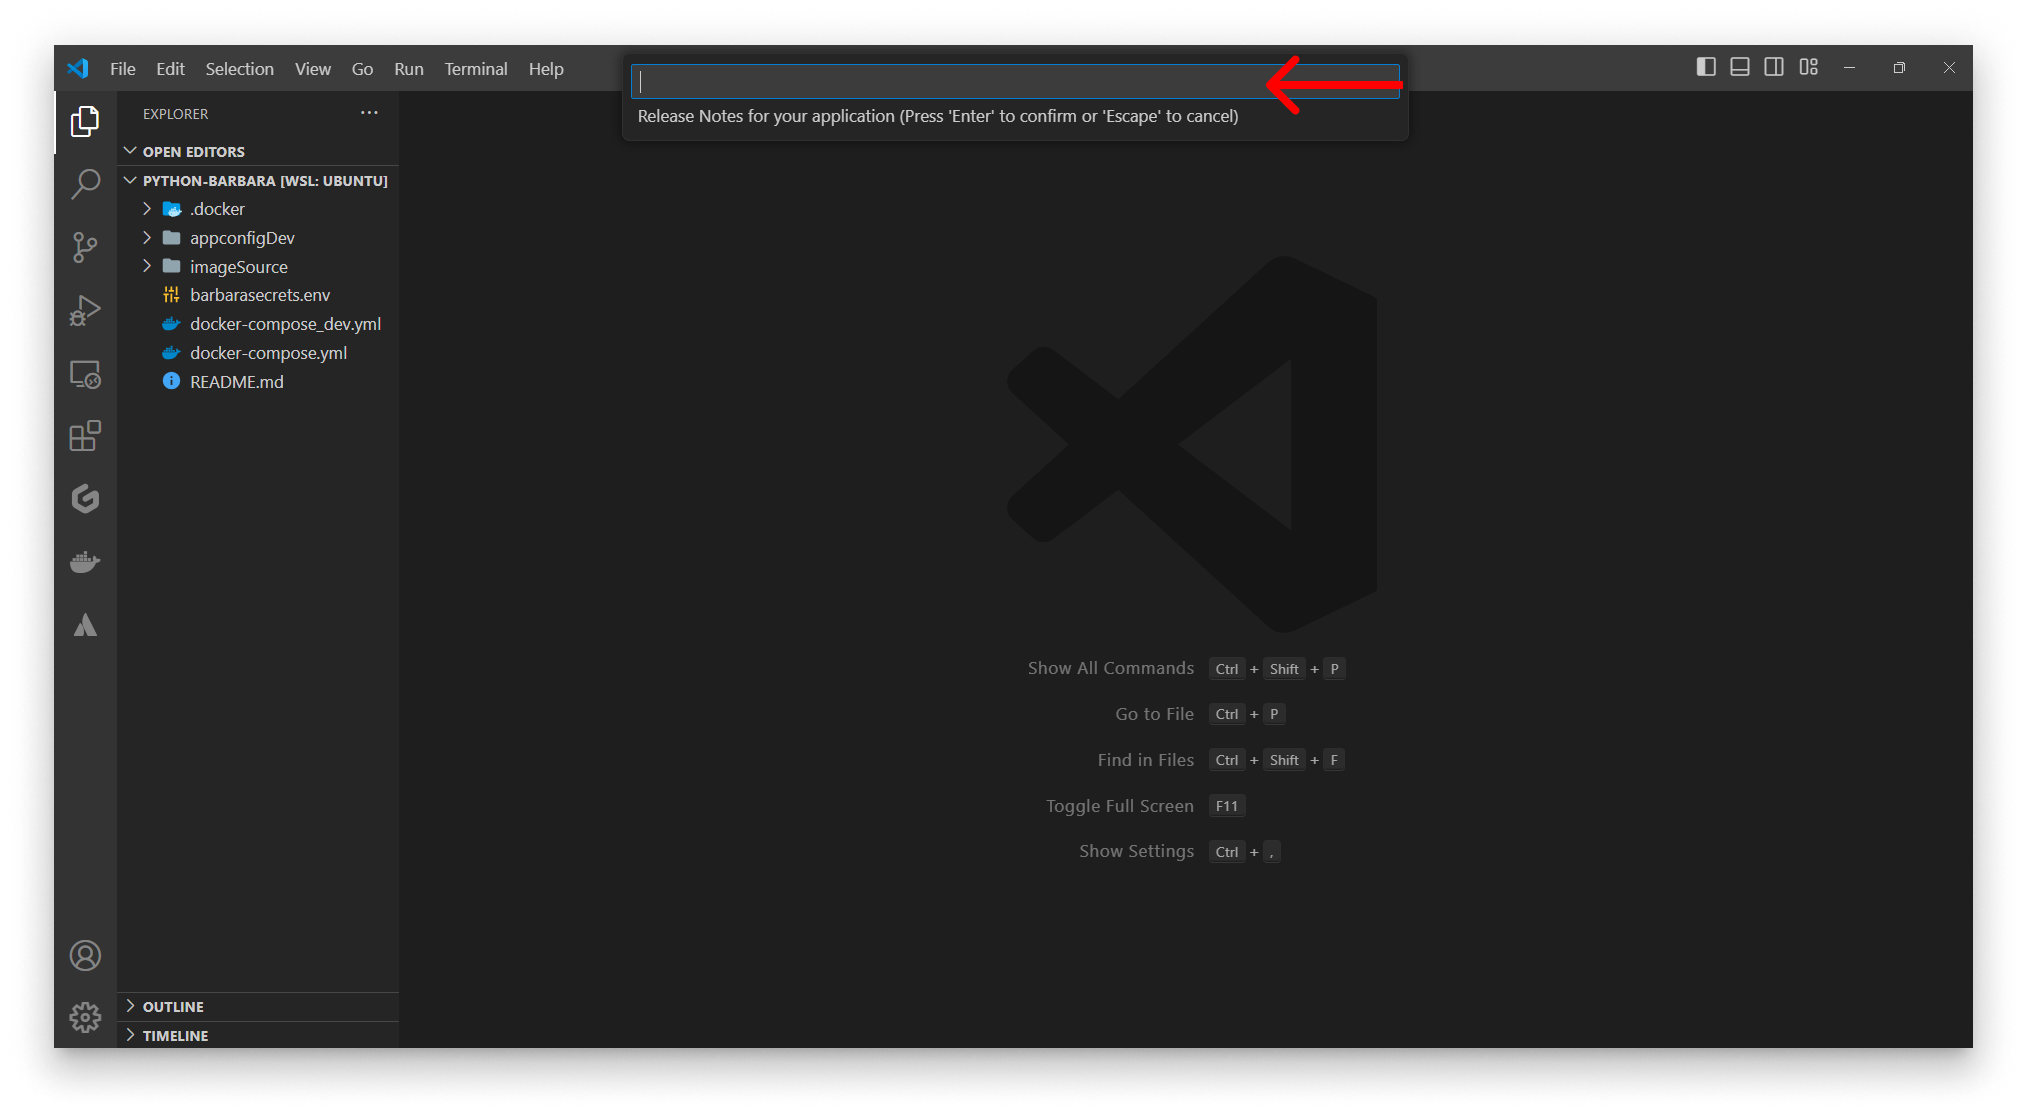
Add release notes
- Pick the folder to upload — the extension lists the sub-folders that contain a
docker-compose.yml.
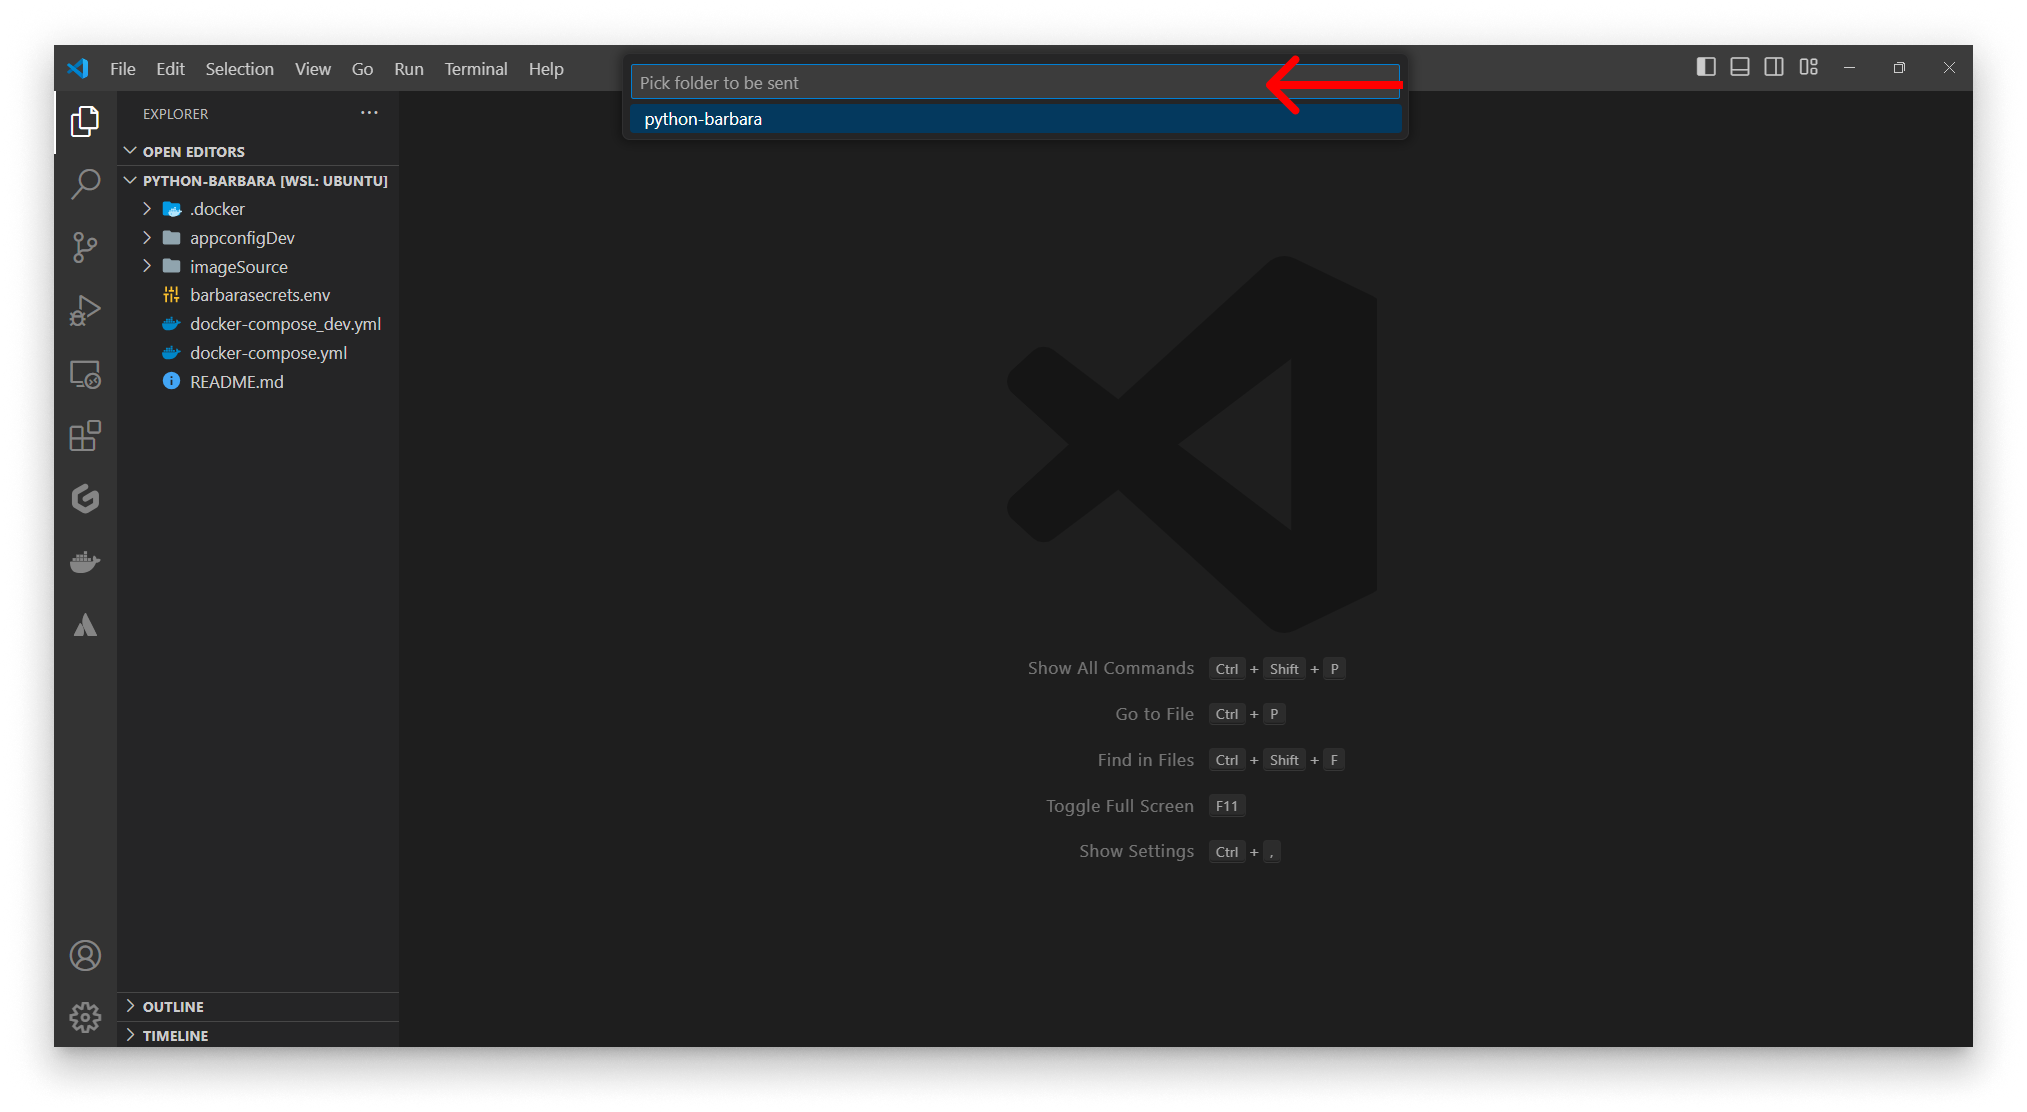
Pick the folder to upload
- After the upload finishes, the extension asks whether to deploy the new version to a node.
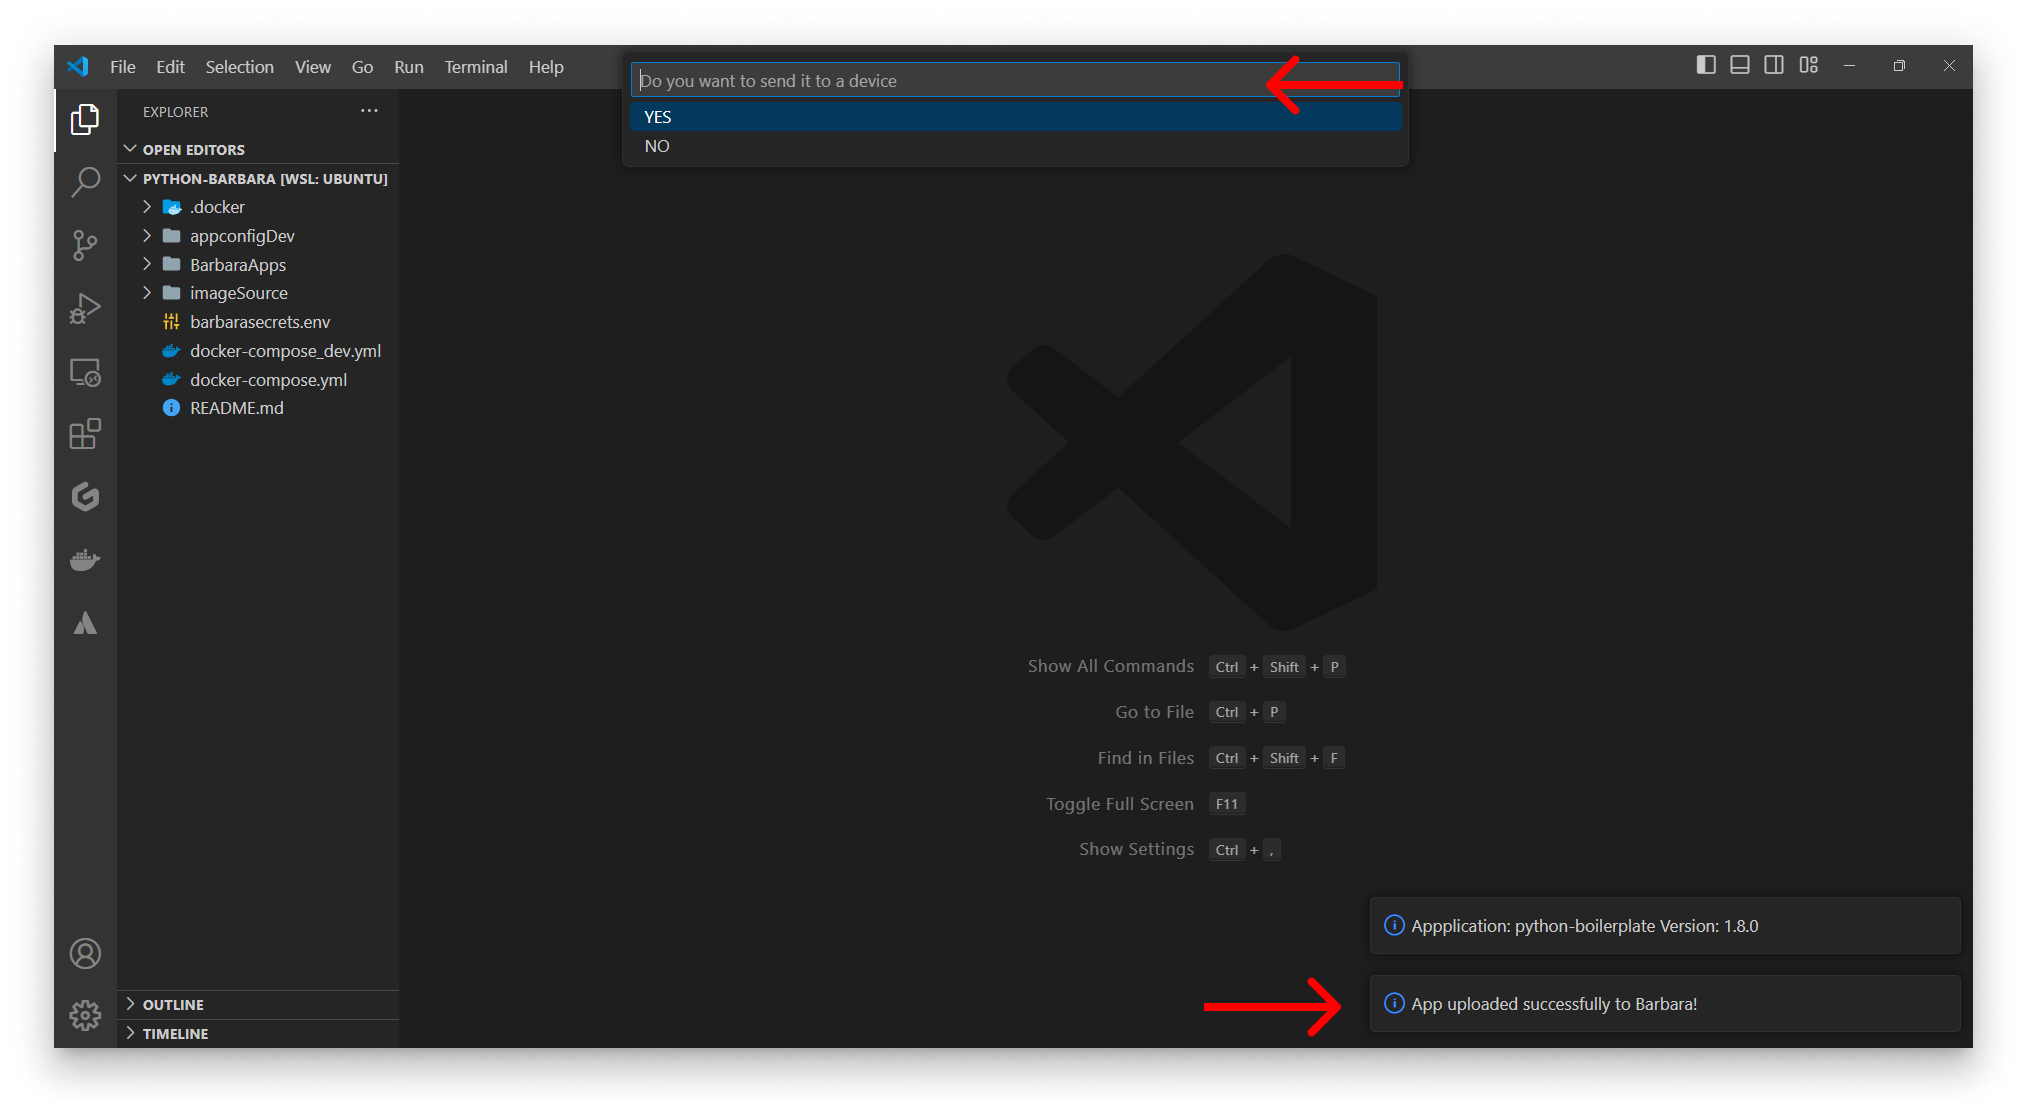
Deploy the new version?
- No — finish here; the version is in the Library, deploy from Panel whenever you want.
- Yes — pick the target node from the list.
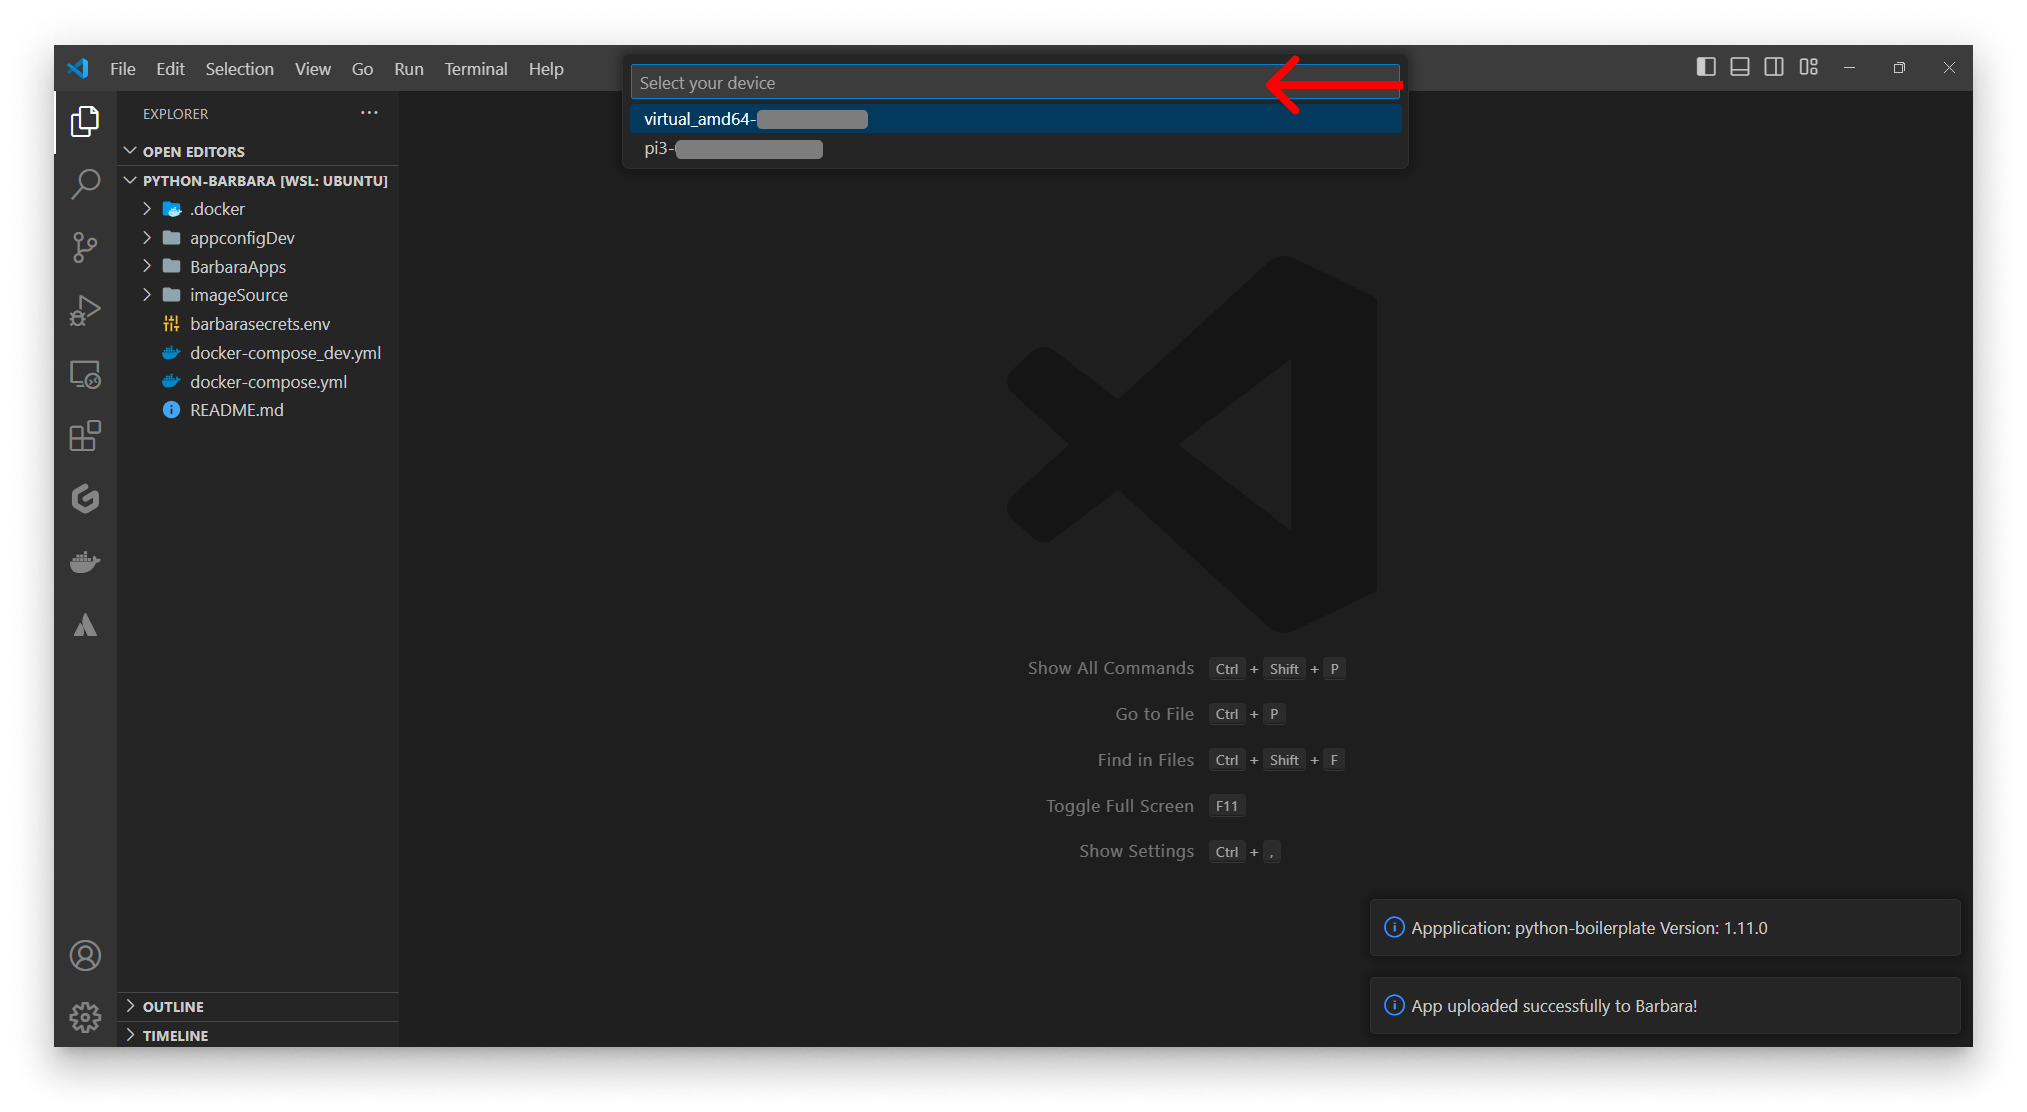
Pick the target node
After a successful upload, the extension prompts a follow-up dialog:
- Repeat action — re-uploads the same folder with an auto-incremented version number and re-deploys to the same node. Ideal for tight development loops.
- Start from the beginning — full flow from folder picker onward.
Summary
The Barbara VS Code extension shortens the inner loop of edge development: scaffold a project, push a new version of it to the Library, and deploy that version to a node — all from the Command Palette. For the brand-new-application flow and for everything Panel does that the extension doesn't, fall back to the App Library reference.