Serve a PyTorch model with Triton
This article refers to Platform v3.0.0. The current Platform version is v3.3.0.
Overview
This tutorial walks you through deploying a PyTorch model on a Barbara edge node, served by NVIDIA Triton Inference Server. We use ResNet18 as the example — a small, well-known image classifier — but the same workflow applies to any TorchScript-exported model. The three phases are:
- Prepare the model — export ResNet18 to TorchScript and write its Triton
config.pbtxt. - Deploy it — upload the zipped model to the App Library, then deploy it to an edge node with the model wizard.
- Run inference — send images to the model's REST endpoint and interpret the predictions.
ResNet18 is a small image-classification network. It is good enough to recognise the 1000 ImageNet classes and small enough to fit comfortably on most edge hardware.
The full source code for this tutorial — model export, payloads, Jupyter notebook — lives at Barbaraedge/resnet18_pytorch_tutorial on GitHub.
1. Prepare the model
Export ResNet18 to TorchScript
Install PyTorch on your laptop before running this script.
import torch
from torchvision import models

# Download the pre-trained ResNet18 model
model = models.resnet18(weights=True)

# Switch to evaluation mode
model.eval()

# Option 1: trace the model with a sample input
dummy_input = torch.randn(1, 3, 224, 224)
traced_script_module = torch.jit.trace(model, dummy_input)

# Option 2: scripted export (more flexible, supports control flow)
script_module = torch.jit.script(model)

# Save the TorchScript artefact
torch.jit.save(traced_script_module, "resnet18_traced.pt")
# or
torch.jit.save(script_module, "resnet18.pt")
The script produces a resnet18_traced.pt (or resnet18.pt) file — the TorchScript artefact Triton will load.
Write config.pbtxt
Triton needs a config.pbtxt that describes the model — name, format, batch size, and the shape and type of each input and output. A minimal config for ResNet18 looks like this:
name: "resnet"
platform: "pytorch_libtorch"
max_batch_size: 1
input [
    {
        name: "INPUT__0"
        data_type: TYPE_FP32
        dims: [3, -1, -1]
    }
]
output [
    {
        name: "OUTPUT__0"
        data_type: TYPE_FP32
        dims: [1]
    }
]
| Field | Accepted values | Description |
|---|---|---|
name | string | Model name. Must match the folder name the model lives in. |
platform | pytorch_libtorch, tensorflow_savedmodel, onnxruntime_onnx | Backend that serves the model. |
max_batch_size | integer | Maximum batch size Triton may build. |
input / output name | string | Layer name. |
input / output data_type | TYPE_BOOL, TYPE_INT8, TYPE_UINT8, TYPE_INT16, TYPE_UINT16, TYPE_INT32, TYPE_UINT32, TYPE_INT64, TYPE_UINT64, TYPE_FP16, TYPE_FP32, TYPE_FP64, TYPE_STRING | Tensor element type. |
input / output dims | array of integers | Tensor shape. Use -1 for a variable dimension. |
Read the full Triton model configuration reference.
Package as a zip
Lay out the files in the folder structure Triton expects, then zip the top-level folder:
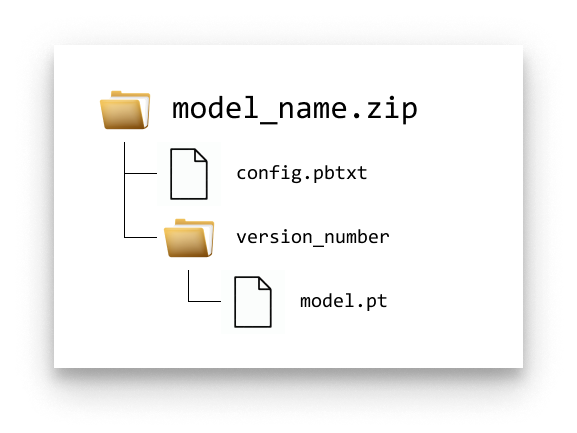
Triton model folder structure
You can download the ready-made package here: resnet.zip.
2. Upload the model to the App Library
- Open the App Library in Barbara Panel.
- Click New.
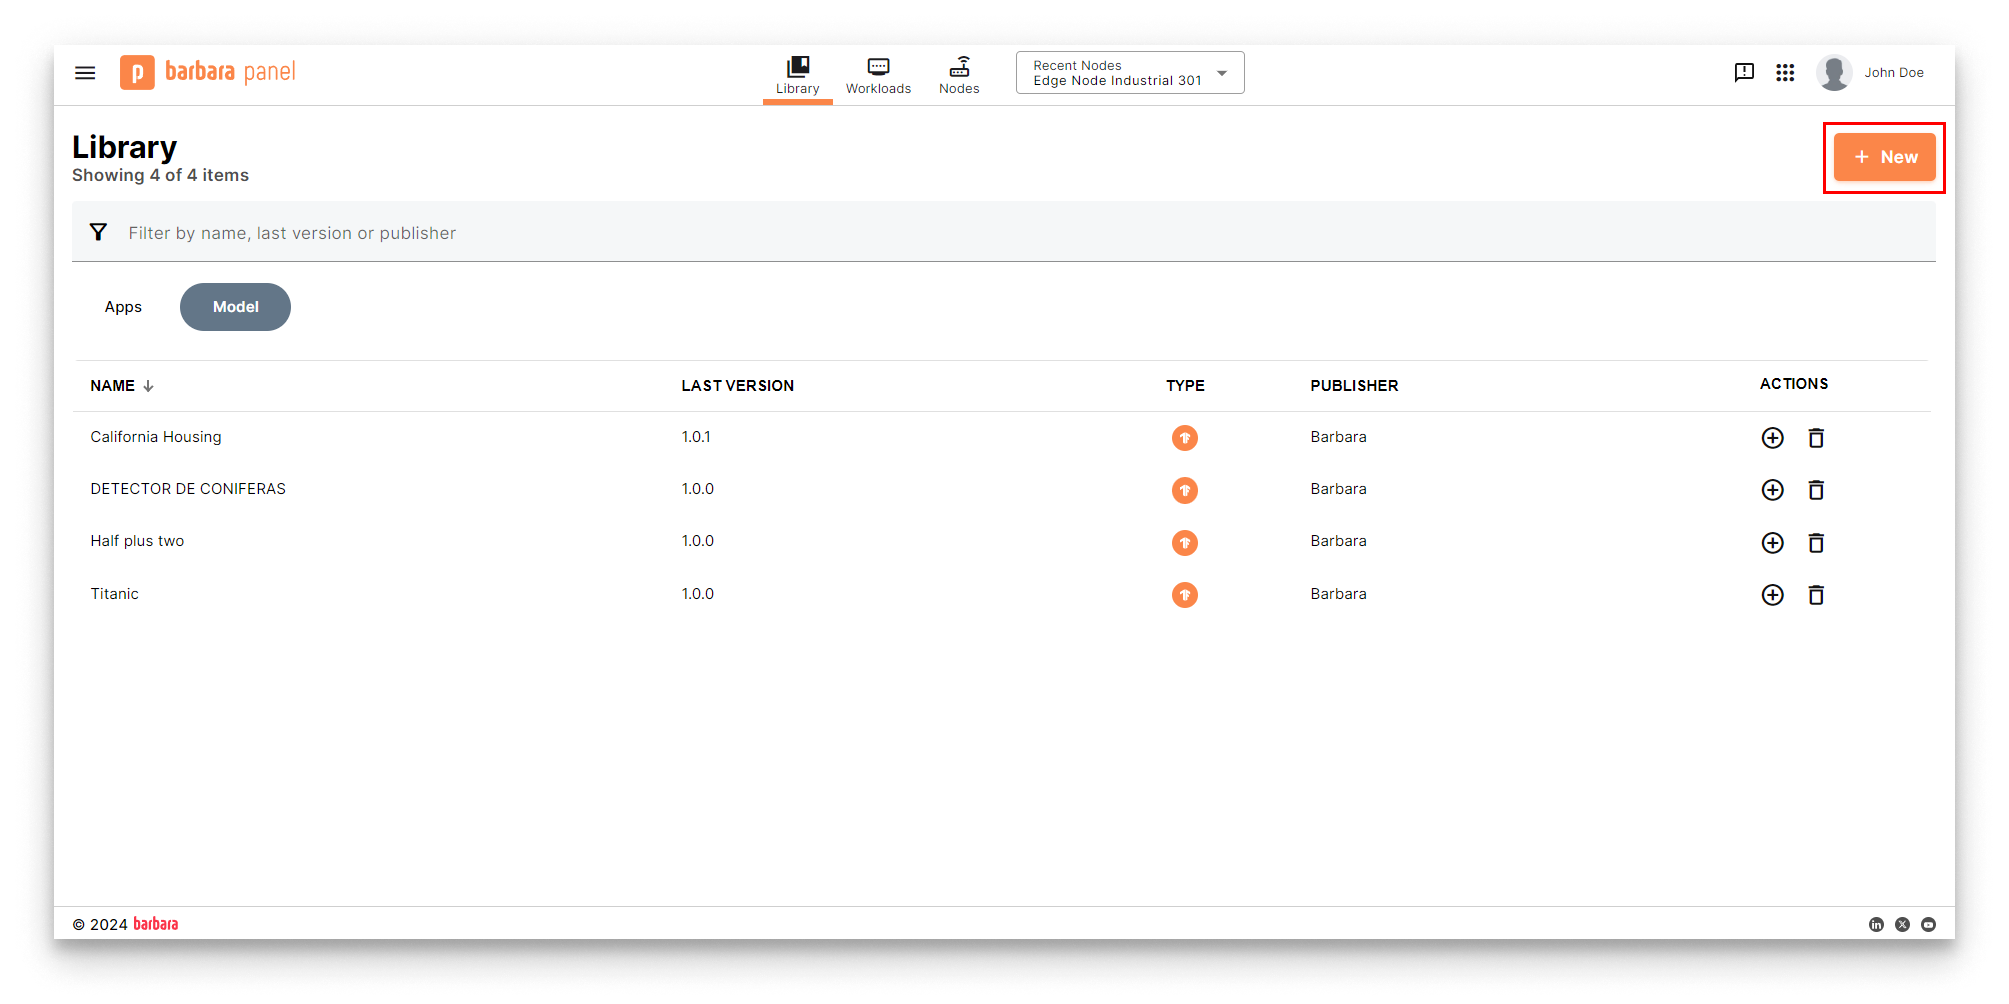
New model button
- Choose Model in the Select Library Item popup.
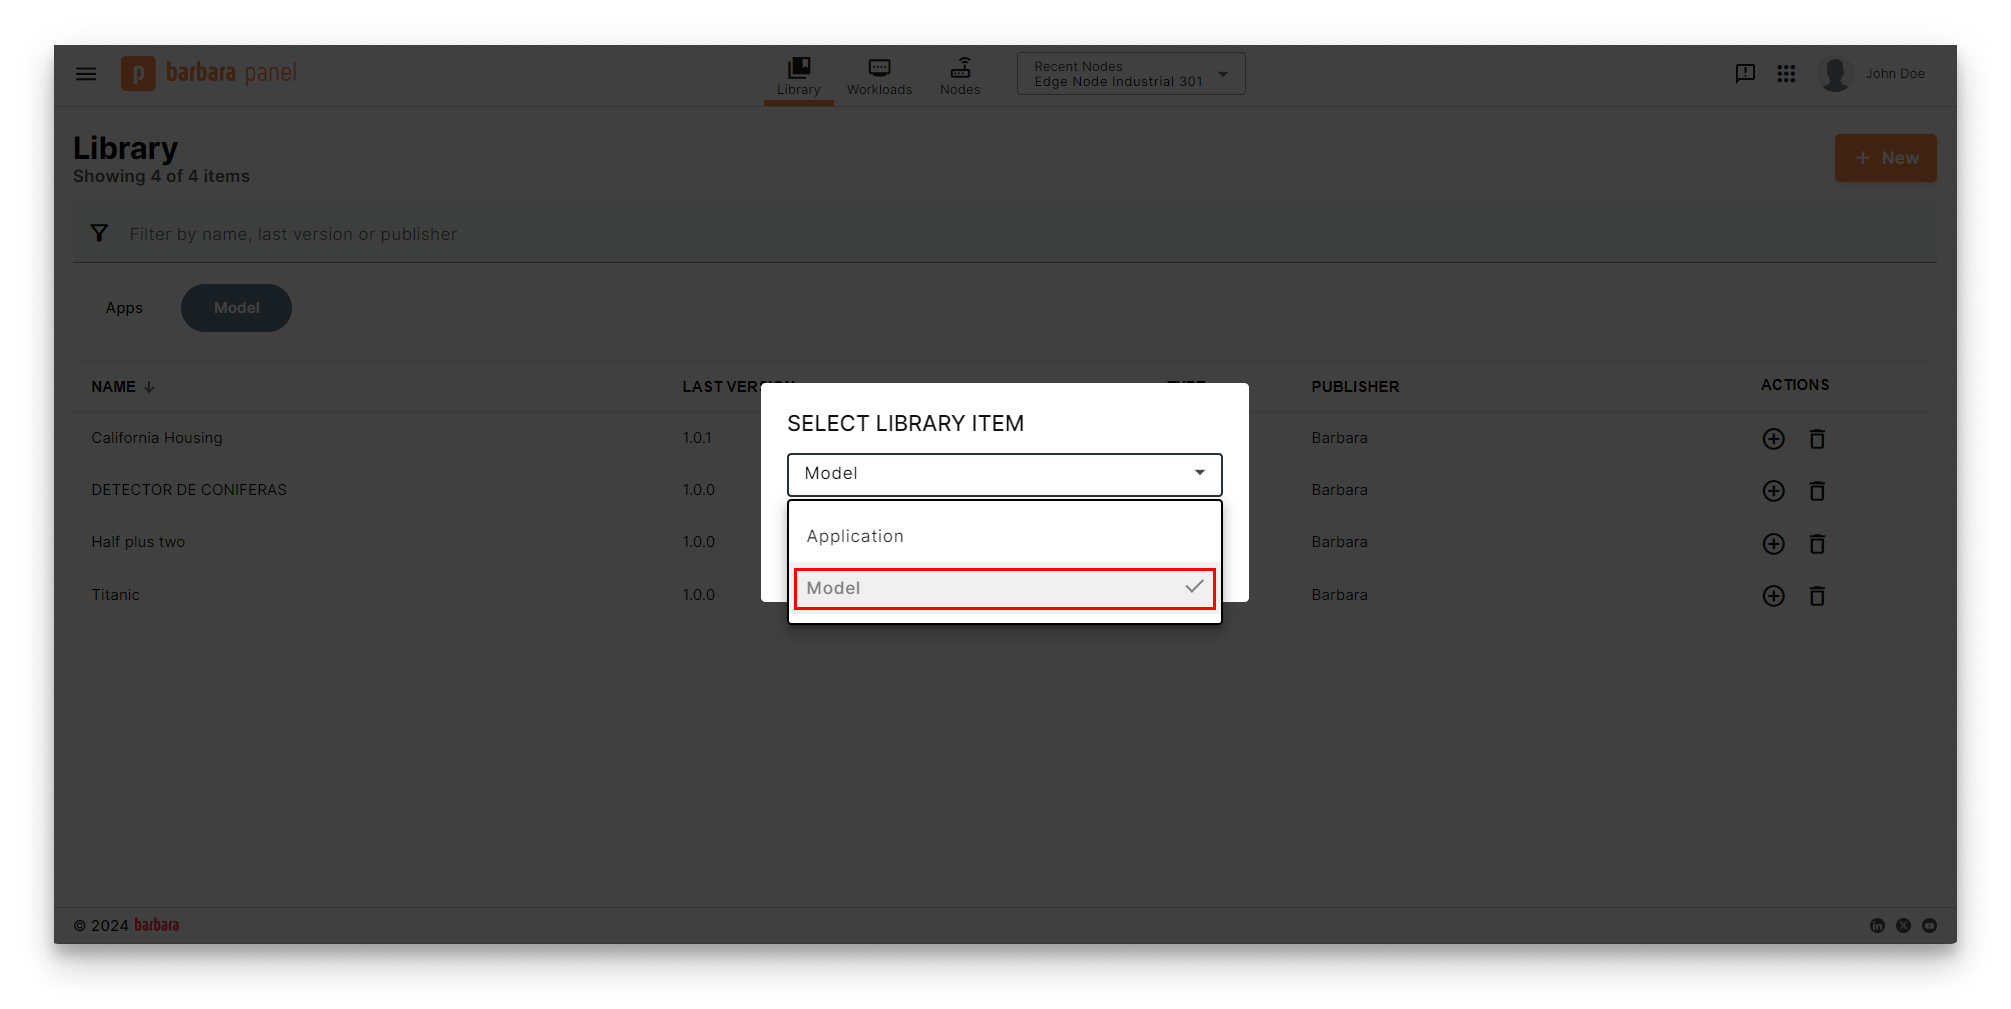
Select Library Item popup
- Name the model (for example,
ResNet18).
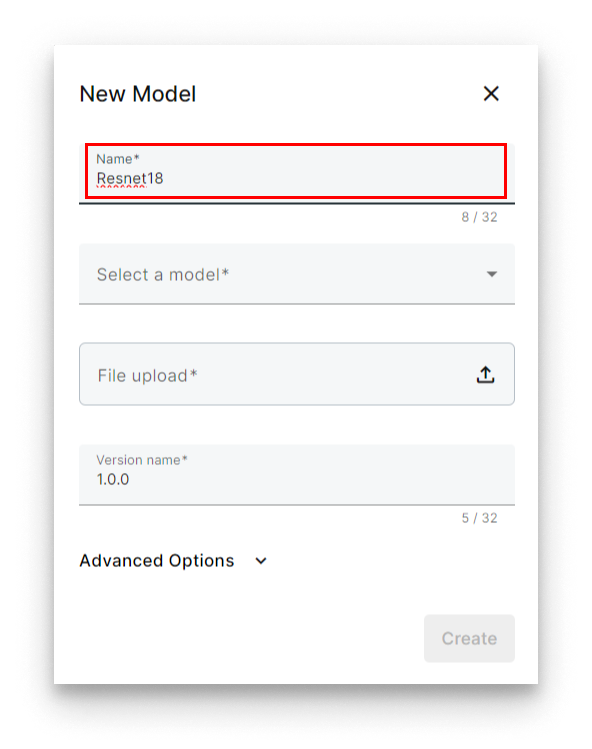
Name the model
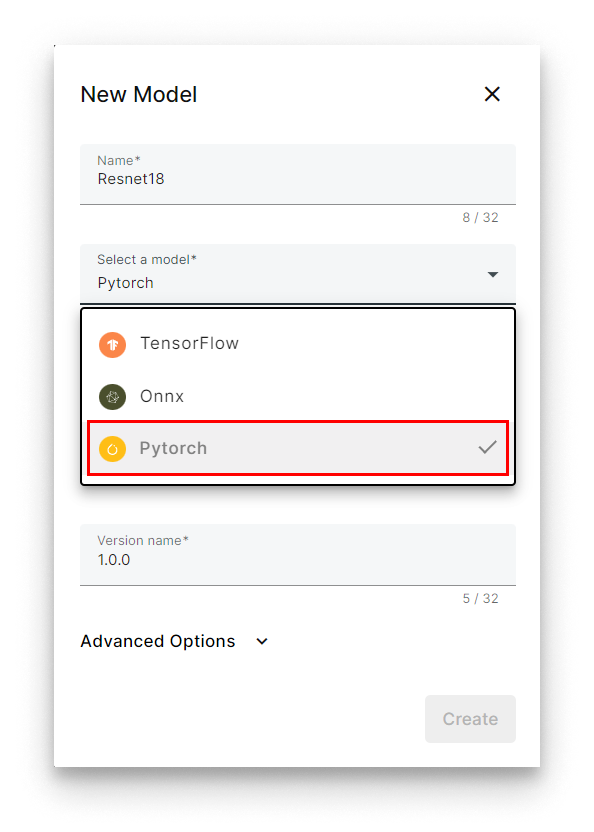
- Under Select a model, pick PyTorch. Panel will auto-select Triton as the serving engine.
Select PyTorch + Triton
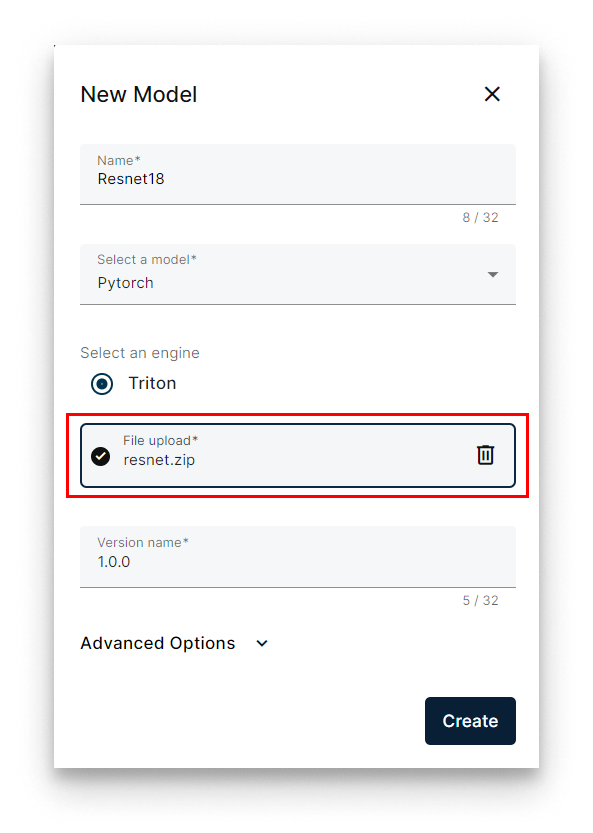
- Click Select file and upload the zip (
resnet.zip).
Select the model zip
- Set the version (for example,
1.0.0). - Optionally expand Advanced to add a description and release notes.
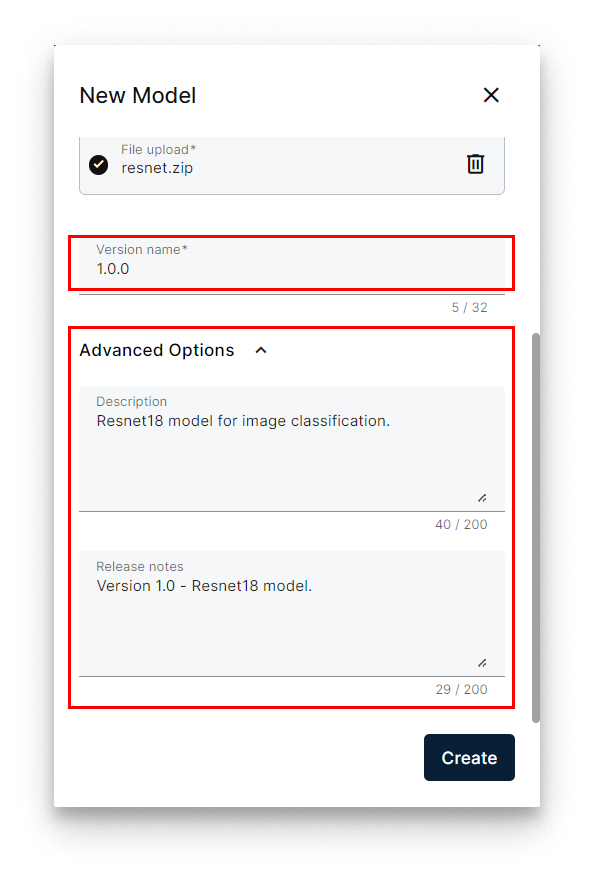
Set the version name
- Click Create.
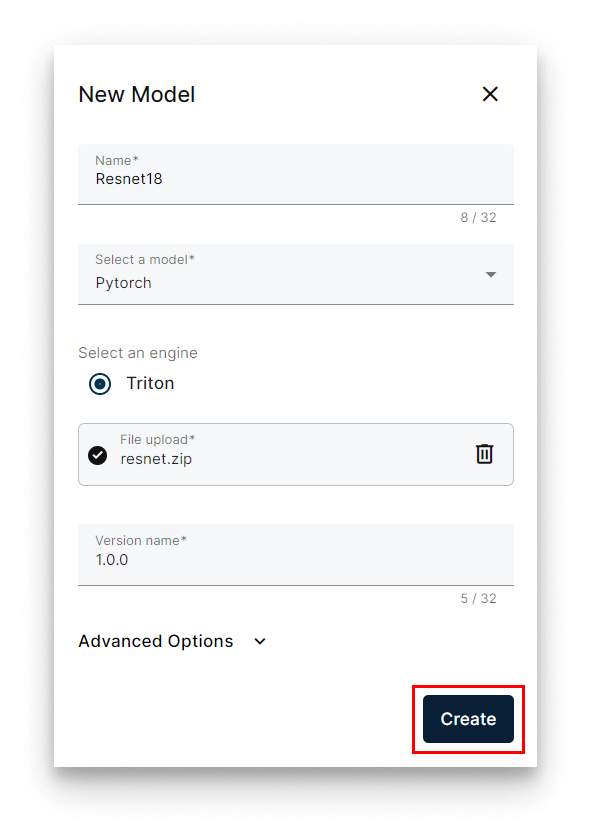
Create the model
The model appears under the Models tab of the Library.
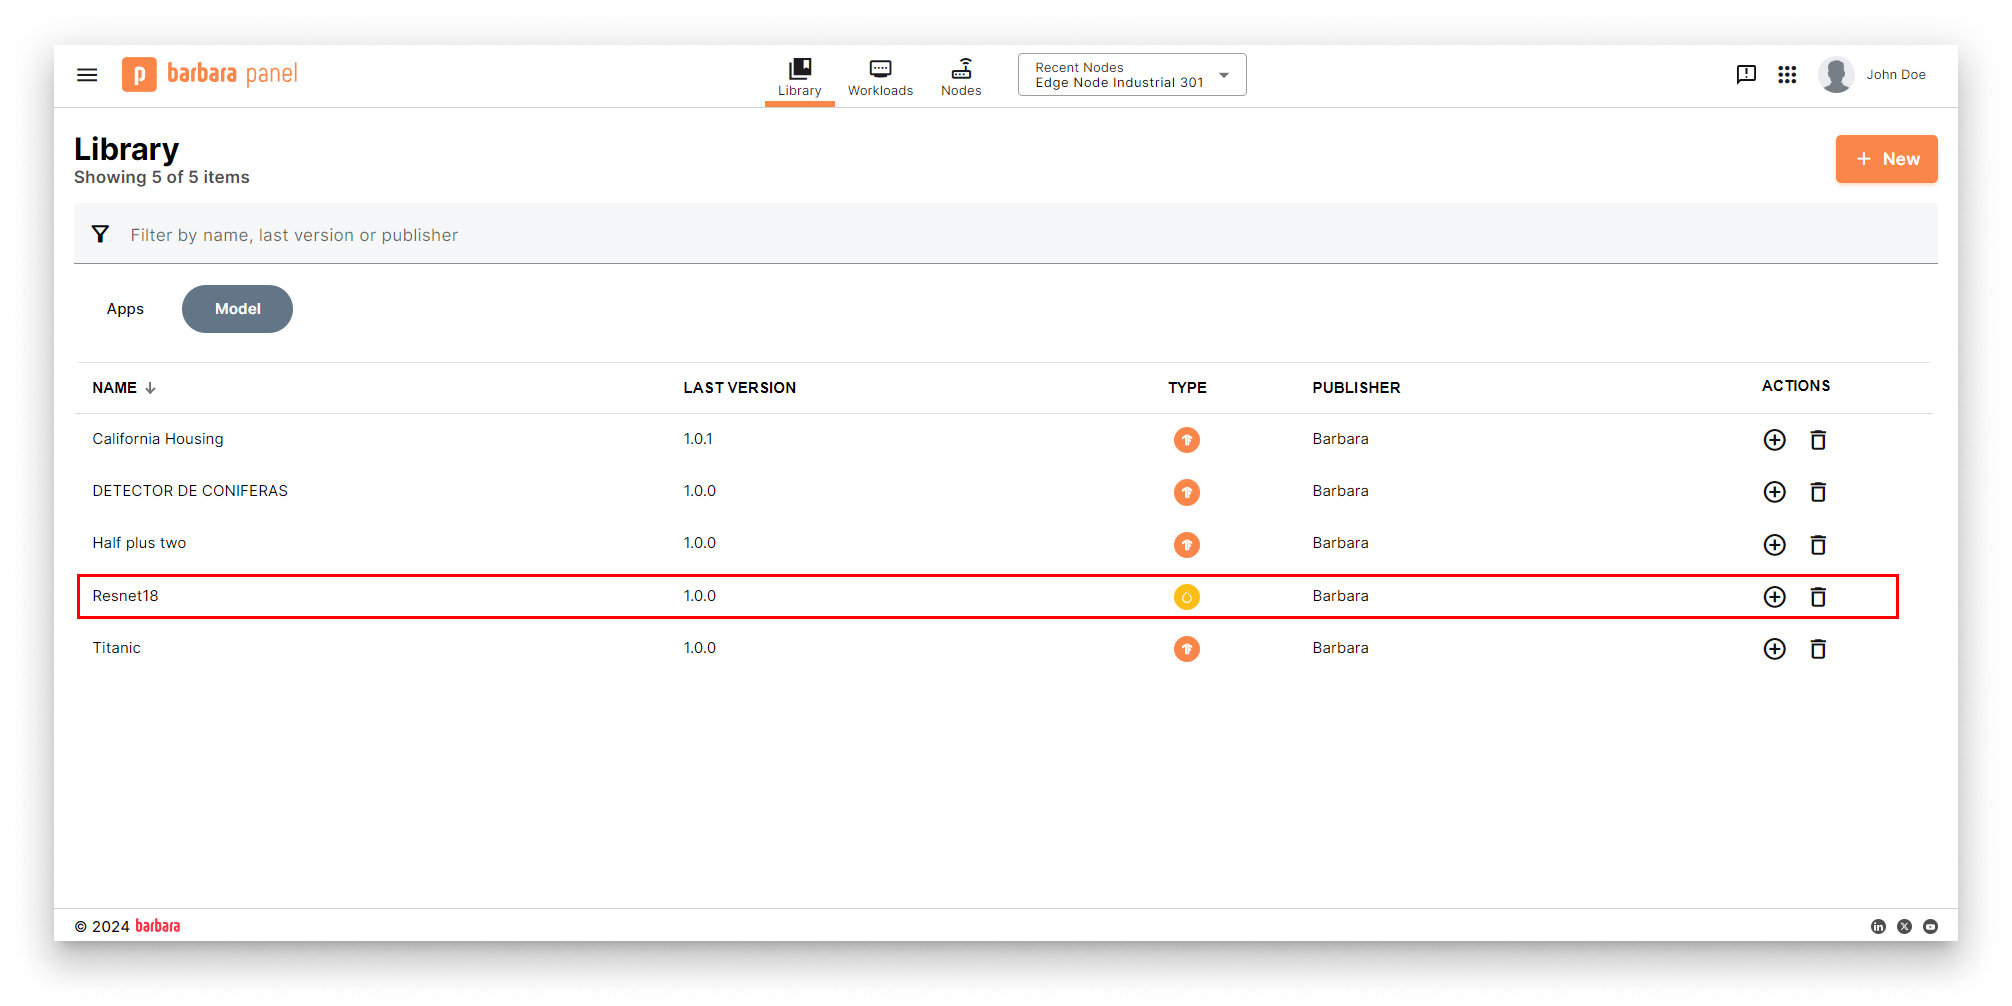
Model added to the Library
3. Deploy the model to an edge node
- Open the Node Details page of the target node and click Add card.
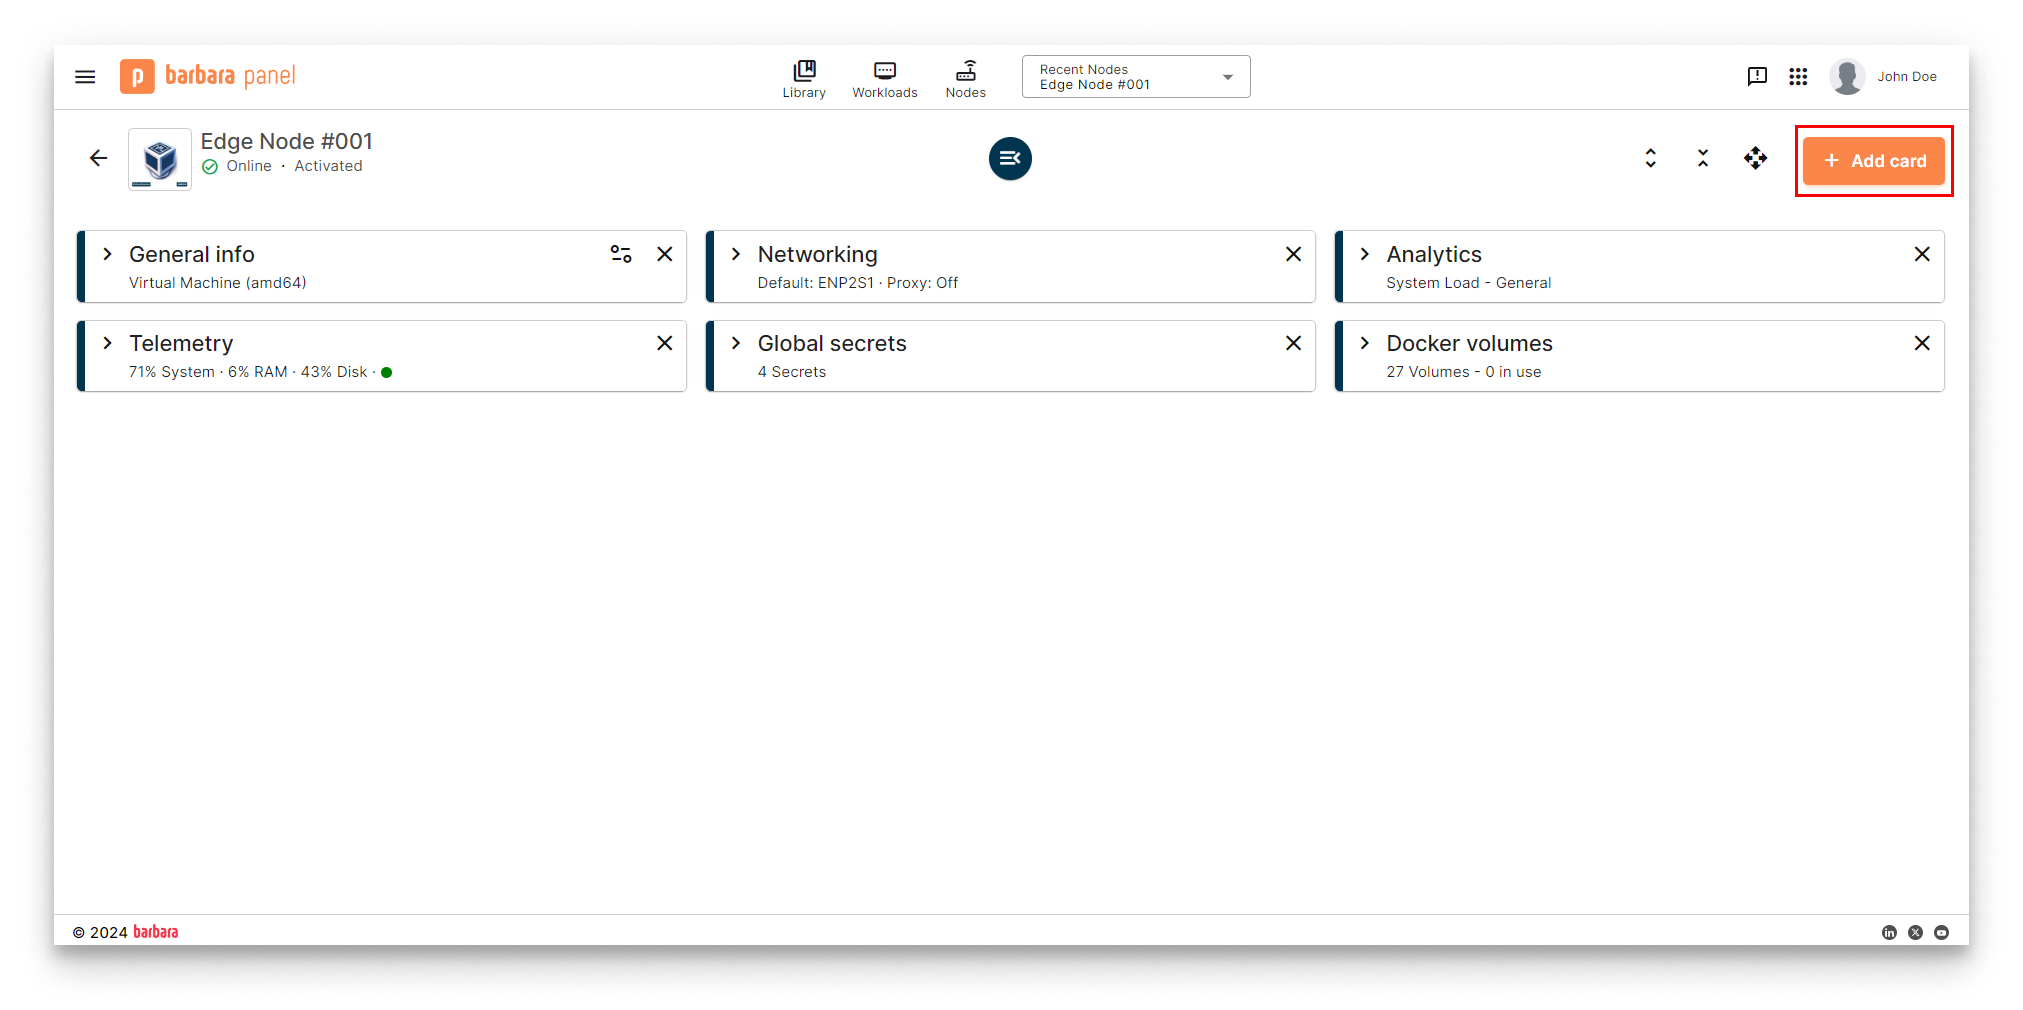
Node Details page
- Pick Model in the card picker.
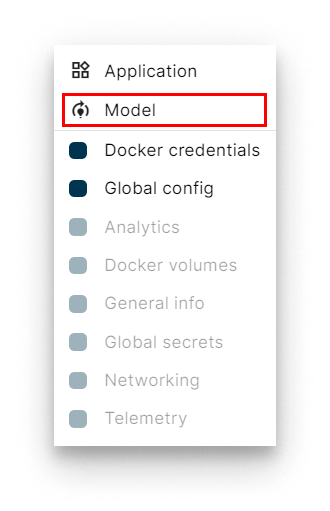
Add a Model card
- The Model Install wizard opens. Tick Serve model using GPU if the node has a GPU.
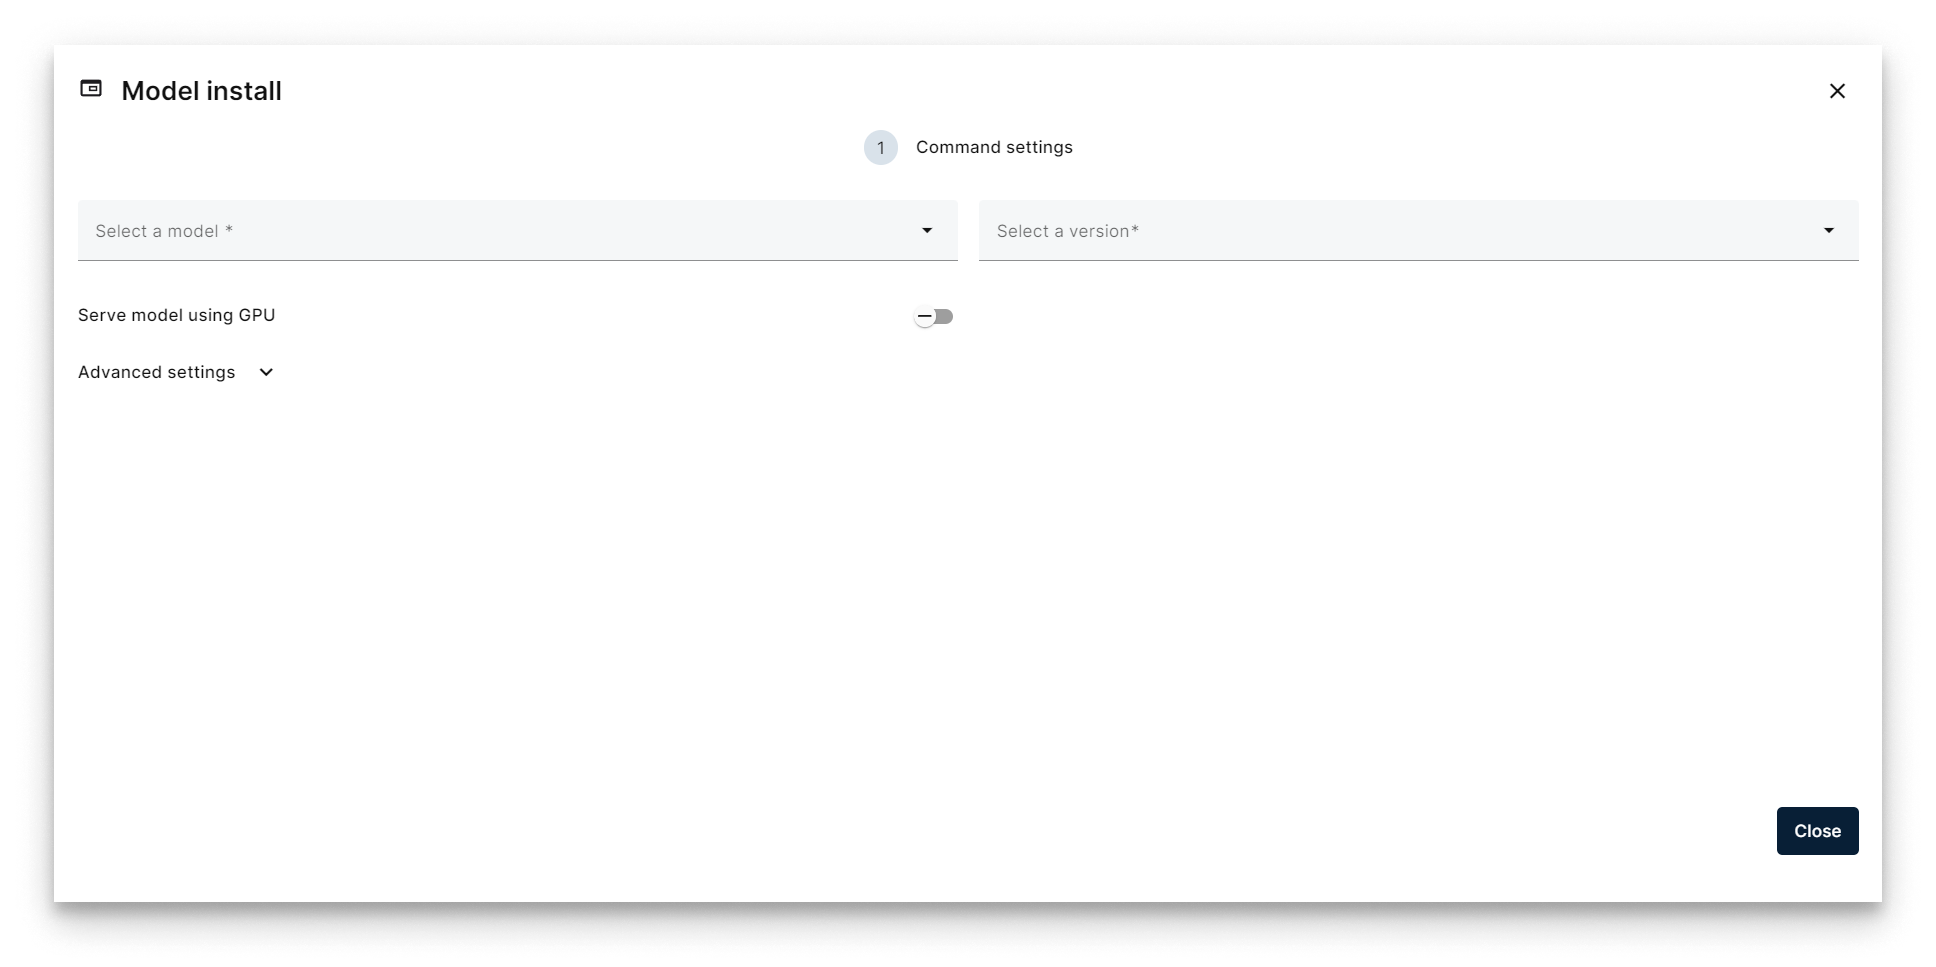
Model Install wizard
- Pick the ResNet18 model.
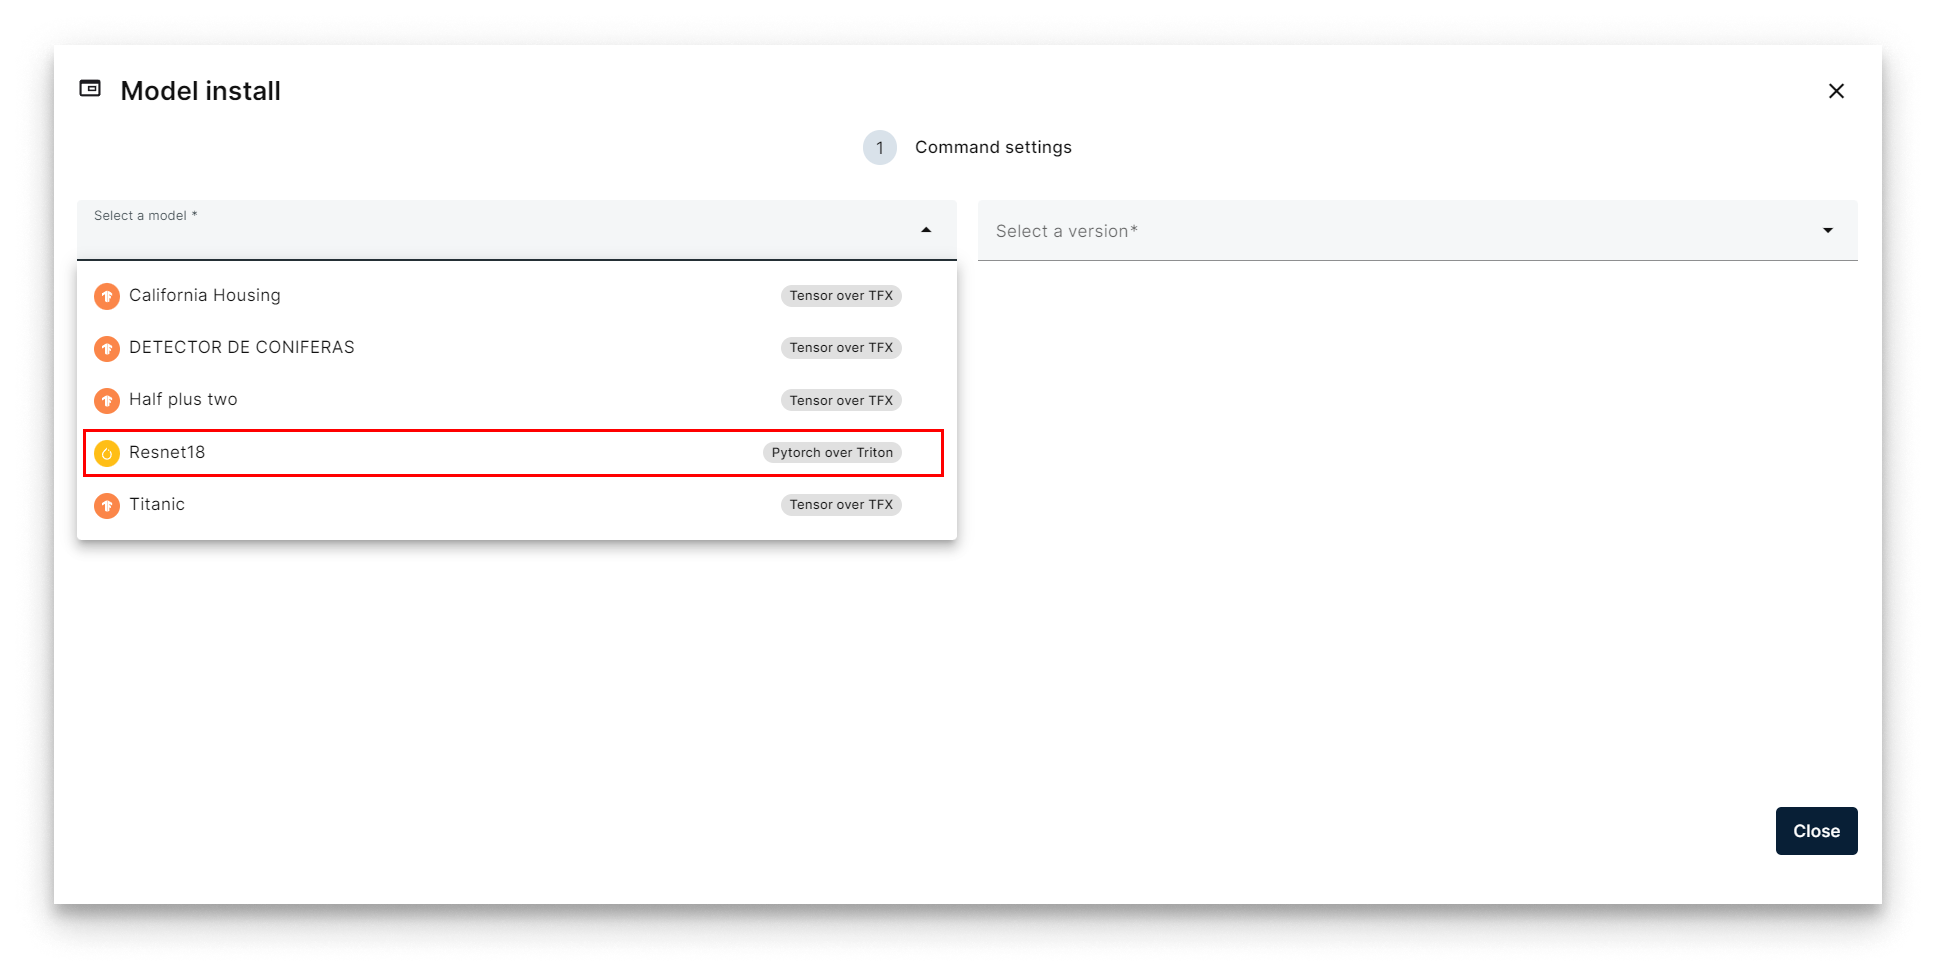
Select ResNet18
- Pick version 1.0.0 and click Next.
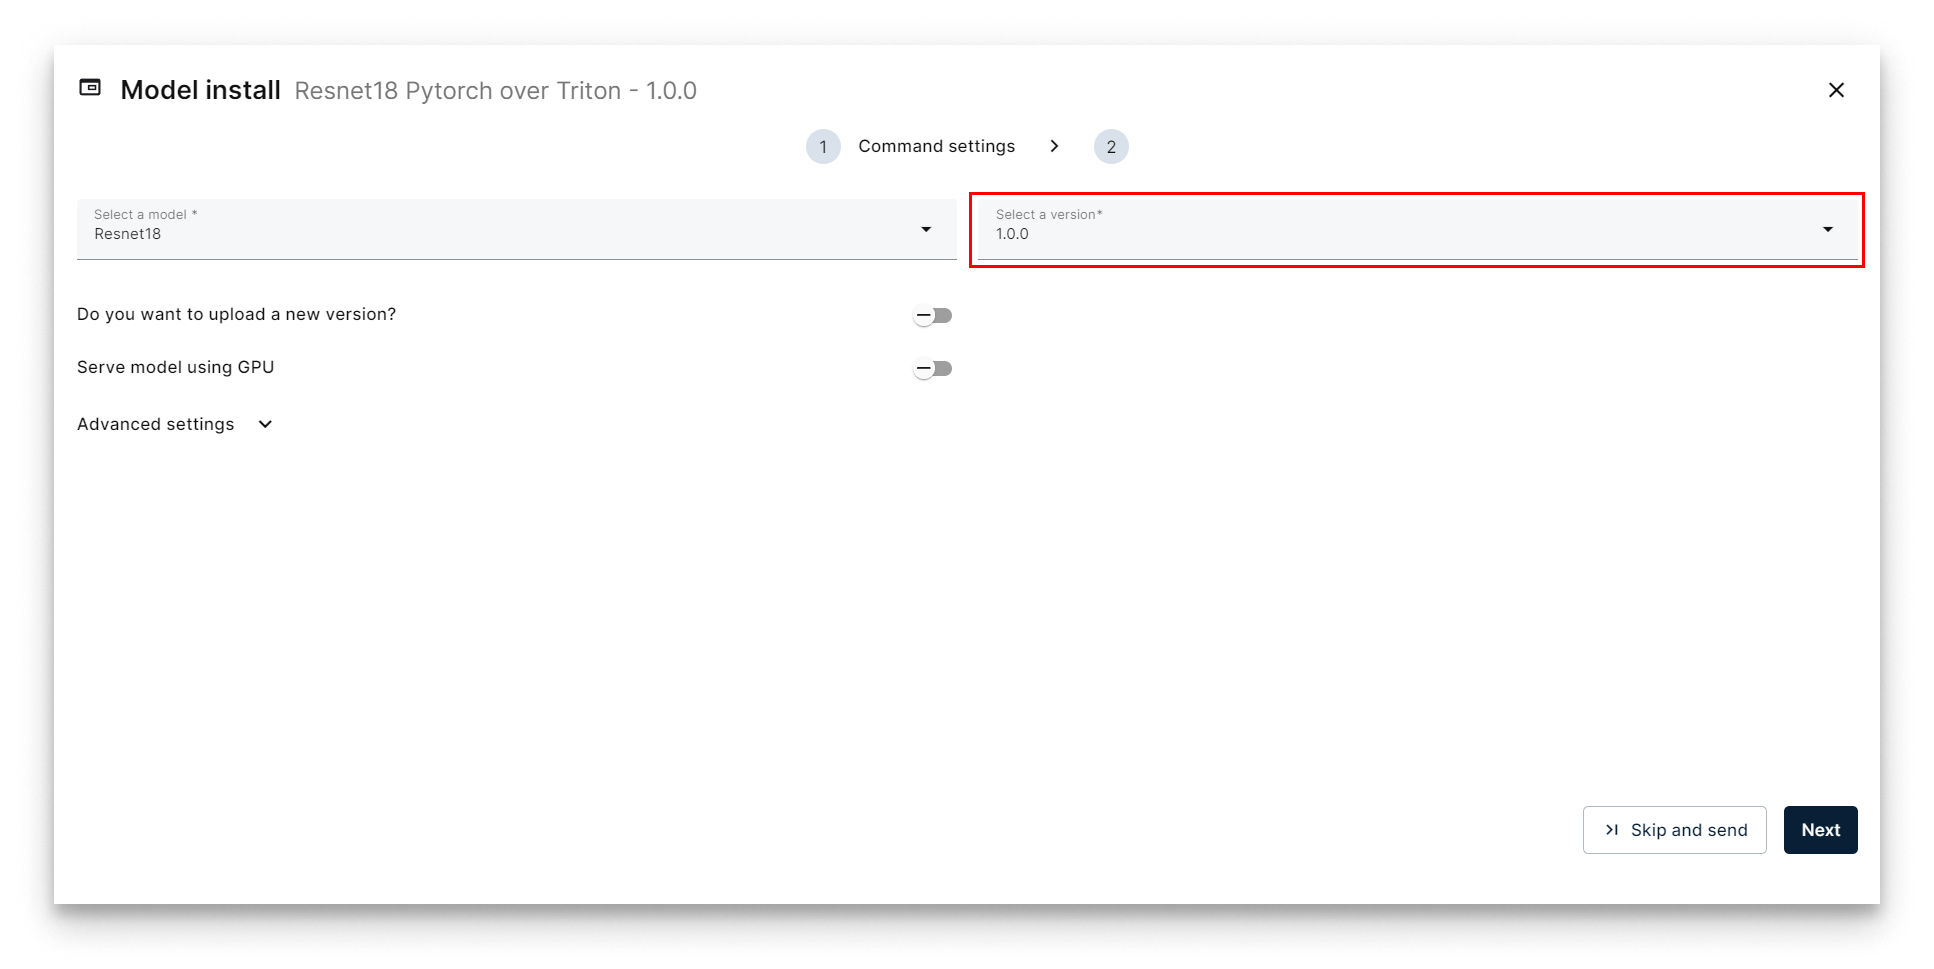
Select version 1.0.0
- On the Compose Config step, adjust the gRPC and REST ports if needed (defaults work for the first model on a node). Click Send Model.
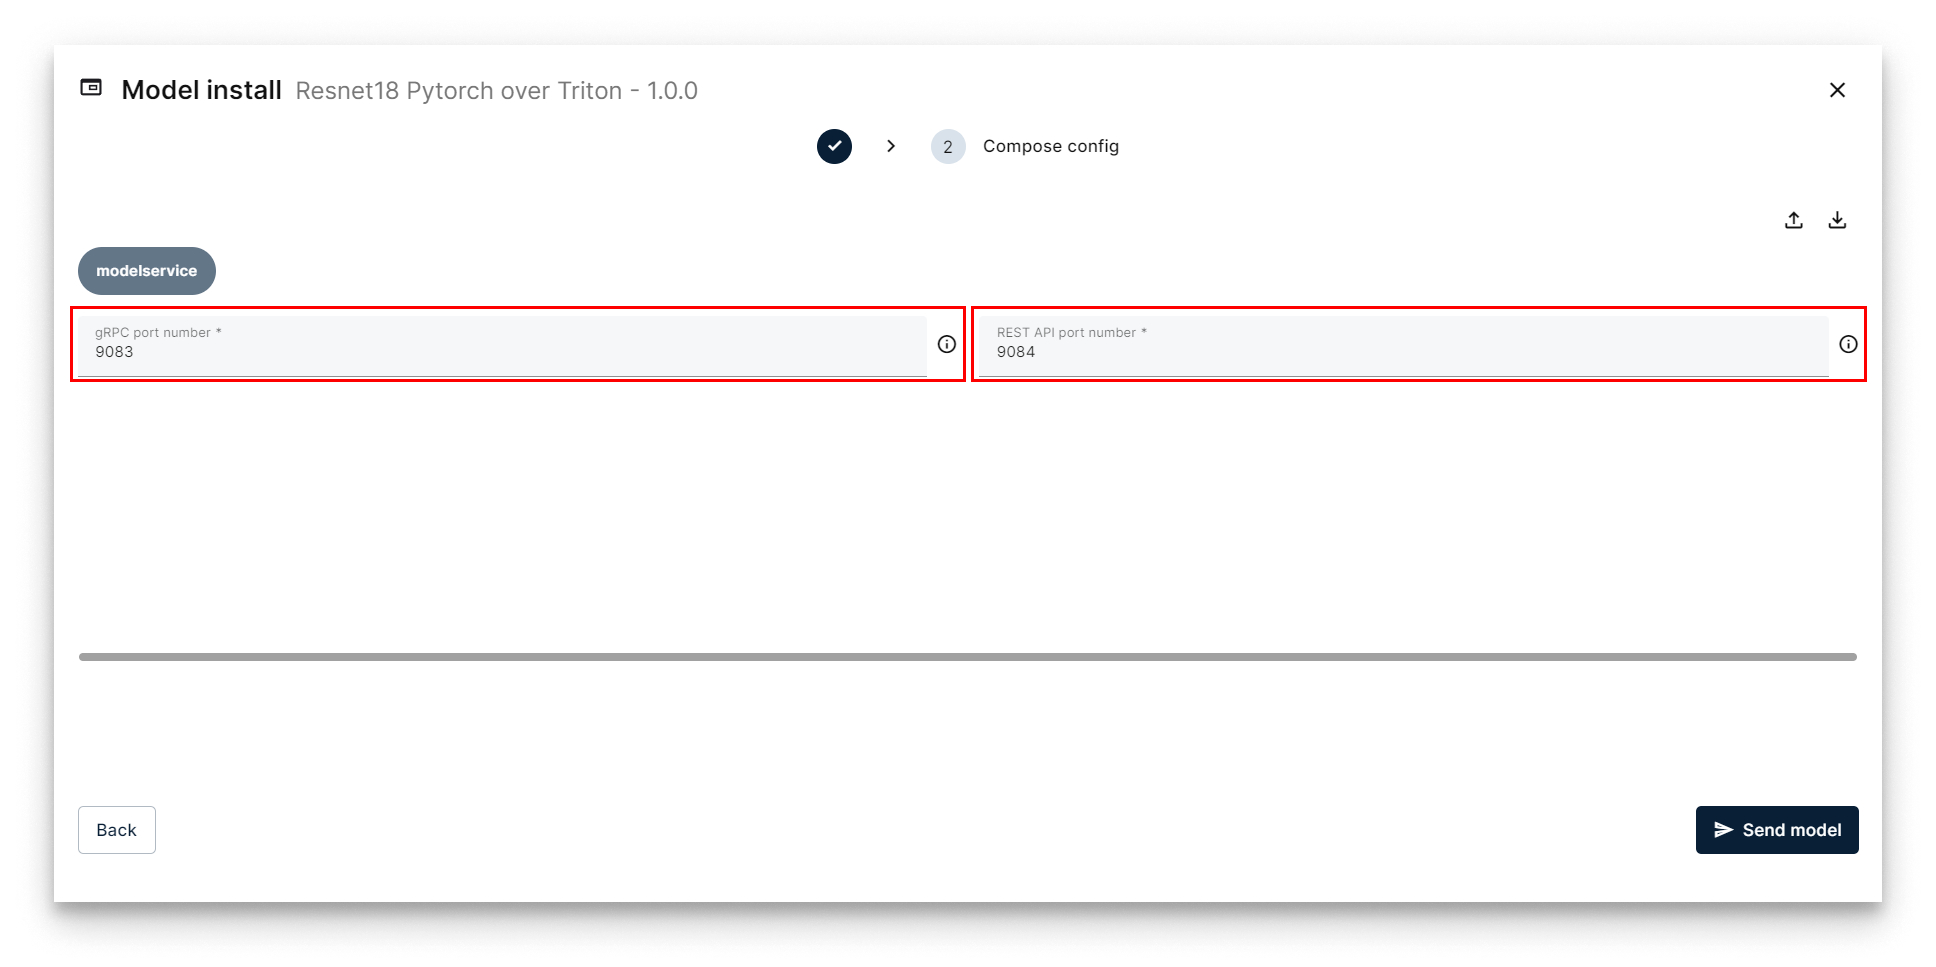
Compose Config — choose ports
A ResNet18 workload card appears on the Node Details page. When the status indicator turns green (Started), the model is being served. The card surfaces the REST and gRPC URLs you will use for inference.
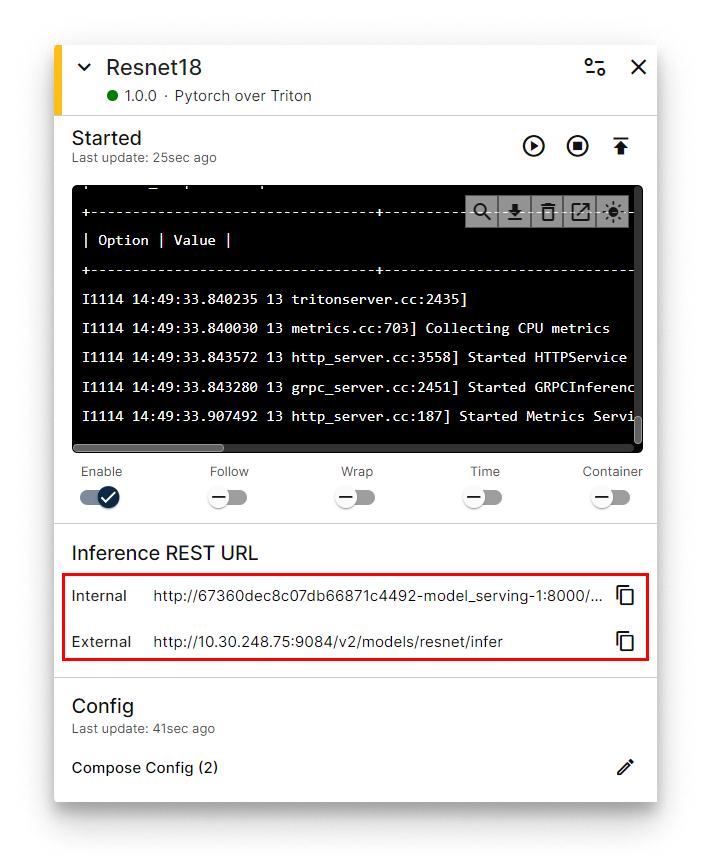
ResNet18 workload card with inference URLs
4. Run inference
Download the Jupyter notebook for this section: resnet_inference.zip.
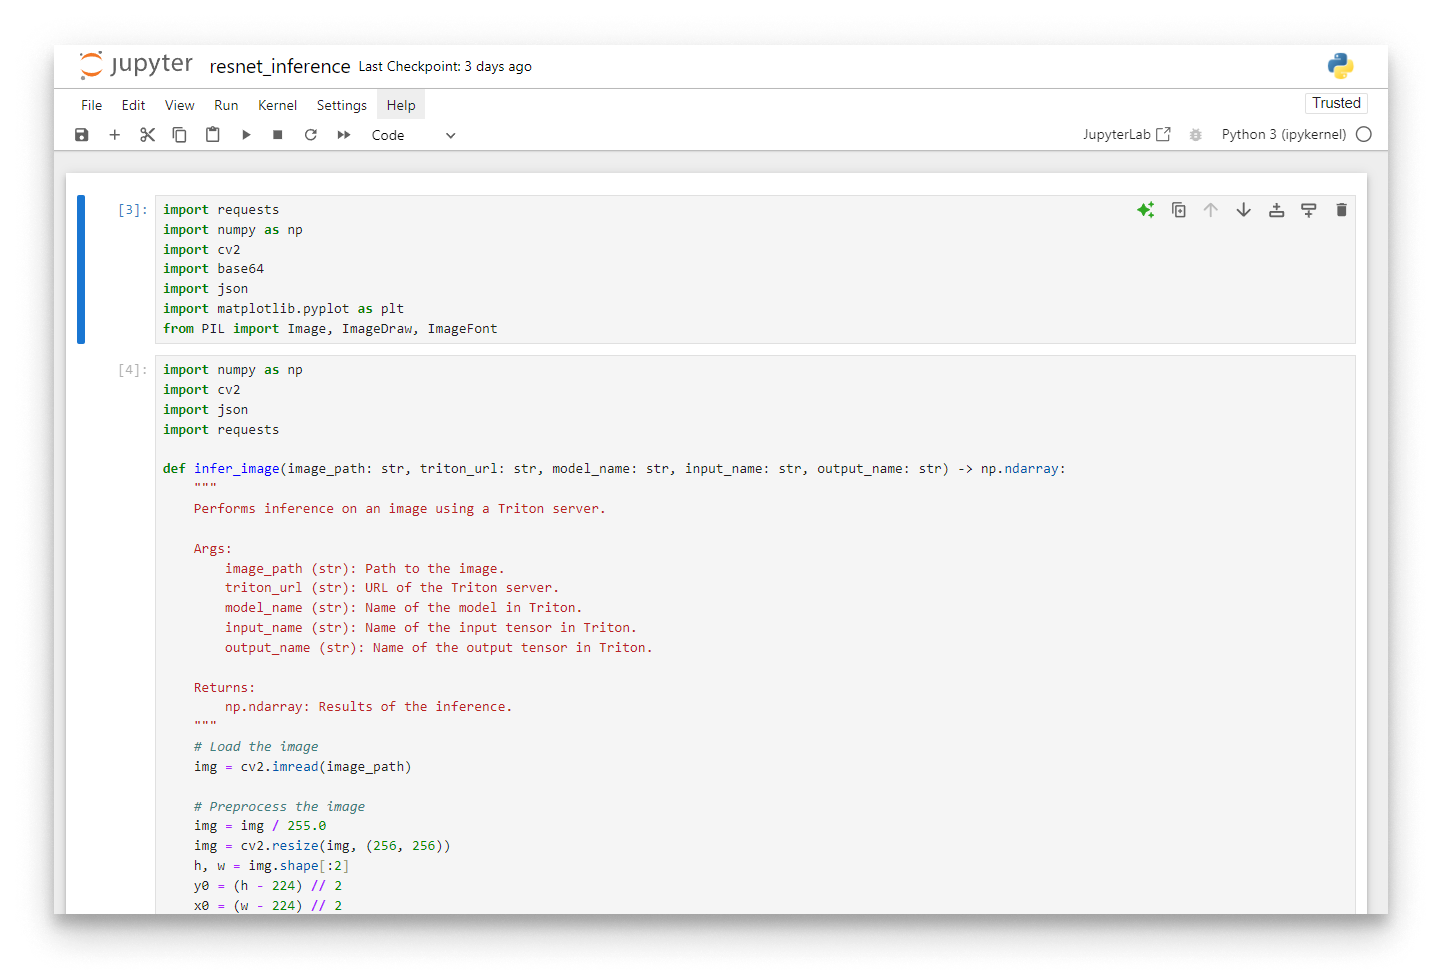
Jupyter notebook with the inference helper
To classify an image, send a POST request to the model's REST endpoint:
http://<NODE_IP>:<REST_PORT>/v2/models/resnet/infer
If your laptop is on a different network than the edge node, enable the VPN and use the node's VPN IP.
Payload structure
The Triton REST API expects a JSON body shaped like this:
{
  "inputs": [
    {
      "name": "<input layer name>",
      "shape": "<input tensor shape>",
      "datatype": "<input tensor datatype>",
      "data": "<input tensor data, as a flat list>"
    }
  ],
  "outputs": [
    {
      "name": "<output layer name>"
    }
  ]
}
Preprocess the image
ResNet18 expects a specific input shape and normalisation:
- Resize to 256×256 and centre-crop to 224×224.
- Normalise with the standard ImageNet mean and standard deviation.
- Permute the dimensions to CHW (Channel, Height, Width).
- Cast to
float32and add a batch dimension. - Flatten the array into the linear payload for the JSON body.
The reference implementation:
import cv2
import json
import numpy as np
import requests


def infer_image(image_path: str, triton_url: str, input_name: str, output_name: str) -> np.ndarray:
    """Run inference on an image against a Triton-served model."""
    img = cv2.imread(image_path)

    # Preprocess
    img = img / 255.0
    img = cv2.resize(img, (256, 256))
    h, w = img.shape[:2]
    y0 = (h - 224) // 2
    x0 = (w - 224) // 2
    img = img[y0:y0 + 224, x0:x0 + 224, :]
    img = (img - [0.485, 0.456, 0.406]) / [0.229, 0.224, 0.225]
    img = np.transpose(img, axes=[2, 0, 1])
    img = img.astype(np.float32)
    img = np.expand_dims(img, axis=0)

    img_flatten = img.flatten()

    data = {
        "inputs": [
            {
                "name": input_name,
                "shape": list(img.shape),
                "datatype": "FP32",
                "data": img_flatten.tolist(),
            }
        ],
        "outputs": [{"name": output_name}],
    }

    response = requests.post(triton_url, data=json.dumps(data))
    if response.status_code != 200:
        raise Exception(f"Error during request: {response.text}")

    return np.array(response.json()["outputs"][0]["data"])
Call the model
Set the parameters and run inference:
image_path = "kitten.jpg"
triton_url = "http://10.30.248.75:9084/v2/models/resnet/infer"
input_name = "INPUT__0"
output_name = "OUTPUT__0"
results_number = 3

result = infer_image(image_path, triton_url, input_name, output_name)
indices = np.argpartition(result, -results_number)[-results_number:]
top_n_predictions = result[indices]
Interpret the output
The output is a vector of 1000 probabilities — one per ImageNet class. Map the top indices back to human-readable labels using the synset.txt shipped with the notebook:
with open("synset.txt") as f:
    labels = [line.rstrip() for line in f]

for i in range(results_number):
    print(f"{labels[indices[i]][10:]} --- prob: {top_n_predictions[i]:.6f}")
Example outputs against the sample images shipped with the GitHub repository:

Top predictions for kitten.jpg
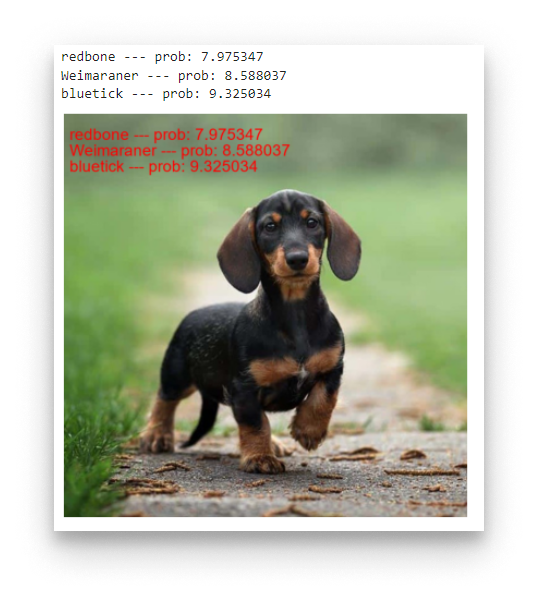
Top predictions for dog.jpg
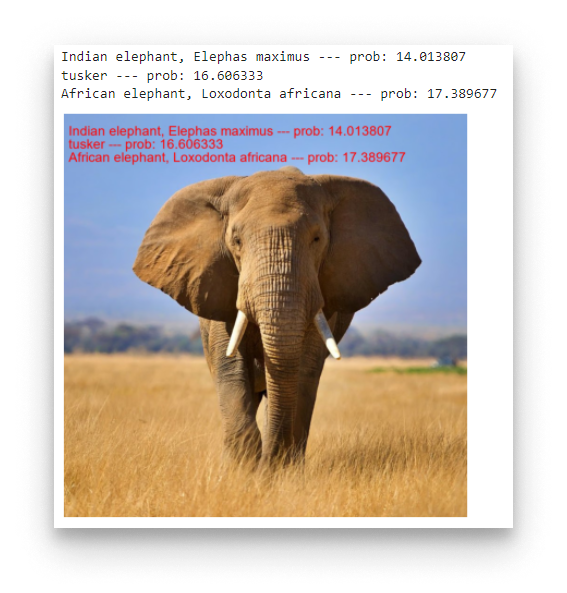
Top predictions for elephant.jpg
Summary
You exported a PyTorch model to TorchScript, packaged it with a Triton config.pbtxt, uploaded it as a model to the App Library, deployed it to an edge node with the Model Install wizard, and ran image inferences against the REST endpoint. The same workflow generalises to any TorchScript model — change the config.pbtxt input/output shapes and adapt the pre-processing in the client.